
A self-balancing legged-wheeled robot, fully documented.
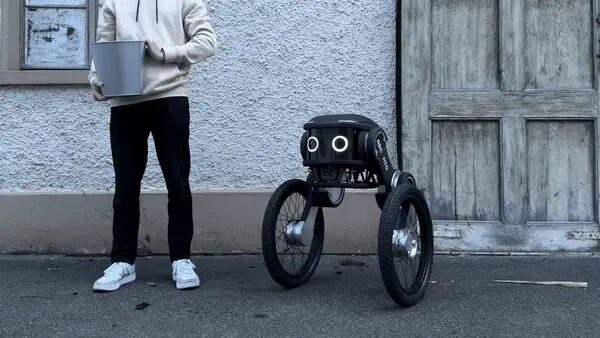
The Ascento Research & Development platform — not to be confused with the security-oriented Ascento Guard product. It balances on two actuated wheels, using hip/knee leg joints to cross gravel, grass, slopes and small ramps (but not steps or stairs), with a deep-learning control framework and automatic fall recovery.
From handling to standing operation
Ascento's own handling, power-on and Steam Deck activation procedure — enough for a supervised operator to go from a packed-away robot to standing under remote control.
Single-person transport
Lift using the designated handles on top of the main body, which distribute the robot's weight evenly. Maintain a stable posture and use both hands.
Two-person transport
One person grips the left-side handle and supports the left wheel; the other does the same on the right. Balanced weight distribution, less strain, better control.
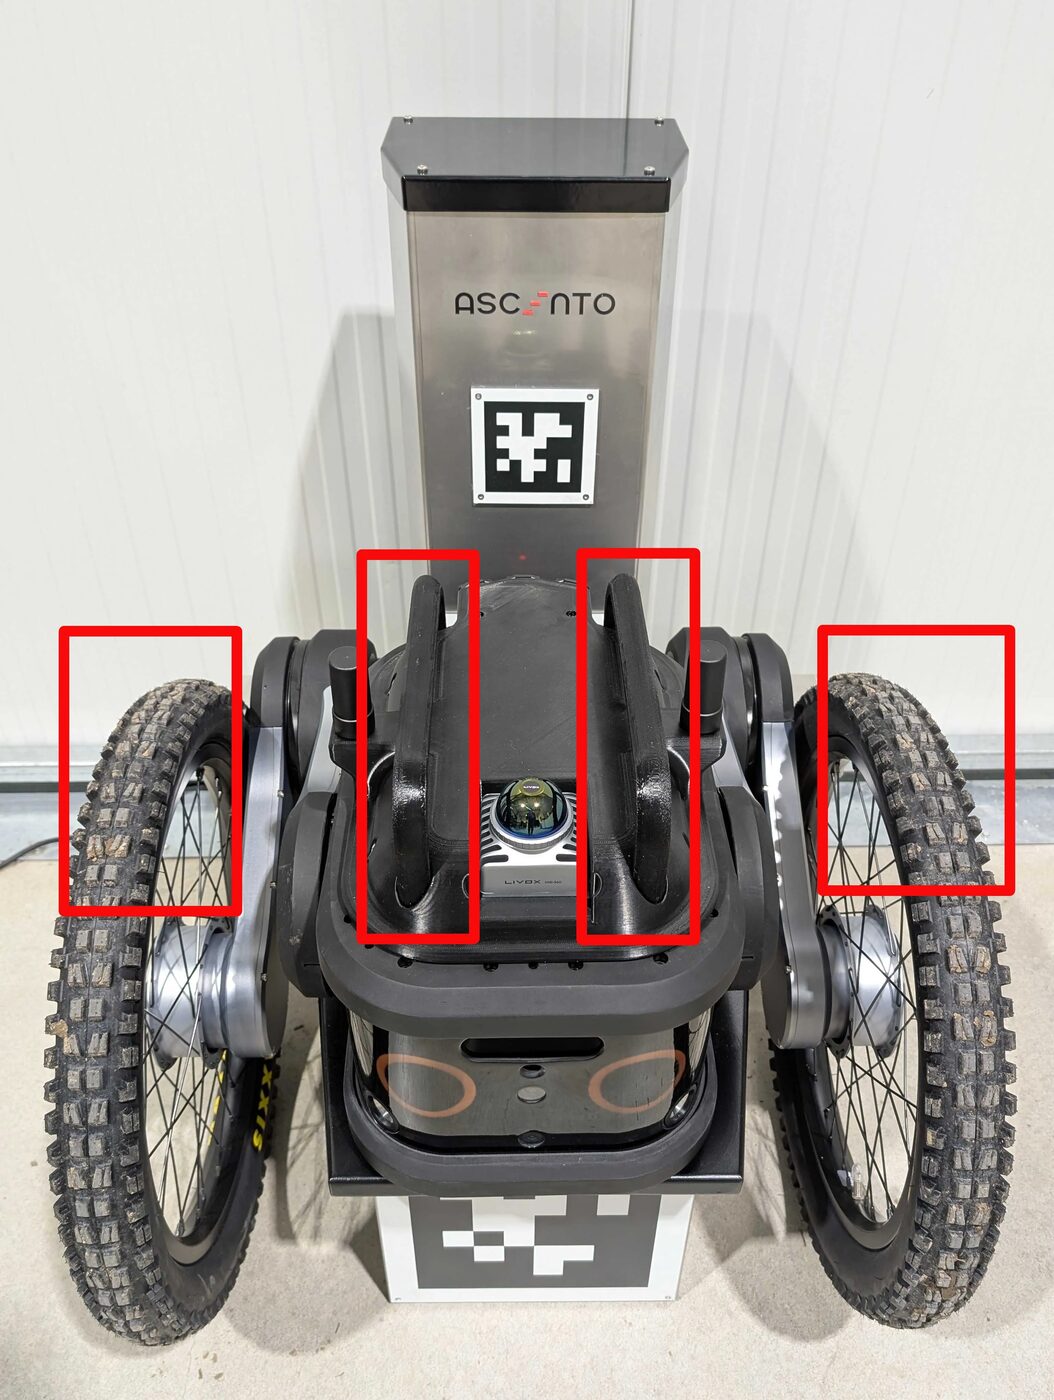
Hardware key
Tilt the robot upward, insert the key into the bottom slot, and turn it clockwise to unlock. The robot's flashlights blink to confirm power is on. Wait about 1 minute for the onboard PC to boot.
Steam Deck activation
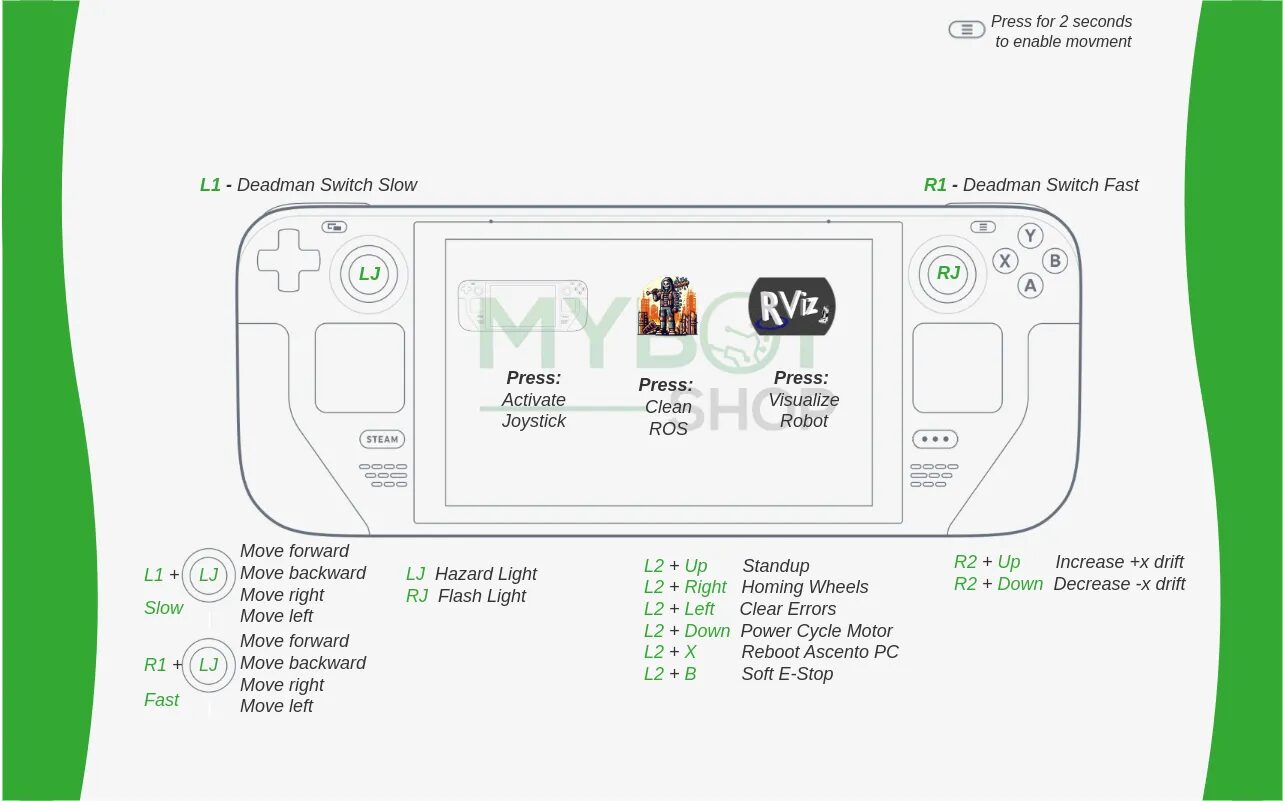
Connect the Steam Deck to Ascento's onboard 5G WiFi, then tap the joystick GUI icon to open communication with the robot. With Ascento flat on the ground, home the wheels with L2 + Right (first boot, or whenever the eyes blink red), then bring it upright with L2 + Up.
Drive with the Steam Deck
Hold a deadman switch — L1 for slow movement, R1 for fast — while driving forward/back/strafe on the left joystick. The right joystick toggles the flashlight; the left toggles hazard lights.
Power off / E-Stop
Keep one person close to the robot, press Soft E-Stop (L2 + B) to dampen the motors and let it settle to the ground, then lock it again with the key.
Charging
The battery sits sealed inside the weatherproof body. Charging is via a docking station with a built-in LED: red while charging, green once full and ready for deployment. Manual cable charging is standard; autonomous docking is optional.
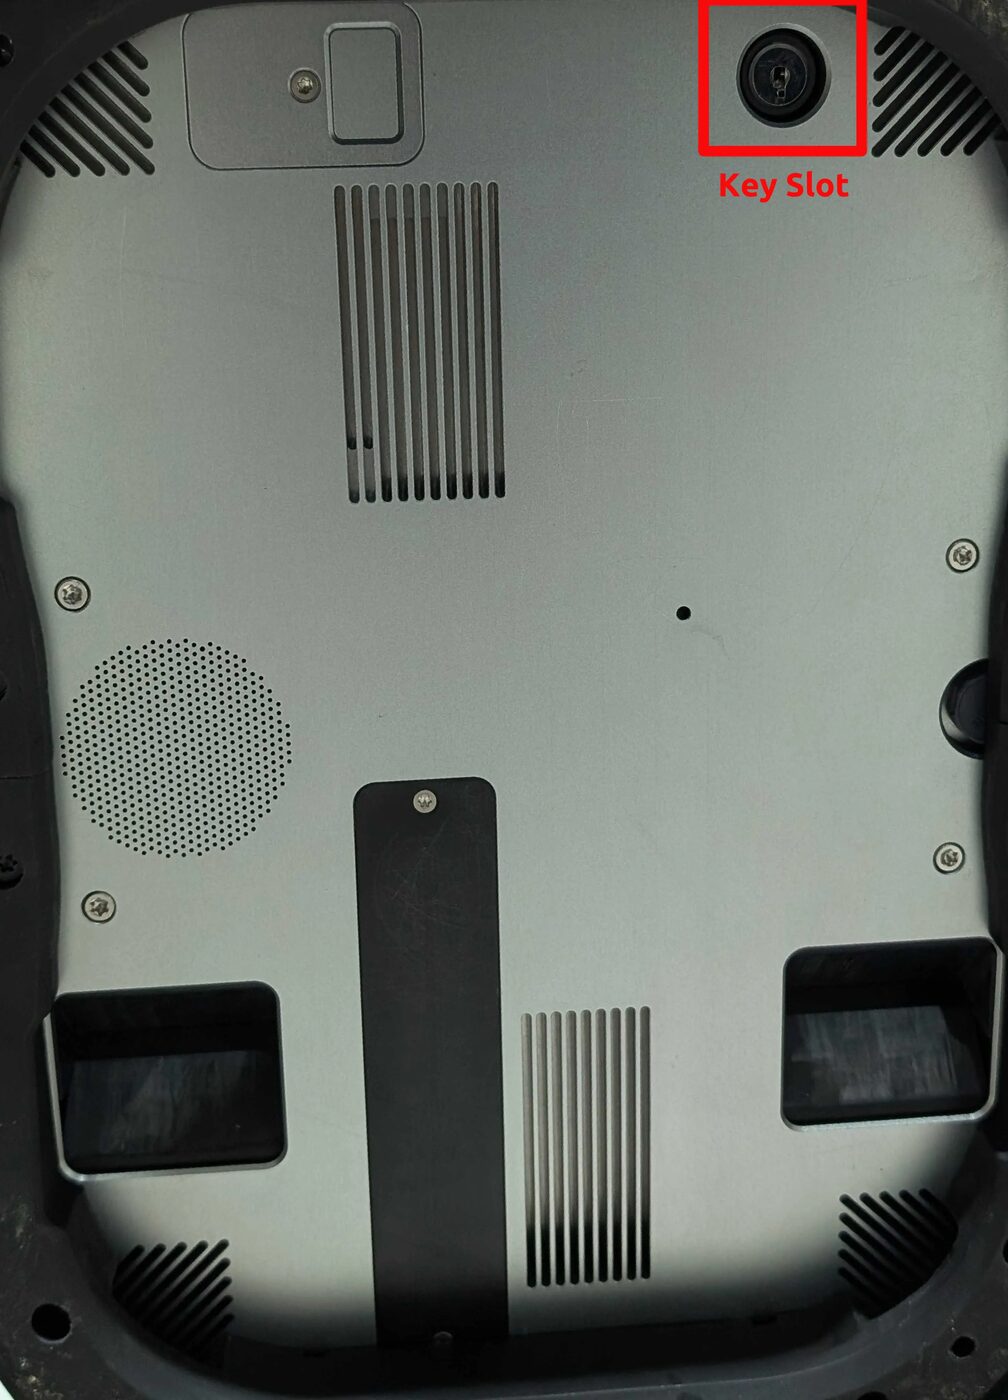
Power key & homing
The physical key lives in a slot on the underside of the robot. Always perform motor homing (L2 + Right) before Standup to ensure proper joint alignment — skipping it is the most common cause of a failed stand-up attempt.
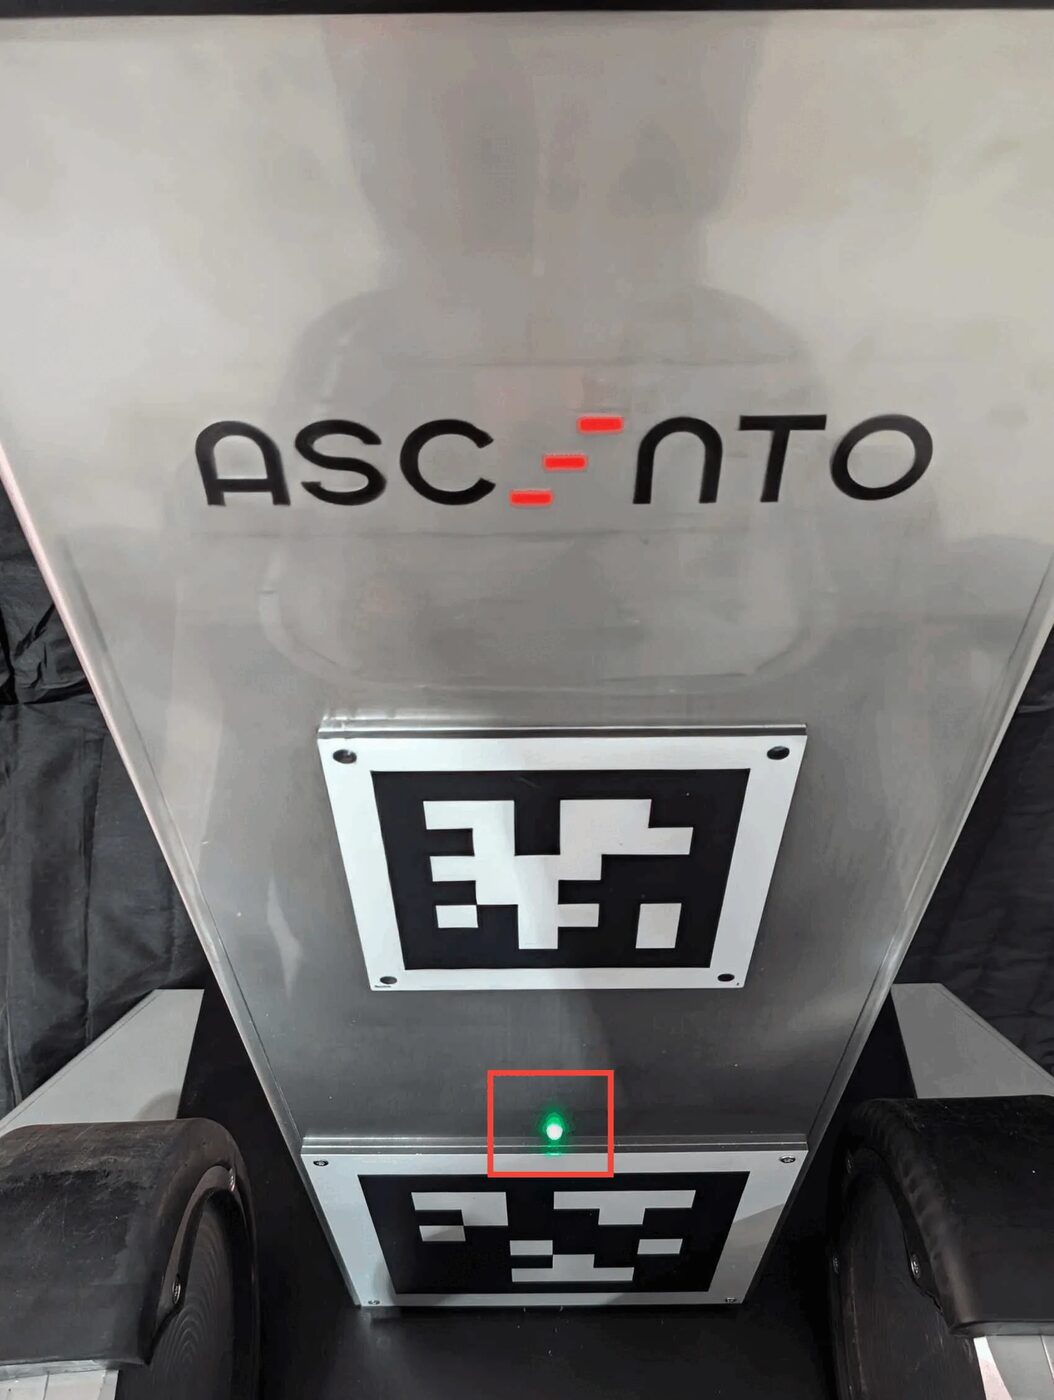
Docking LED status
Green means fully charged and ready to deploy; red means charging is still in progress. No separate app or display is needed to check charge state at the dock.
Full button map, drift trim and sensor toggles: MYBOTSHOP Ascento User Manual (PDF).
What Ascento can do
A wheeled-legged balancing platform built for all-terrain, all-weather autonomous operation, with a full ROS 2 driver stack layered on top by MYBOTSHOP.
Balance & Fall Recovery
A deep-learning control framework keeps Ascento upright on two wheels and lets it stand, sit and balance on uneven terrain. If it falls, it can stand back up from any position automatically.
All-Terrain, Not Stairs
Flat ground, gravel, grass, small ramps and slopes are all in scope for the two-wheeled platform — steps and stairs are not. Changing ride height deactivates the leg lock and increases fall risk, so it's a deliberate action only.
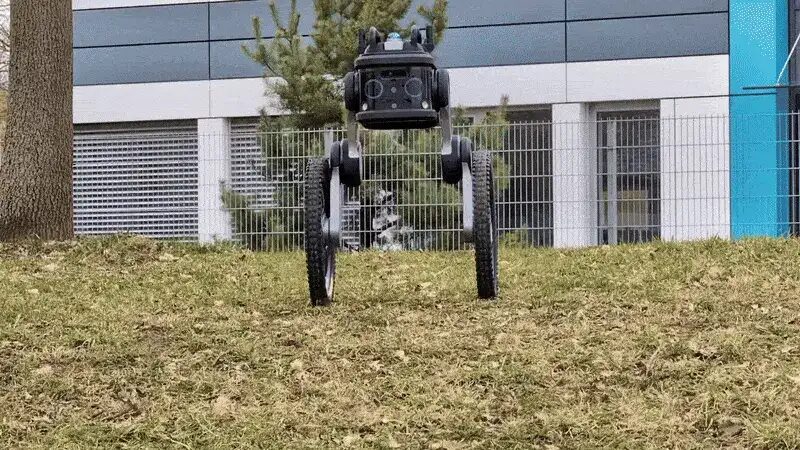
Sensing Suite
Intel RealSense D435i depth camera, a Livox Mid-360 LiDAR (or Hesai JT16, model-dependent), thermal and infrared cameras, a Fixposition Vision-RTK2 GNSS/INS unit, plus microphone and speaker — day and night, cm-level precision.
All-Weather, Fully Weatherproof
The body and battery are sealed to operate through rain, snow and strong wind. Combined with the docking charger, Ascento is built to run unattended outdoors, not just indoors.
Steam Deck Teleoperation
A Steam Deck on the robot's own onboard WiFi connects straight to the joystick GUI — deadman-switch driving, homing, standup, lights and drift trim, all from one handheld, no laptop required.
ROS 2 Driver & Onboard Webserver
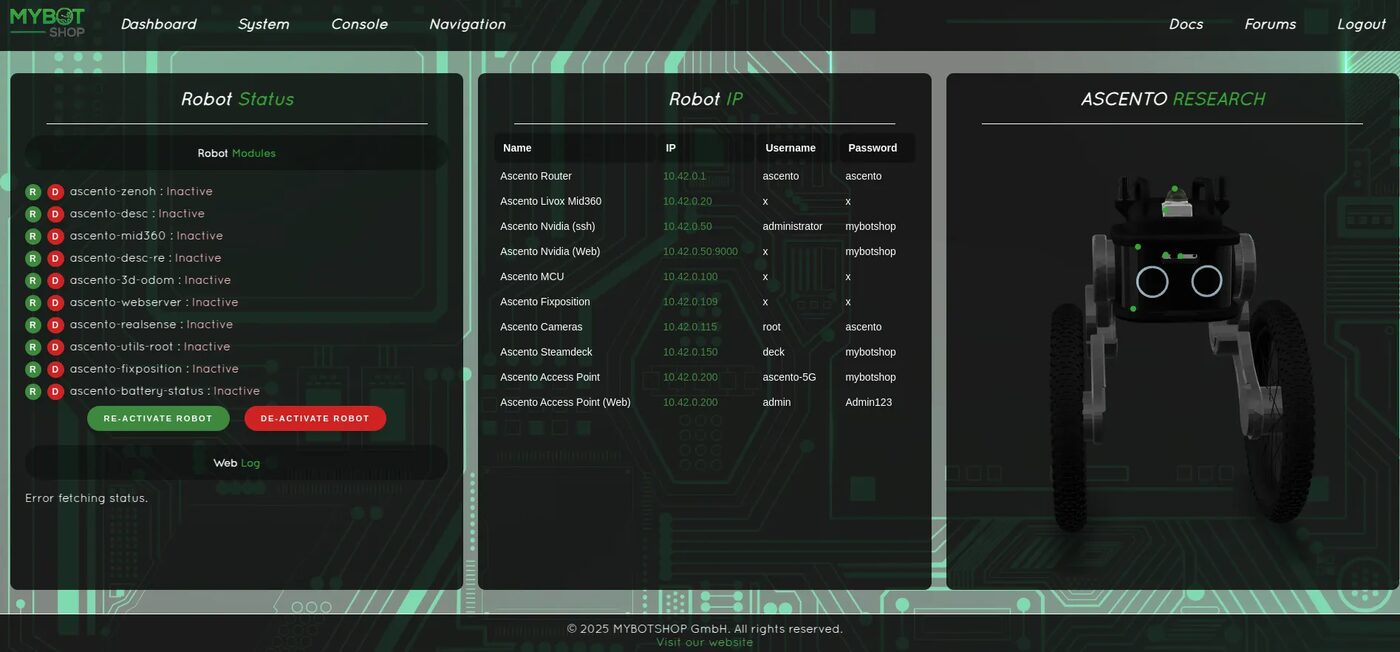
Joint states, robot description, high-level leg control, IMU, sensor fusion, twist mux and a Zenoh bridge for DDS communication — pre-configured and already running on the robot, plus a browser dashboard for status, IPs and a live 3D preview.
SLAM, navigation & simulation
Straight from the mbs_ascento repository's own ROS 2 documentation.
SLAM
Launch ascento_nav2 slam.launch.py, drive a map with the teleop keyboard at ~0.2 m/s, then export it with nav2_map_server map_saver_cli.
Odometric & Map Navigation
Both ascento_nav2 odom_navi.launch.py and map_navi.launch.py exist and are launchable today, but are explicitly flagged as under active development in Ascento's own docs.
Gazebo Fortress Simulation
A Fortress-based simulation (ascento_gazebo) targets low-level control, training and testing — it does not yet support the high-level Ascento interface.
Manuals, ROS 2 docs & robot description
Everything needed to operate Ascento safely, develop against its ROS 2 stack, or bring its model into your own tooling.
MYBOTSHOP Ascento User Manual
A single self-contained manual: transport & power-on/off procedure, static network setup and the onboard IP table, and the full ROS 2 package, service and command reference.
Download PDFAscento Robot Description (URDF)
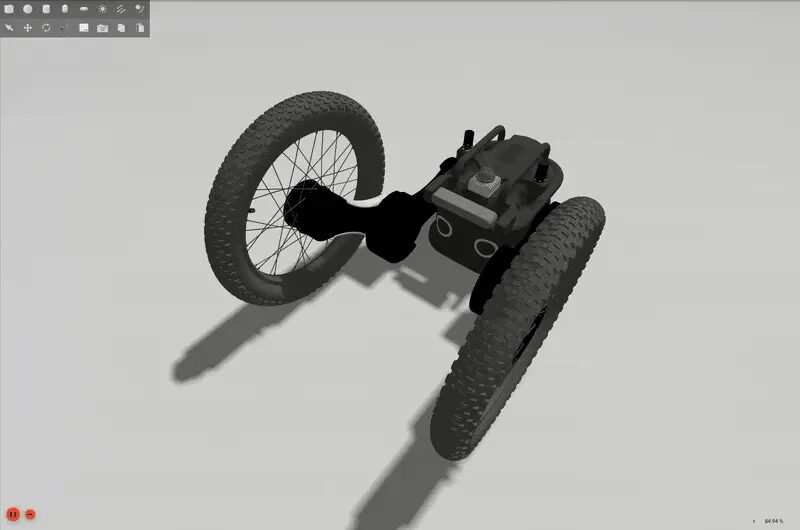
The ascento_description package — URDF, visual meshes and package.xml — the same model rendered live in the viewer above. Drop it straight into a ROS 2 workspace, RViz, or MoveIt.
Looking for the full mbs_ascento ROS 2 driver source (private repository)? Ask us directly — include your MYBOTSHOP order ID and GitHub username or email.
If something goes wrong
Two steps, in order — the forum first for fast community and staff triage, then a direct ticket if it needs to go further.
MYBOTSHOP Forum
Open a topic on the MYBOTSHOP Forum describing the issue in detail — support staff and the community will try to resolve it remotely first. Code-level bugs can also go to GitHub Issues, StackOverflow or Answers-ROS.
Direct ticket & RMA
If it can't be resolved remotely, email support@mybotshop.de with a detailed description and the troubleshooting already tried. MYBOTSHOP will evaluate the case and, if needed, issue an RMA number with a return address or shipping label — returns without an RMA number are declined and sent back.
RMA returns ship to: MYBOTSHOP GmbH, Willy-Messerschmitt-Strasse 12, 50126 Bergheim, Germany.
We're here for the whole deployment
Fleet rollout, a new use case, or a question about a specific ROS 2 package — the MYBOTSHOP team can help.
support@mybotshop.de