
An all-terrain outdoor UGV, fully documented.
A rugged, skid-steer outdoor research platform built around four in-wheel brushless motors and an aluminum weather-resistant chassis — ships with ROS 2 Jazzy pre-installed, with MYBOTSHOP layering a webserver dashboard, SLAM/odometric/map navigation and named sensor drivers (Seyond Robin lidar, Oak-D Pro-POE depth camera, Fixposition GNSS) on top.
From power-on to first drive
Enough to go from a cold Husky A300 to a robot you can drive on blocks — charging, emergency stop, power-on/off, and the joystick controller.
Charging
Open the rear charge door and connect only Clearpath-provided chargers (standard indoor or IP66-rated outdoor), red-to-red and black-to-black. The LED shows red while charging, green when full (robot off), or red with pulsing status lights while charging powered-on. Optional wireless charging engages automatically once the Mobile Coil is within 30 mm of the Stationary Coil.
Activating E-Stop
Press either red mushroom button (front or rear) to immediately disconnect power to the drivetrain.
Resetting E-Stop
Twist both depressed red actuators clockwise until they pop out, then press the green Safety Restart button. The robot may move immediately if it has pending motion commands.
Wireless E-Stop
An optional wireless E-stop kit halts the robot remotely, and engages automatically if the link to the transmitter is lost.
Power on / off
Set the Battery Breaker to ON, then hold the Power Button for one second. Initialization takes about a minute — lights transition from solid red to a white/red pattern — then press the green Safety Restart button to enable the drivetrain. To power off, hold the Power Button for one second and wait ~10 seconds for all lights to extinguish; set the Battery Breaker to OFF for extended storage.
Drive with the joystick
Pair a PlayStation-style controller, press PS to connect, hold L1 for slow mode (max 0.3 m/s) or R1 for fast mode (max 2.0 m/s), and steer with the left thumbstick. Start with the robot up on blocks and speeds around 0.1–0.3 m/s while learning; never cross the robot's path and keep clear of the wheels.
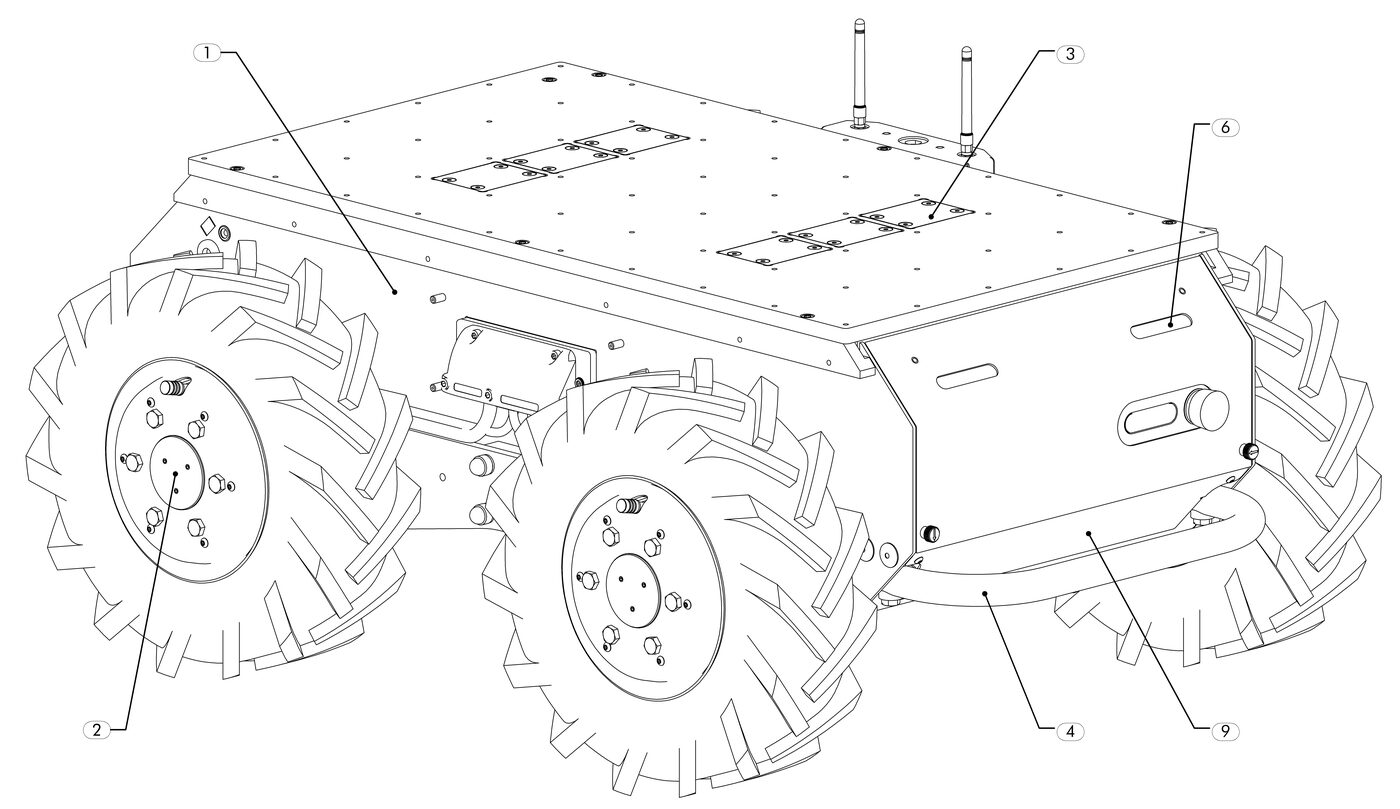
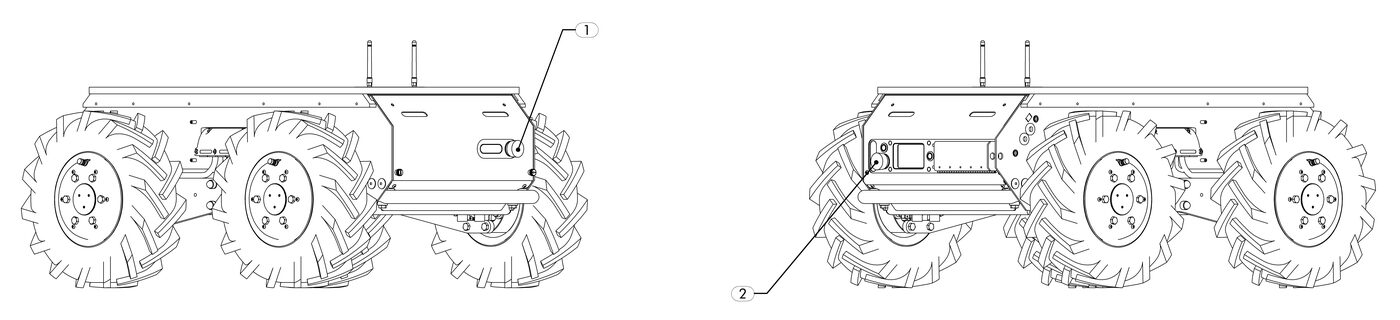
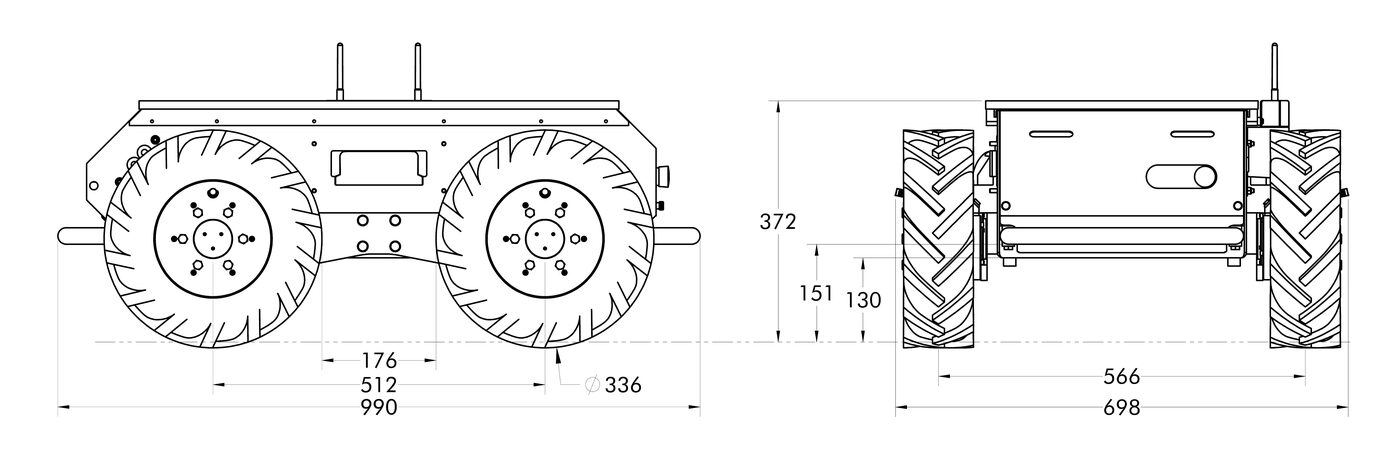
Recommended speeds: 2.0 m/s (paved, no payload) down to 0.1–0.3 m/s for initial testing — halve them with up to 50 kg of payload on board. Full procedure: MYBOTSHOP Husky A300 User Manual (PDF).
Reaching the robot over SSH and the web
A direct Ethernet connection is the recommended path in; the onboard webserver and the sensor payload each get their own static address on the same subnet.
Example IP configuration
| Device | IP Address | Credentials |
|---|---|---|
| Husky A300 MCU (SSH) | 192.168.131.1 | robot / clearpath |
| Husky A300 Webserver | 192.168.131.1:9000 | admin / mybotshop |
| Seyond Robin lidar | 192.168.131.20 | — |
| Oak-D Pro-POE camera | 192.168.131.21 | — |
| Fixposition GNSS | 192.168.131.22 | — |
Access at a glance
Change the default SSH password on first connection. Other active network connections can interfere with reaching the robot — disable unused ones before connecting.
Checking the robot booted cleanly
ROS 2 nodes auto-start via systemd on every boot — check the service before assuming a sensor or driver issue.
Service Status
Green means running correctly, red means the startup job failed, grey means it hasn't started yet.
Restart & Logs
Restart the service after editing configuration, or follow its live log when diagnosing a failed startup.
Robot YAML Configuration
ROS 2 Jazzy configures the platform via /etc/clearpath/robot.yaml instead of environment variables — edit it, then restart the service to apply.
Perception stack on this configuration
Beyond the built-in IMU and wheel encoders, this documented A300 configuration carries three named sensors, each with its own MYBOTSHOP ROS 2 launch file — the platform also supports Clearpath's own RealSense, ZED, Velodyne, Ouster and SICK integrations via robot.yaml.
Seyond Robin — 3D Lidar
Provides point clouds with time synchronization modified for the A300. Runs by default via the auto services; launch manually if disabled.
Oak-D Pro-POE — Depth Camera
Stereo depth camera providing 3D point clouds, powered over the same Ethernet/POE run. Normally enabled via auto services.
Fixposition — GNSS/INS
High-accuracy GPS and odometry fusion, pre-configured through the Fixposition web interface at 192.168.131.22 (Fusion, GNSS, Network and I/O tabs). Monitor via IMU Status (should read converging) and Baseline Status (should be green).
Adding a different depth camera, lidar or GPS receiver instead is a robot.yaml edit — see the ROS 2 Software section below, or the full reference in the PDF manual.
Navigation, teleoperation & simulation
The A300 ships with ROS 2 Jazzy on Ubuntu 24.04 pre-installed and configured — Clearpath's clearpath_common packages provide the platform stack, with MYBOTSHOP's hsky_* packages layered on top for the webserver, sensors and navigation.
Teleoperation
Joystick control (PS button, L1/R1, left stick), keyboard via teleop_twist_keyboard, or a graphical rqt_robot_steering panel — all remap onto the namespaced cmd_vel topic.
Visualization
RViz2 via clearpath_viz or MYBOTSHOP's own husky_a300_viz for robot model, TF frames, sensor data and odometry; Foxglove Bridge is available as a modern web-based alternative.
Navigation
Three modes via clearpath_nav2_demos/hsky_navigation: odometry-only (no map), map-based (with 2D Pose Estimate / 2D Goal Pose in RViz), and outdoor GPS navigation with a configured GNSS receiver.
Simulation
Gazebo Harmonic via clearpath_gz, launchable from the onboard computer or an external workstation pointed at the local hsky_gazebo checkout; NVIDIA Isaac Sim is supported for advanced scenarios.
Core Packages
clearpath_common, clearpath_config, clearpath_description, clearpath_generator, clearpath_msgs and clearpath_platform — shared across all Clearpath platforms on Jazzy, plus twist_mux priority-arbitrating joystick/nav/e-stop commands and robot_localization's EKF fusing wheel odometry with IMU.
Debugging
List topics/nodes, check TF with tf2_tools view_frames, watch /diagnostics and /platform/mcu/status, or validate a robot.yaml edit before restarting the service.
Building and using a map
The three-step SLAM workflow behind map-based and GPS navigation.
1. Create the map
Launch SLAM Toolbox (slam.launch.py), drive the Husky around with the joystick, then save with nav2_map_server map_saver_cli.
2. Rebuild packages
If the map isn't named map, rebuild so it's found: colcon build --symlink-install, then re-source install/setup.bash.
3. Load & navigate
Launch nav2.launch.py map:=/path/to/map.yaml, then set a 2D Pose Estimate and 2D Goal Pose in RViz2.
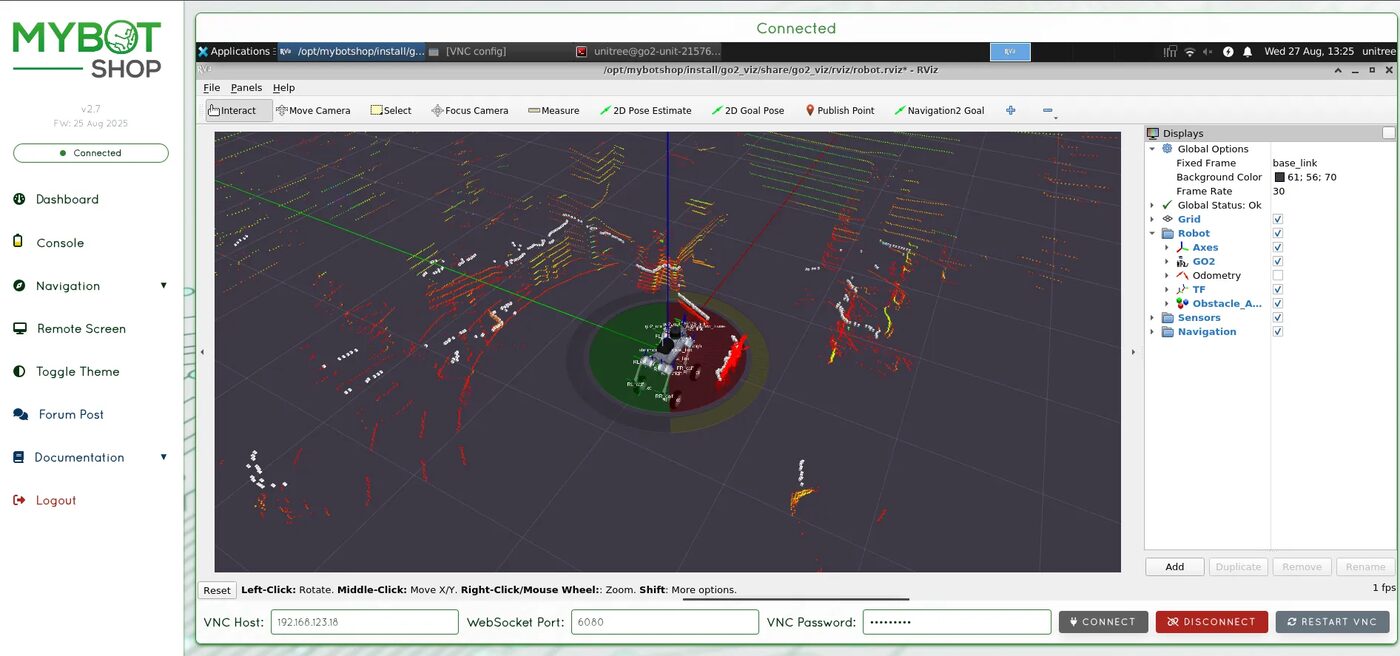
RViz2 visualization, viewed over the onboard remote desktop — ros2 launch clearpath_viz view_robot.launch.py
See it in the browser
A guided tour of the Husky A300 webserver at 192.168.131.1:9000, straight from the driver package's own documentation.
Manuals, ROS 2 docs & robot description
Everything needed to operate the Husky A300 safely, develop against its ROS 2 stack, or bring its model into your own tooling.
Official Clearpath Husky A300 Docs
The manufacturer's own product page, User Manual, Integration Guide, Maintenance Manual and Troubleshooting Guide, plus the upstream clearpath_common ROS 2 packages on GitHub.
MYBOTSHOP Husky A300 User Manual
A single self-contained manual covering everything on this page in depth: charging/E-stop/power procedures, network & webserver access, the Seyond/Oak-D/Fixposition sensor payload, the full ROS 2 Jazzy software reference, and the platform's safety guidelines.
Download PDFHusky A300 Robot Description (URDF)
MYBOTSHOP's a300_description package, trimmed to the base A300 platform — chassis, top plate, suspension, wheels and drivetrain, pre-flattened to a ready-to-load a300.urdf (no xacro processing required). The same file drives the viewer above. Excludes accessory sensor mounts and the optional xArm850 manipulator, neither of which is part of this documented configuration.
Looking for the Seyond, Oak-D or Fixposition sensor SDKs, the xArm850 manipulator package, or the full private source repository? Ask us directly.
If something goes wrong
Two steps, in order — the forum first for fast community and staff triage, then a direct ticket if it needs to go further.
MYBOTSHOP Forum
Open a topic on the MYBOTSHOP Forum for community and staff triage — most software questions and known issues get resolved here first. For code-level bugs, GitHub Issues is also in play.
Direct ticket & RMA
If it's unresolved, email support@mybotshop.de with the problem description and what's already been tried. For hardware issues we'll issue an RMA number and return instructions — returns without an RMA number are auto-rejected.
RMA returns ship to: MYBOTSHOP GmbH, Willy-Messerschmitt-Strasse 12, 50126 Bergheim, Germany.
We're here for the whole deployment
A fleet rollout, a new sensor payload, or a question about a specific ROS 2 package — the MYBOTSHOP team can help.
support@mybotshop.de