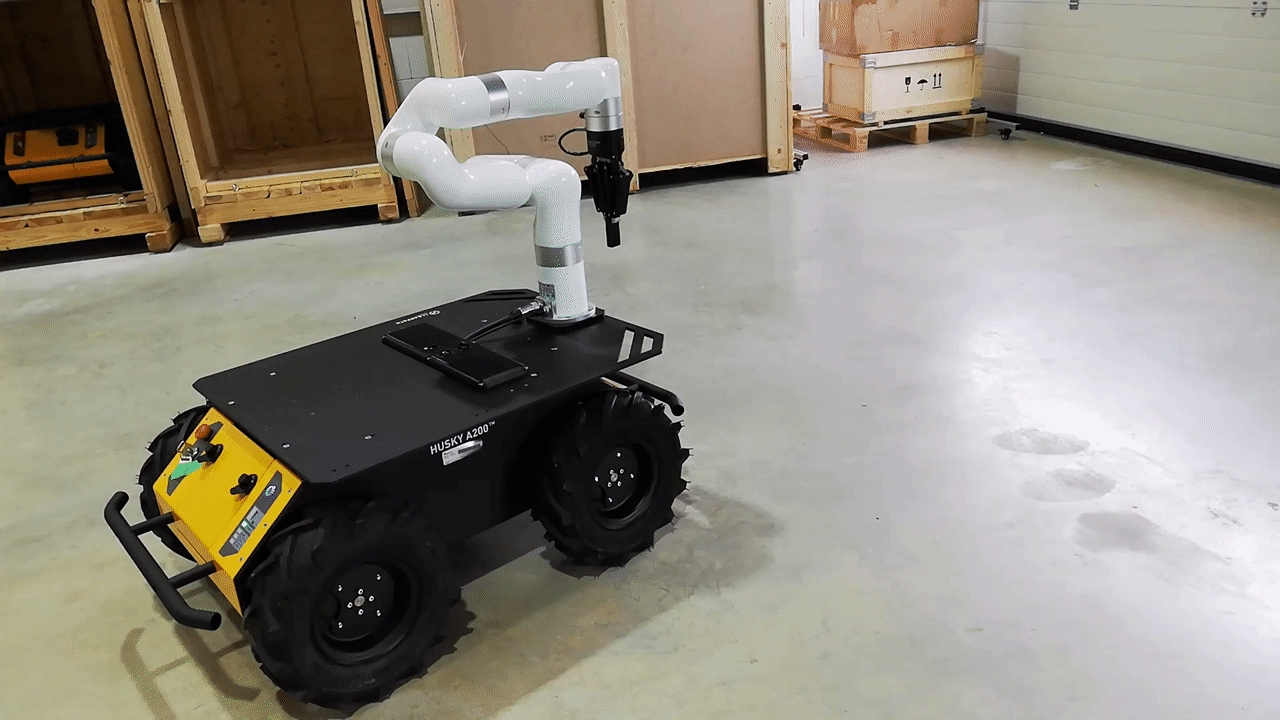
MMP Husky TUHH
Getting Started
To start-up the Husky, the instructional video playlist can be used which details the opening and use of the Husky.
Data Sheets
Documentations
Pre-requisite Software
The ROS driver for the robots is initially supported for the
ROS Noetic. All of ROS related software should be installed in a
remote Husky-PC as well as the Remote-PC. The
steps for shown below are for Remote-PC as the Husky is pre-installed with
the required drivers and ROS distribution.
PC Setup
ROS Noetic installation requires Ubutnu 20.04.
Download Ubuntu 20.04
Follow the Ubuntu 20.04 Installation guide
ROS-noetic Installation
The ros driver provided can be run either on a remote PC or on board robot computer. Usually, the on-board computer already has pre-installed ROS distribution, so the instructions below will be applicable to a remote computer. You may run the following commands to install ROS noetic or you can simply follow the instructions from the roswiki.
Enter the Ubuntu terminal and typie in the following command:
cd
The next step is setting up the source list:
sudo sh -c 'echo "deb http://packages.ros.org/ros/ubuntu $(lsb_release -sc) main" > /etc/apt/sources.list.d/ros-latest.list'
After which you will set up the keys:
sudo apt install curl
curl -s https://raw.githubusercontent.com/ros/rosdistro/master/ros.asc | sudo apt-key add -
Then, you will install ROS-noetic:
sudo apt update
sudo apt install ros-noetic-desktop-full
Finally, you will add ROS environment to your bash file, what this means is that each time you load up your terminal, it will automatically find the built-in ROS packages.
echo "source /opt/ros/noetic/setup.bash" >> ~/.bashrc
source ~/.bashrc
Install python dependencies and initialize repo:
sudo apt install python3-rosdep python3-rosinstall python3-rosinstall-generator python3-wstool build-essential
sudo rosdep init
rosdep update
Once the ROS packages are set-up the next step would be to set up a workspace in which you can add pre-built packages to control your robot.
Catkin Workspace
The first step is to ensure that you have correctly setup you ROS noetic. It can be checked by:
cd ..
source /opt/ros/noetic/setup.bash
Next, install catkin_tools:
sudo apt install python3-catkin-tools
The next step is to create, your workspace. This is typically created in the home directory following the standard ROS convention, once built, you should see a
buildanddevelfolder next to yoursrcfolder:
mkdir -p ~/catkin_ws/src
cd ~/catkin_ws/
catkin build
To enable the workspace, you must type in:
source devel/setup.bash
To avoid typing this everytime you start a terminal, you’ll add this into the
last lineof the bashrc file:
gedit ~/.bashrc
Add the following line at the end of the bashrc file:
source /home/<your_computer_username>/catkin_ws/devel/setup.bash
Everytime you do a
catkin build, it is necessary to either restart all your terminals, or source them.To verify that everything is working correctly, type the following into the terminal:
echo $ROS_PACKAGE_PATH
Installation
The package is designed to work on the Husky. To install the package simply download it from the MBS Husky-xARM6-Robotiq github repo.
Give root permission to the installation script via
sudo chmod +x Installation_script.bash
Run the script from the terminal via
./Installation_script.bash
Provide the workspace name as
catkin_wsProvide the directory as
/home/administrator.
Note
In case the username is not administrator then manual changes will have to be made in the startup job.
Network Setup
To set up a connection to the Husky, please follow the provided guidelines:
Connect an Ethernet cable from your Host PC to the Ethernet port of the Husky.
Next in your Host PC, create a static connection from your network manager with an ip of
192.168.131.51. For the netmask, use255.255.255.0.Once the static connection is setup correctly, one can
sshinto the on-board PC as described below.
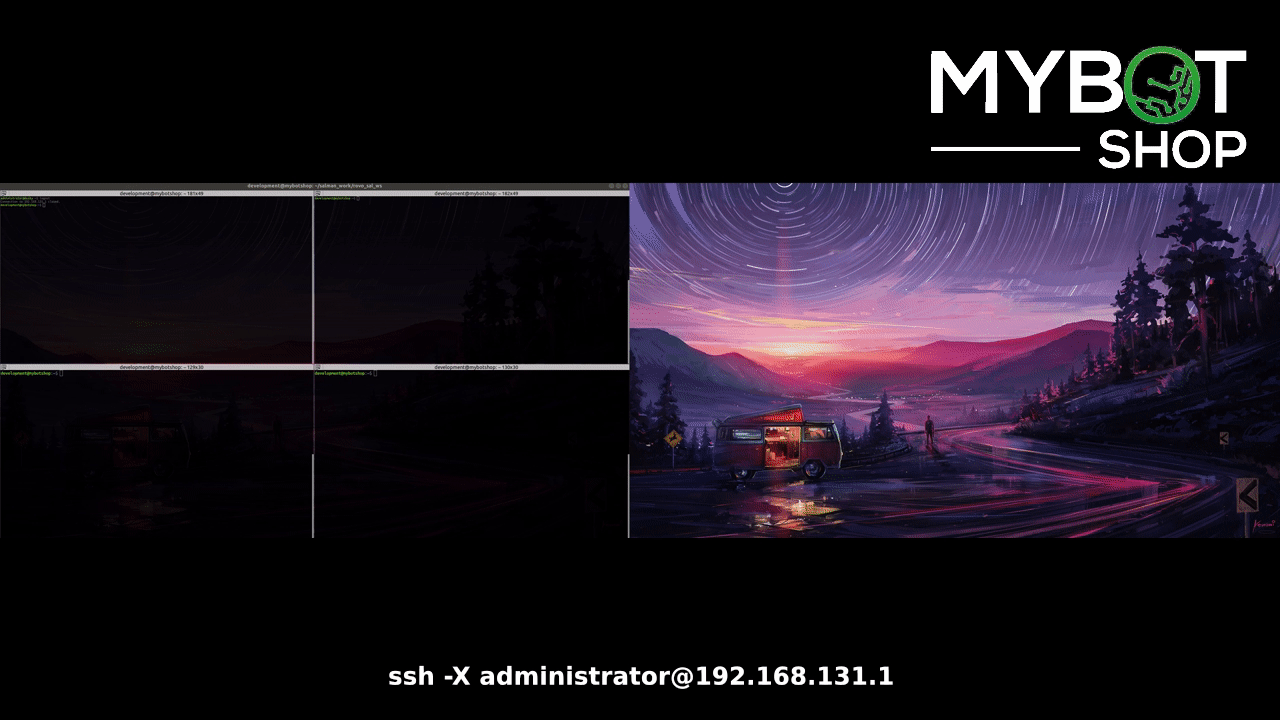
To ssh, enter the command terminal and enter the following:
ssh -X administrator@192.168.131.1
The password is:
clearpath
Attention
The first port of the Husky is configured with the static ip 192.168.131.1, others have been left dynamic for internet access.
Network tables
Device |
Network Address |
|---|---|
Husky |
192.168.131.1 |
xARM6 |
192.168.132.1 |
Start-up
When the Husky is powered-on, the mbs_husky robot upstart job starts the ros hardware drivers for the Husky.
Startup Example
A 40 second video illustrating the activation of the visualization module, xARM6 hardware driver, and the Robotiq gripper driver.
Powering xARM6
ssh into the husky.
ssh -X administrator@192.168.131.1
clearpath
To power-on the
xARM6
rostopic pub /pwr_relay std_msgs/Bool "data: true" --once
To power-off the
xARM6
rostopic pub /pwr_relay std_msgs/Bool "data: false" --once
Important
It takes approximately 60 seconds for the arm to power up. On start-up a beep sound can be heard. After 60 seconds two consecutive beep sounds can be heard indicating that the xARM6 has successfully started and can be accessed.
Hardware drivers xARM6
To launch the xARM6 hardware driver, run the command:
roslaunch mbs_xarm_robotiq xarm_hardware_driver.launch
Hardware drivers Robotiq Gripper 2f-140
To launch the Robotiq 2f-140 hardware driver, run the command:
roslaunch mbs_xarm_robotiq robotiq_hardware_driver.launch
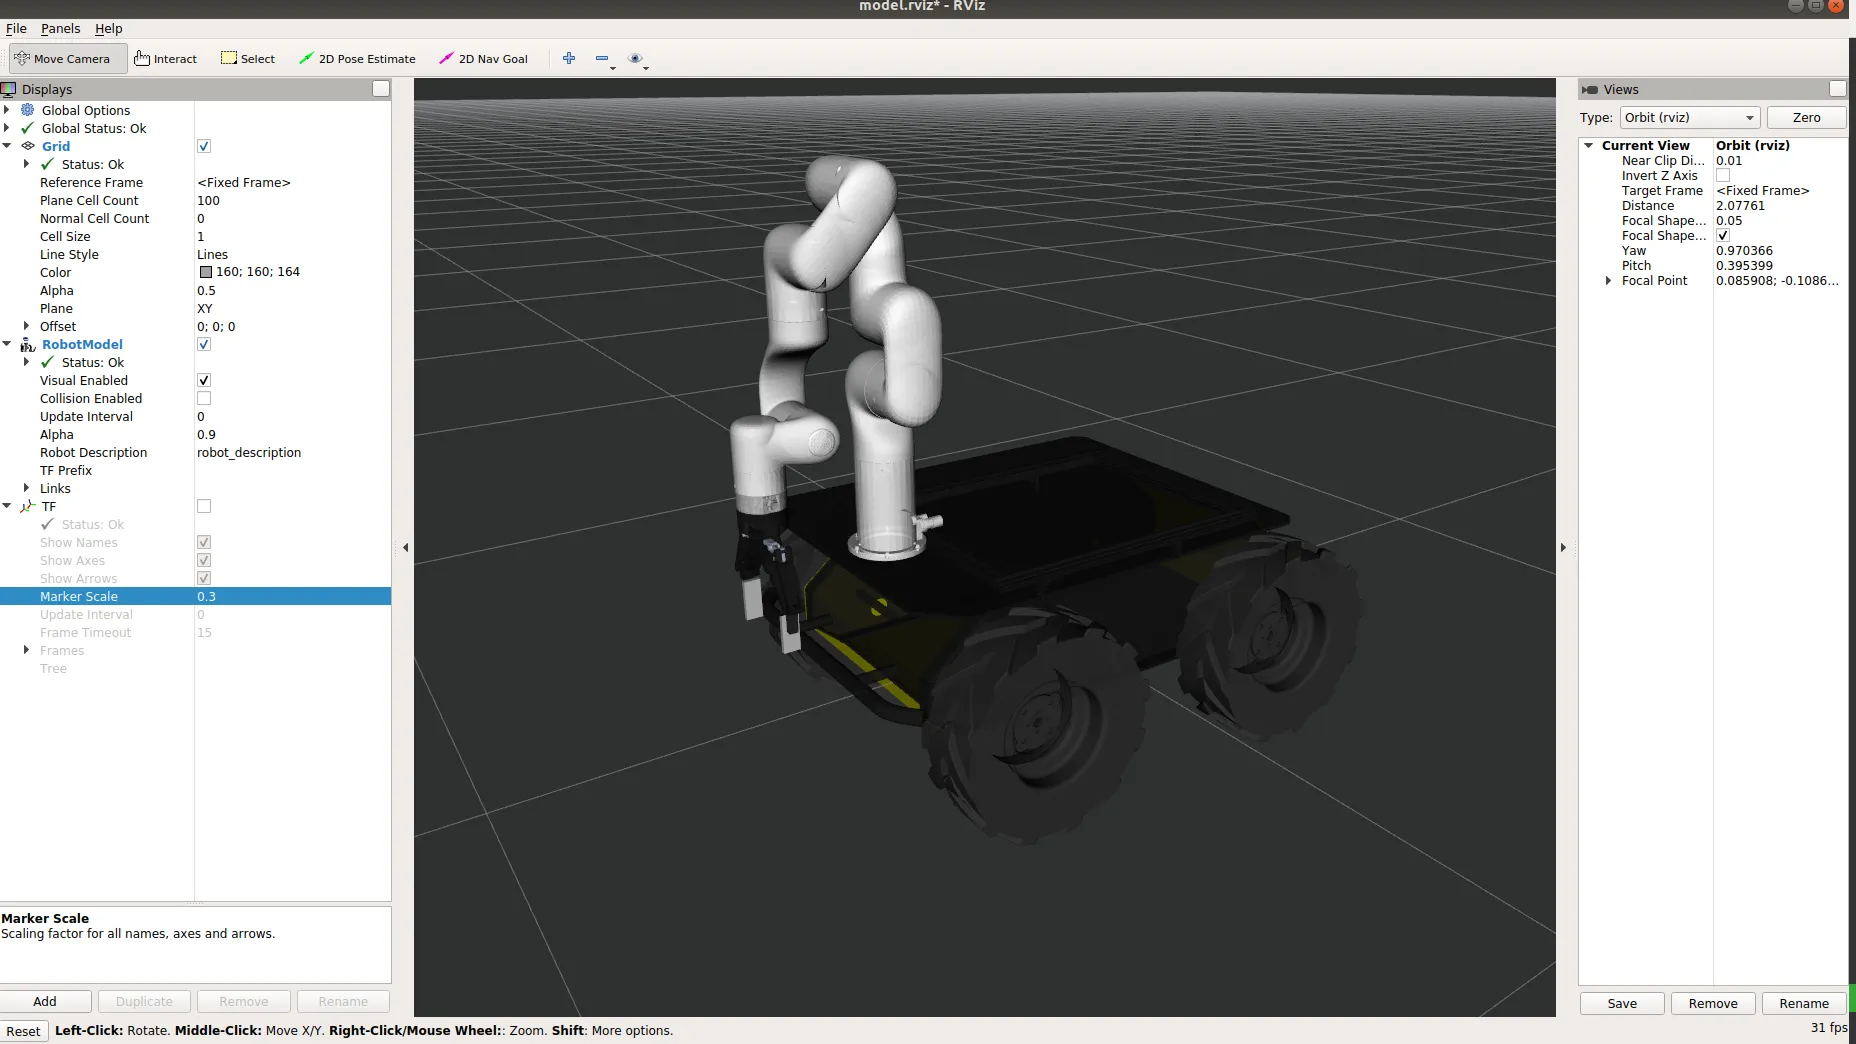
Visualization
The visualize the robot model.
roslaunch mbs_viz viz.launch
Husky xARM6 URDF
MBS Husky Startup
The launch file mbs_husky.launch includes everything which is being
launched at the startup. This file can be updated to include all the nodes needed
to run at the startup (e.g. your own packages). Startup job and its contents can be
verified in the directory /etc/ros/noetic; here the original launch file will
be copied.
Important
Do not create multiple startup jobs with multiple launch files this will break the system. Only one launch file should be created and everything else should be included in this.
If the systems breaks at startup you can start debugging by:
roslaunch mbs_husky_startup mbs_husky.launch
This will show which part of the launch file is having errors or you can start running everything in the launch file one by one in separate terminals.
Note
Once you add your custom node or launch files in the mbs_husky.launch,
you will need to run the following script so that it updates the start-up job on
the Husky’s PC; to run with the newly updated mbs_husky.launch.
rosrun mbs_husky_startup startup_script.sh
MBS Viz
The mbs_viz package will be the primary viewing tool for the robot. It is launched via:
roslaunch mbs_viz viz.launch
Important
At start-up only the Husky and Phidgets IMU hardware drivers are running, whilst the Husky-xARM6-Robotiq and the Robotiq gripper are both powered-off, due to which only the Husky will be displayed. Once the xARM6 and the Robotiq hardware drivers are powered on then, they will show up in the rviz display.
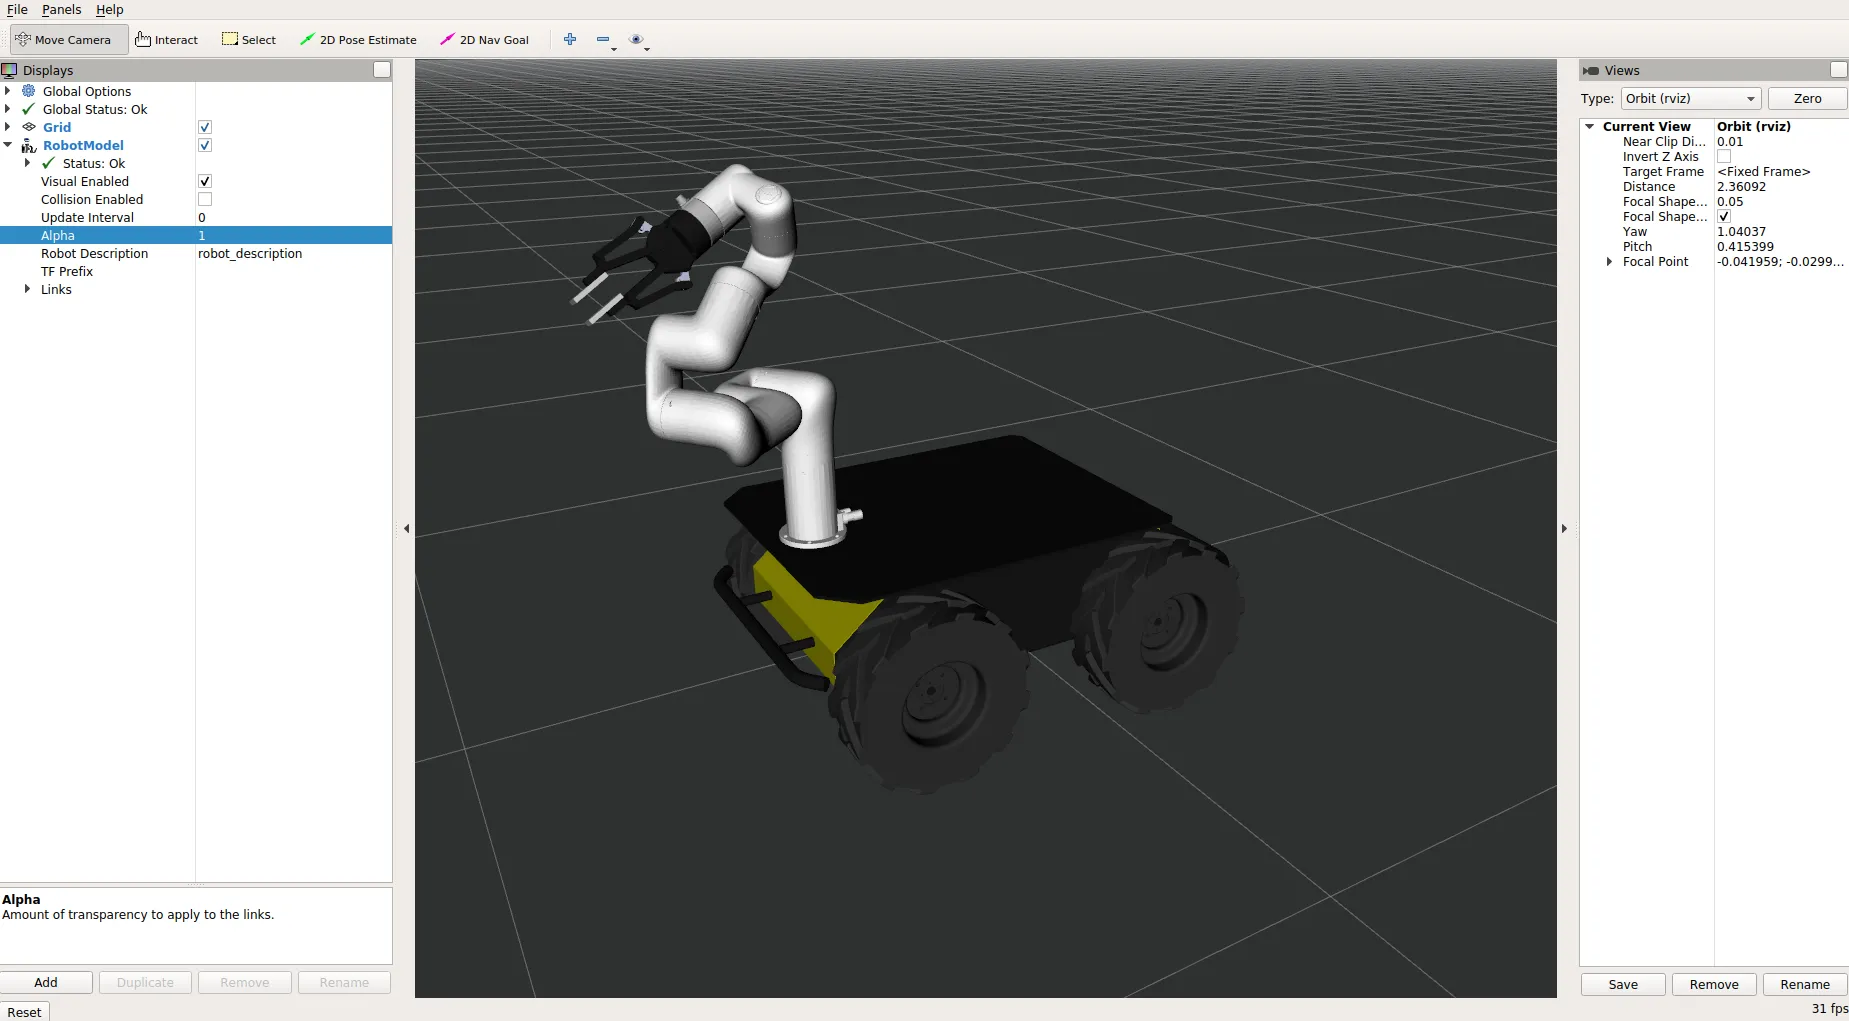
RVIZ display for the Husky-xARM6-Robotiq
MBS Husky Description
The launch file description.launch includes a custom URDF that has the Husky, xARM6, Phidgets imu, and Robotiq 2f-140
gripper integrated into it. It simply uses the roswiki robot_state_publisher to publish the static joints of
the robot. It is automatically launched via the startup job. To launch it manually, it can be done via:
roslaunch mbs_husky_description description.launch
The bringup.launch launches the description launch file as well as the fake joint state publishers from
roswiki joint_state_publisher_gui. It can be used for visualization when not connected to the robot or for
debugging the URDF. It can be launched via:
roslaunch mbs_husky_description bringup.launch
MBS xARM Robotiq
The mbs_xarm_robotiq package is used to turn on the hardware drivers for the xARM6 and the Robotiq gripper.
xARM6
xARM6
Ensure that the xARM6 is powered-on by following the Start-up.
To launch the xARM6 hardware driver, run the command:
roslaunch mbs_xarm_robotiq xarm_hardware_driver.launch
To launch a stand-alone moveit planner for the xARM6:
roslaunch mbs_xarm_robotiq xarm_standalone_moveit.launch
Note
Currently, for the xarm_standalone_moveit.launch the xARM6, is only valid. The gripper has not yet been
configured to work with it in the moveit planner. For more information on how to use this, you may check
the roswiki moveit_setup_assistant.
Robotiq Gripper 2f-140
Robotiq Gripper 2f-140
Ensure that the xARM6 is powered-on by following the Start-up. * To launch the Robotiq 2f-140 hardware driver, run the command:
roslaunch mbs_xarm_robotiq robotiq_hardware_driver.launch
The hardware driver launches an action-client server as well as a joint-state publisher for the gripper.
An example on how to communicate with the gripper is available in the mbs_xarm_robotiq/nodes/test_robotiq_gripper.py
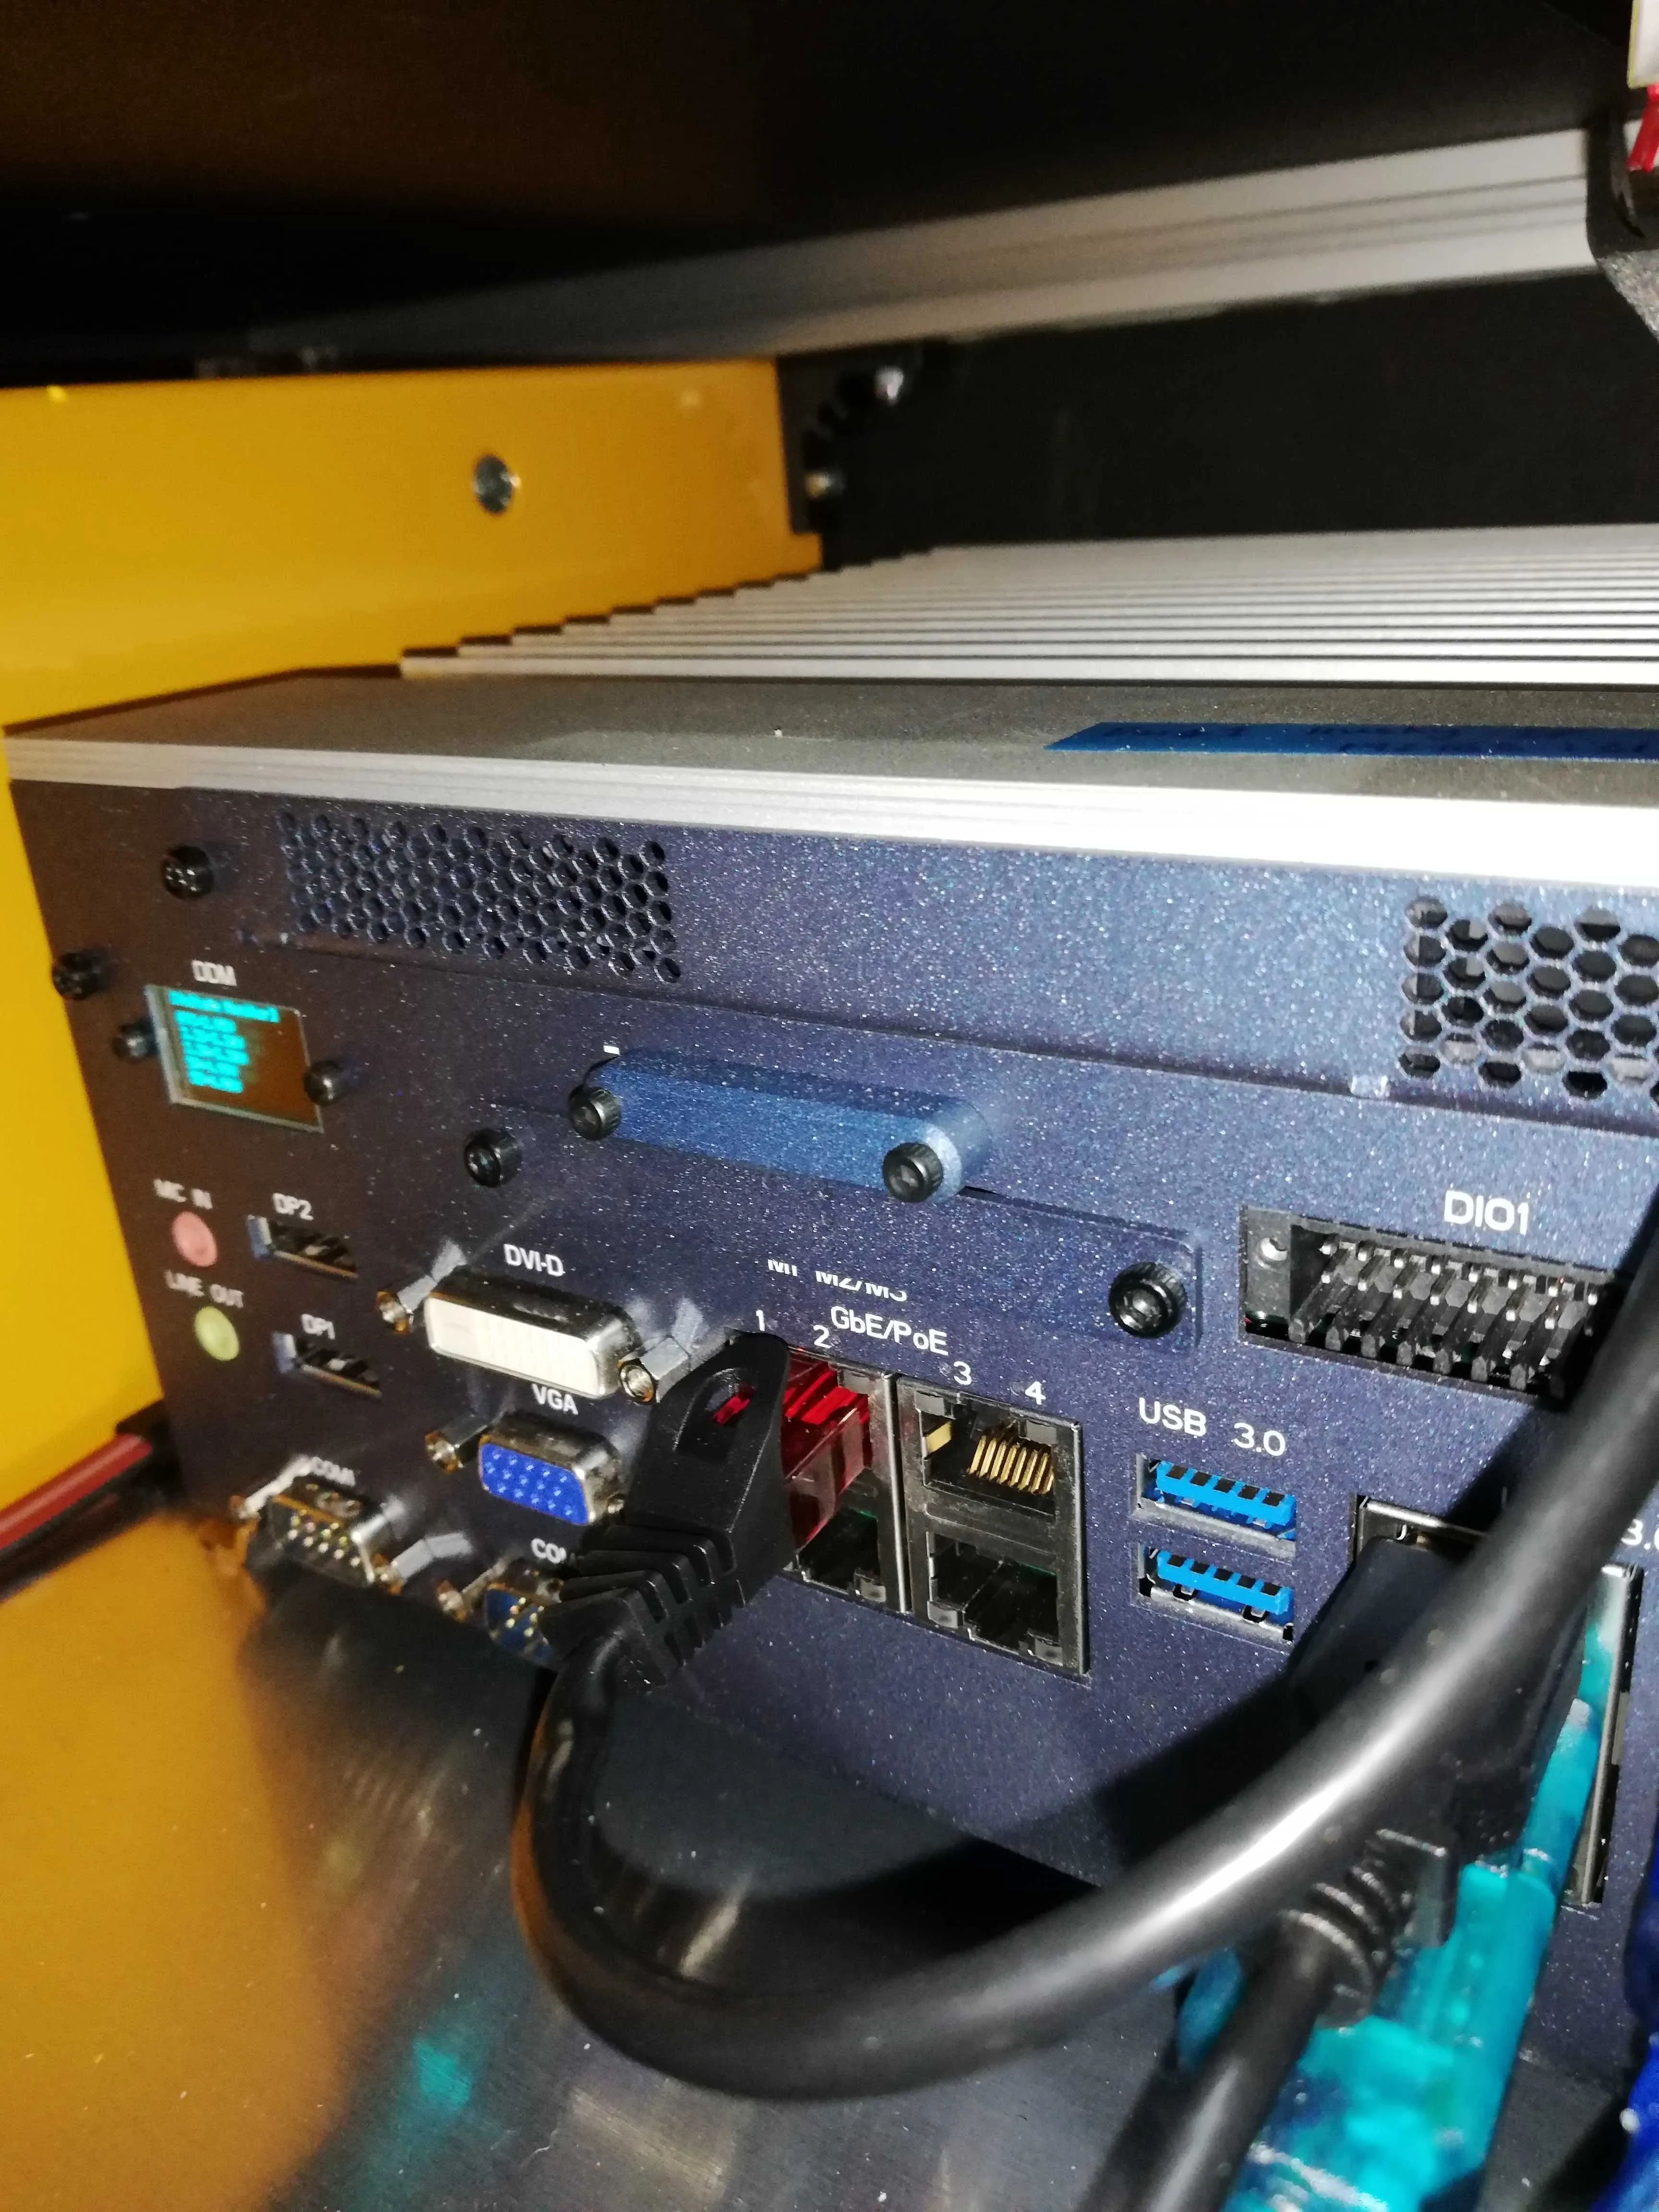
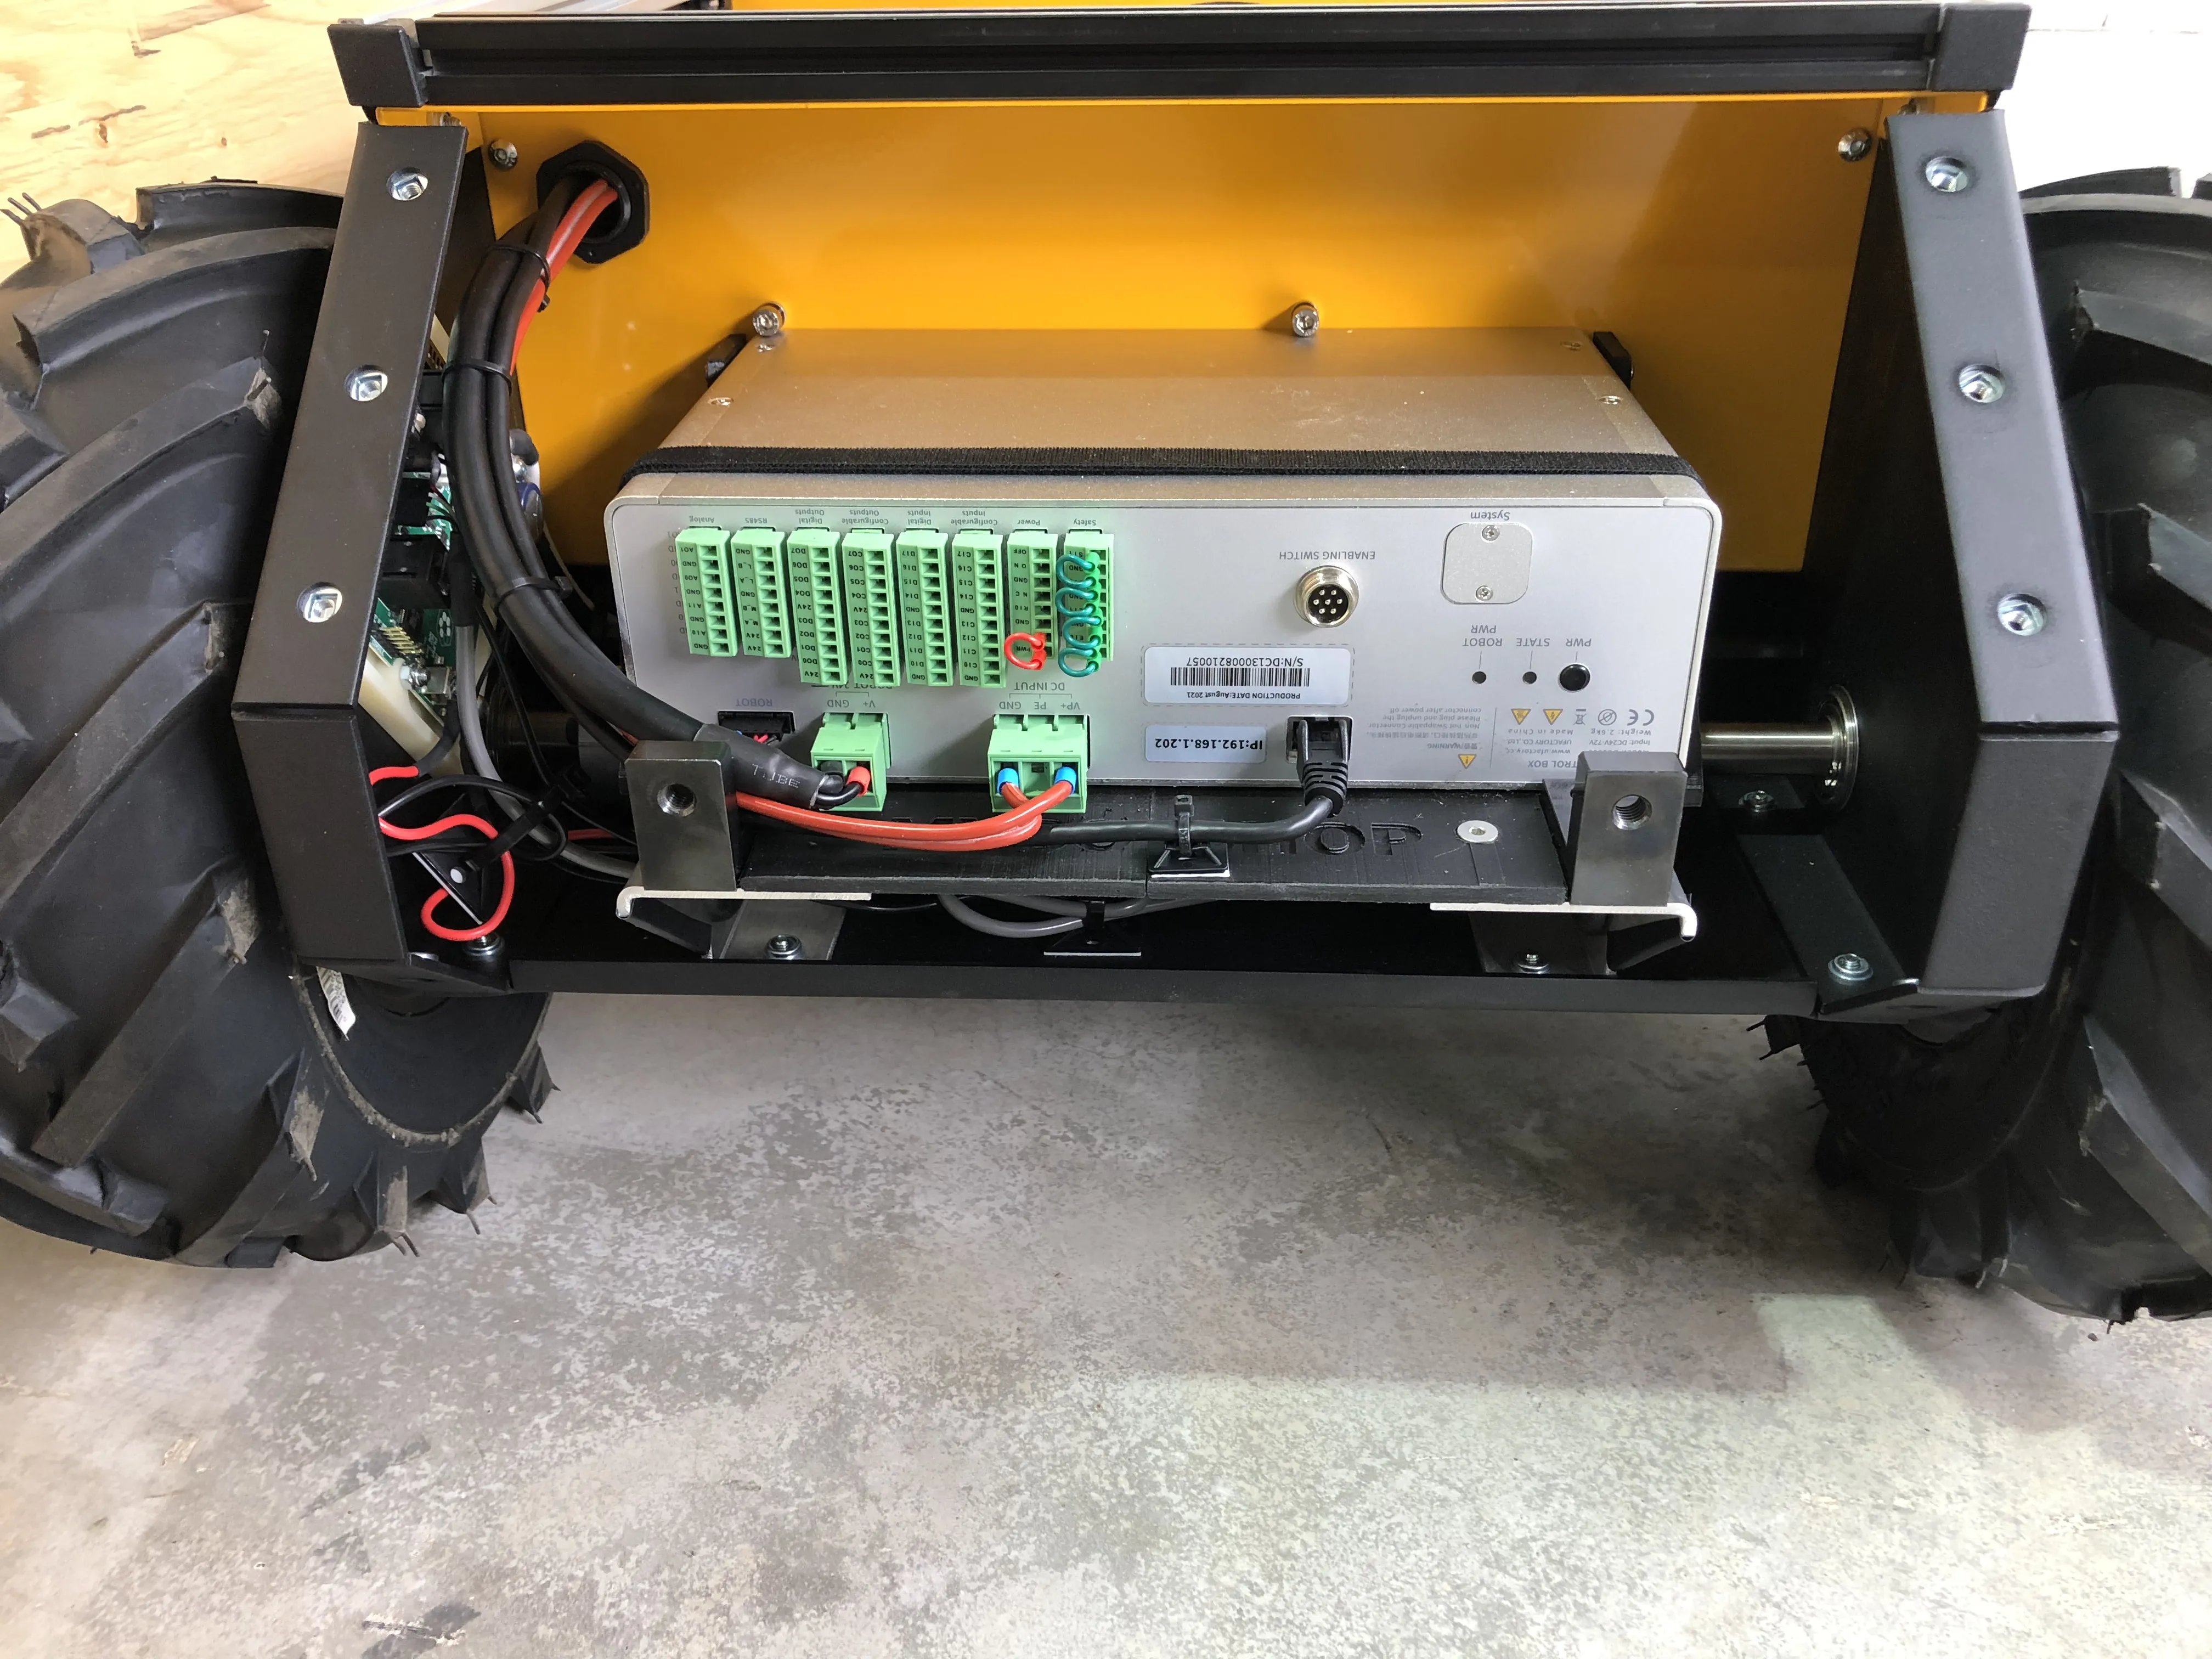
Power-relay
Power-relay Status
When the robot starts, an Arduino starts.This Arduino controls a power relay via the main PC in the husky. A startup script starts the communication between the Arduino and the main PC in the husky. To check the status of this module, the following steps are to be performed:
Connecting to the robot via Ethernet as described:
ssh -X administrator@192.168.131.1
clearpath
Next, we can check the status of the power-relay node via:
sudo service mbs_husky status
Note
If the icon is green, it means that the packages have started without any issues. In the event of an error, you may restart this startup job via:
sudo service mbs_husky restart
To power-on the relay, run the command:
rostopic pub /pwr_relay std_msgs/Bool "data: true"
Note
An audible click can be heard of the switching relay.One ROS message needs to go through after
which you may cancel the publisher ctrl+c.
To power-off the relay, run the command:
rostopic pub /pwr_relay std_msgs/Bool "data: false"
Attention
The rostopic that subscribes to this is the /pwr_relay and it accepts Boolean messages std_msgs/Bool.
|
|
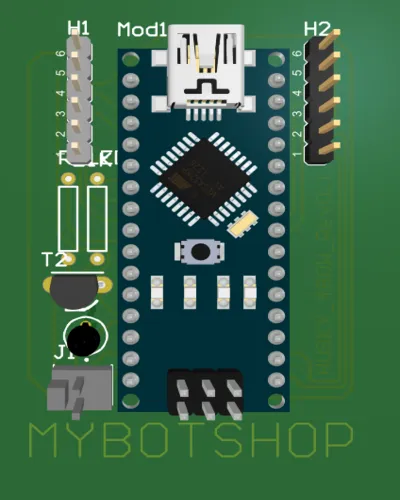
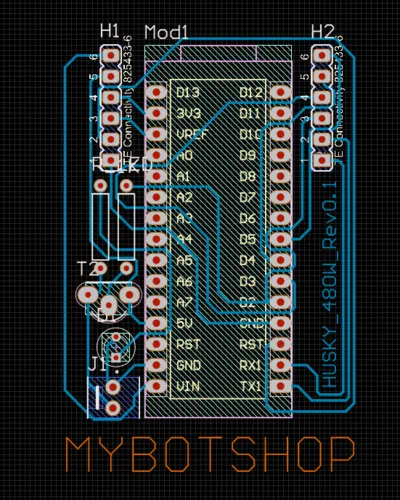
Arduino Nano |
Arduino Nano Connections |
Power-relay Technical Specification
The Arduino is activating the 24V DC battery power on the XT60 connector.
A 20amps fuse ensures that the cables and the installed electronics are not damaged.
Furthermore, the voltage applied to the XT60 connector can vary depending on the battery
capacity, since no voltage converter or something similar is integrated.
The Arduino is connected to the /dev/ttyUSB0 port.
Warning
The Red/Black 2,5mm2 cable inside the Husky, which is
going to the 24V external power control box is always live
as the battery power is continuously supplied.
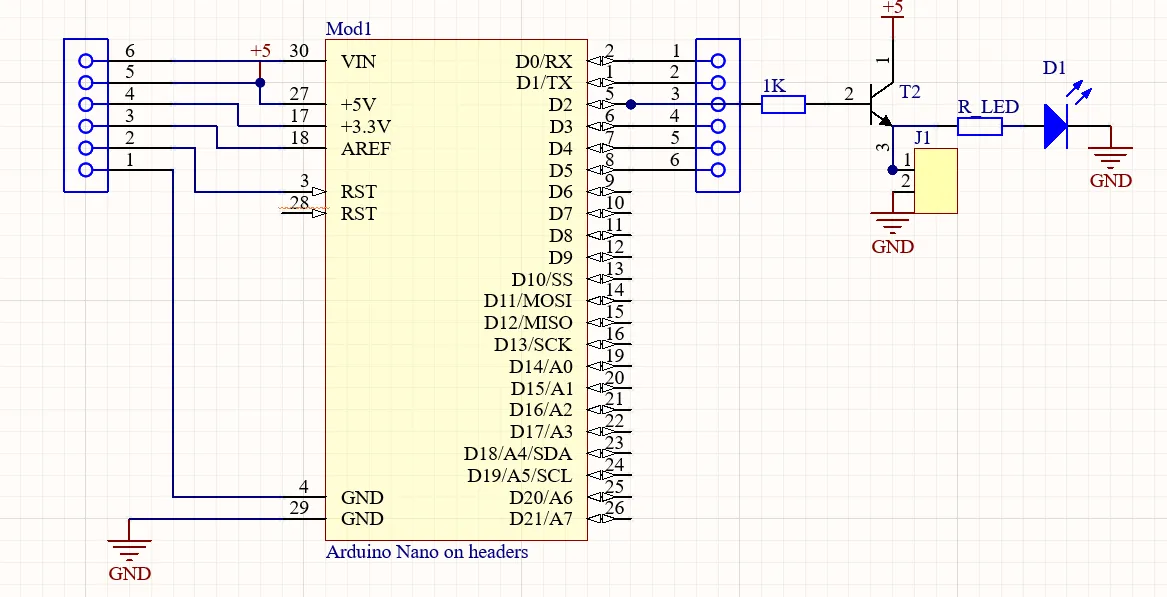
Power-board schematic
Phidget IMU
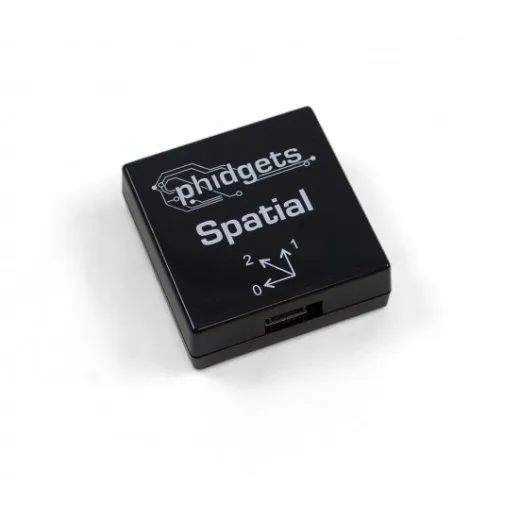
Phidgets IMU
Phidgets Start-up
When the robot starts, the Phidget’s IMU starts via a startup script. To check the status of this module, the following steps are to be performed:
Connecting to the robot via Ethernet as described:
ssh -X administrator@192.168.131.1
clearpath
Next, we can check the status of the Phidget’s IMU via:
sudo service mbs_husky status
Important
If the icon is green, it means that the packages has started without any issues. In the event of an error, you may restart this startup job via:
sudo service mbs_husky restart
To check the linear accelerations and angular velocities:
rostopic echo /IMU/data_raw
Attention
This topic does not include orientations. For more information on orientation please refer to the roswiki phidgets_imu .
To check magnetic orientation:
rostopic echo /IMU/mag
More information is available on roswiki phidgets_imu .
To check the orientation on rviz, be sure to use use the IMU visualization plugin.
roslaunch mbs_husky_description description.launch
Calibration must be done as instructed in the wiki according to the location.
The Phidgets is connected to the
/dev/ttyUSB1port.
Husky
Note
As the MYBOTSHOP Husky-xARM6-Robotiq is a multi-robot system consisting of Clearpath’s Husky, hence, the guide provided by Clearpath for Husky Navigation is applicable. For ease of view, the guide is available below as well.
Below are the example launch files for three different configurations for navigating Husky:
Navigation in an odometric frame without a map, using only roswiki move_base.
Generating a map using roswiki gmapping.
Localization with a known map using roswiki amcl.
If you’re working with a real Husky, it’s suggested to connect via SSH and launch the roswiki husky_navigation launchfiles from on board the robot. You’ll need to have bidirectional communication with the robot’s roscore in order to launch roswiki rviz on your workstation.
Important
It should be noted that without any auxiliary components such as a camera or lidar, the robot will not be able to perform obstacle avoidance or mapping.
Making a Map
In this demonstration, Husky generates a map using gmapping. Begin by launch the gmapping launch file on the robot:
roslaunch husky_navigation gmapping_demo.launch
And on your workstation, launch rviz with the suggested configuration:
roslaunch husky_viz view_robot.launch config:=gmapping
You must slowly drive Husky around to build the map. As obstacles come into view of the laser scanner, they will be added to the map, which is shown in rviz. You can either drive manually using the interactive markers, or semi-autonomously by sending navigation goals.
When you’re satisfied, you can save the produced map using map_saver:
rosrun map_server map_saver -f mymap
This will create a mymap.yaml and mymap.pgm file in your current directory.
xARM6
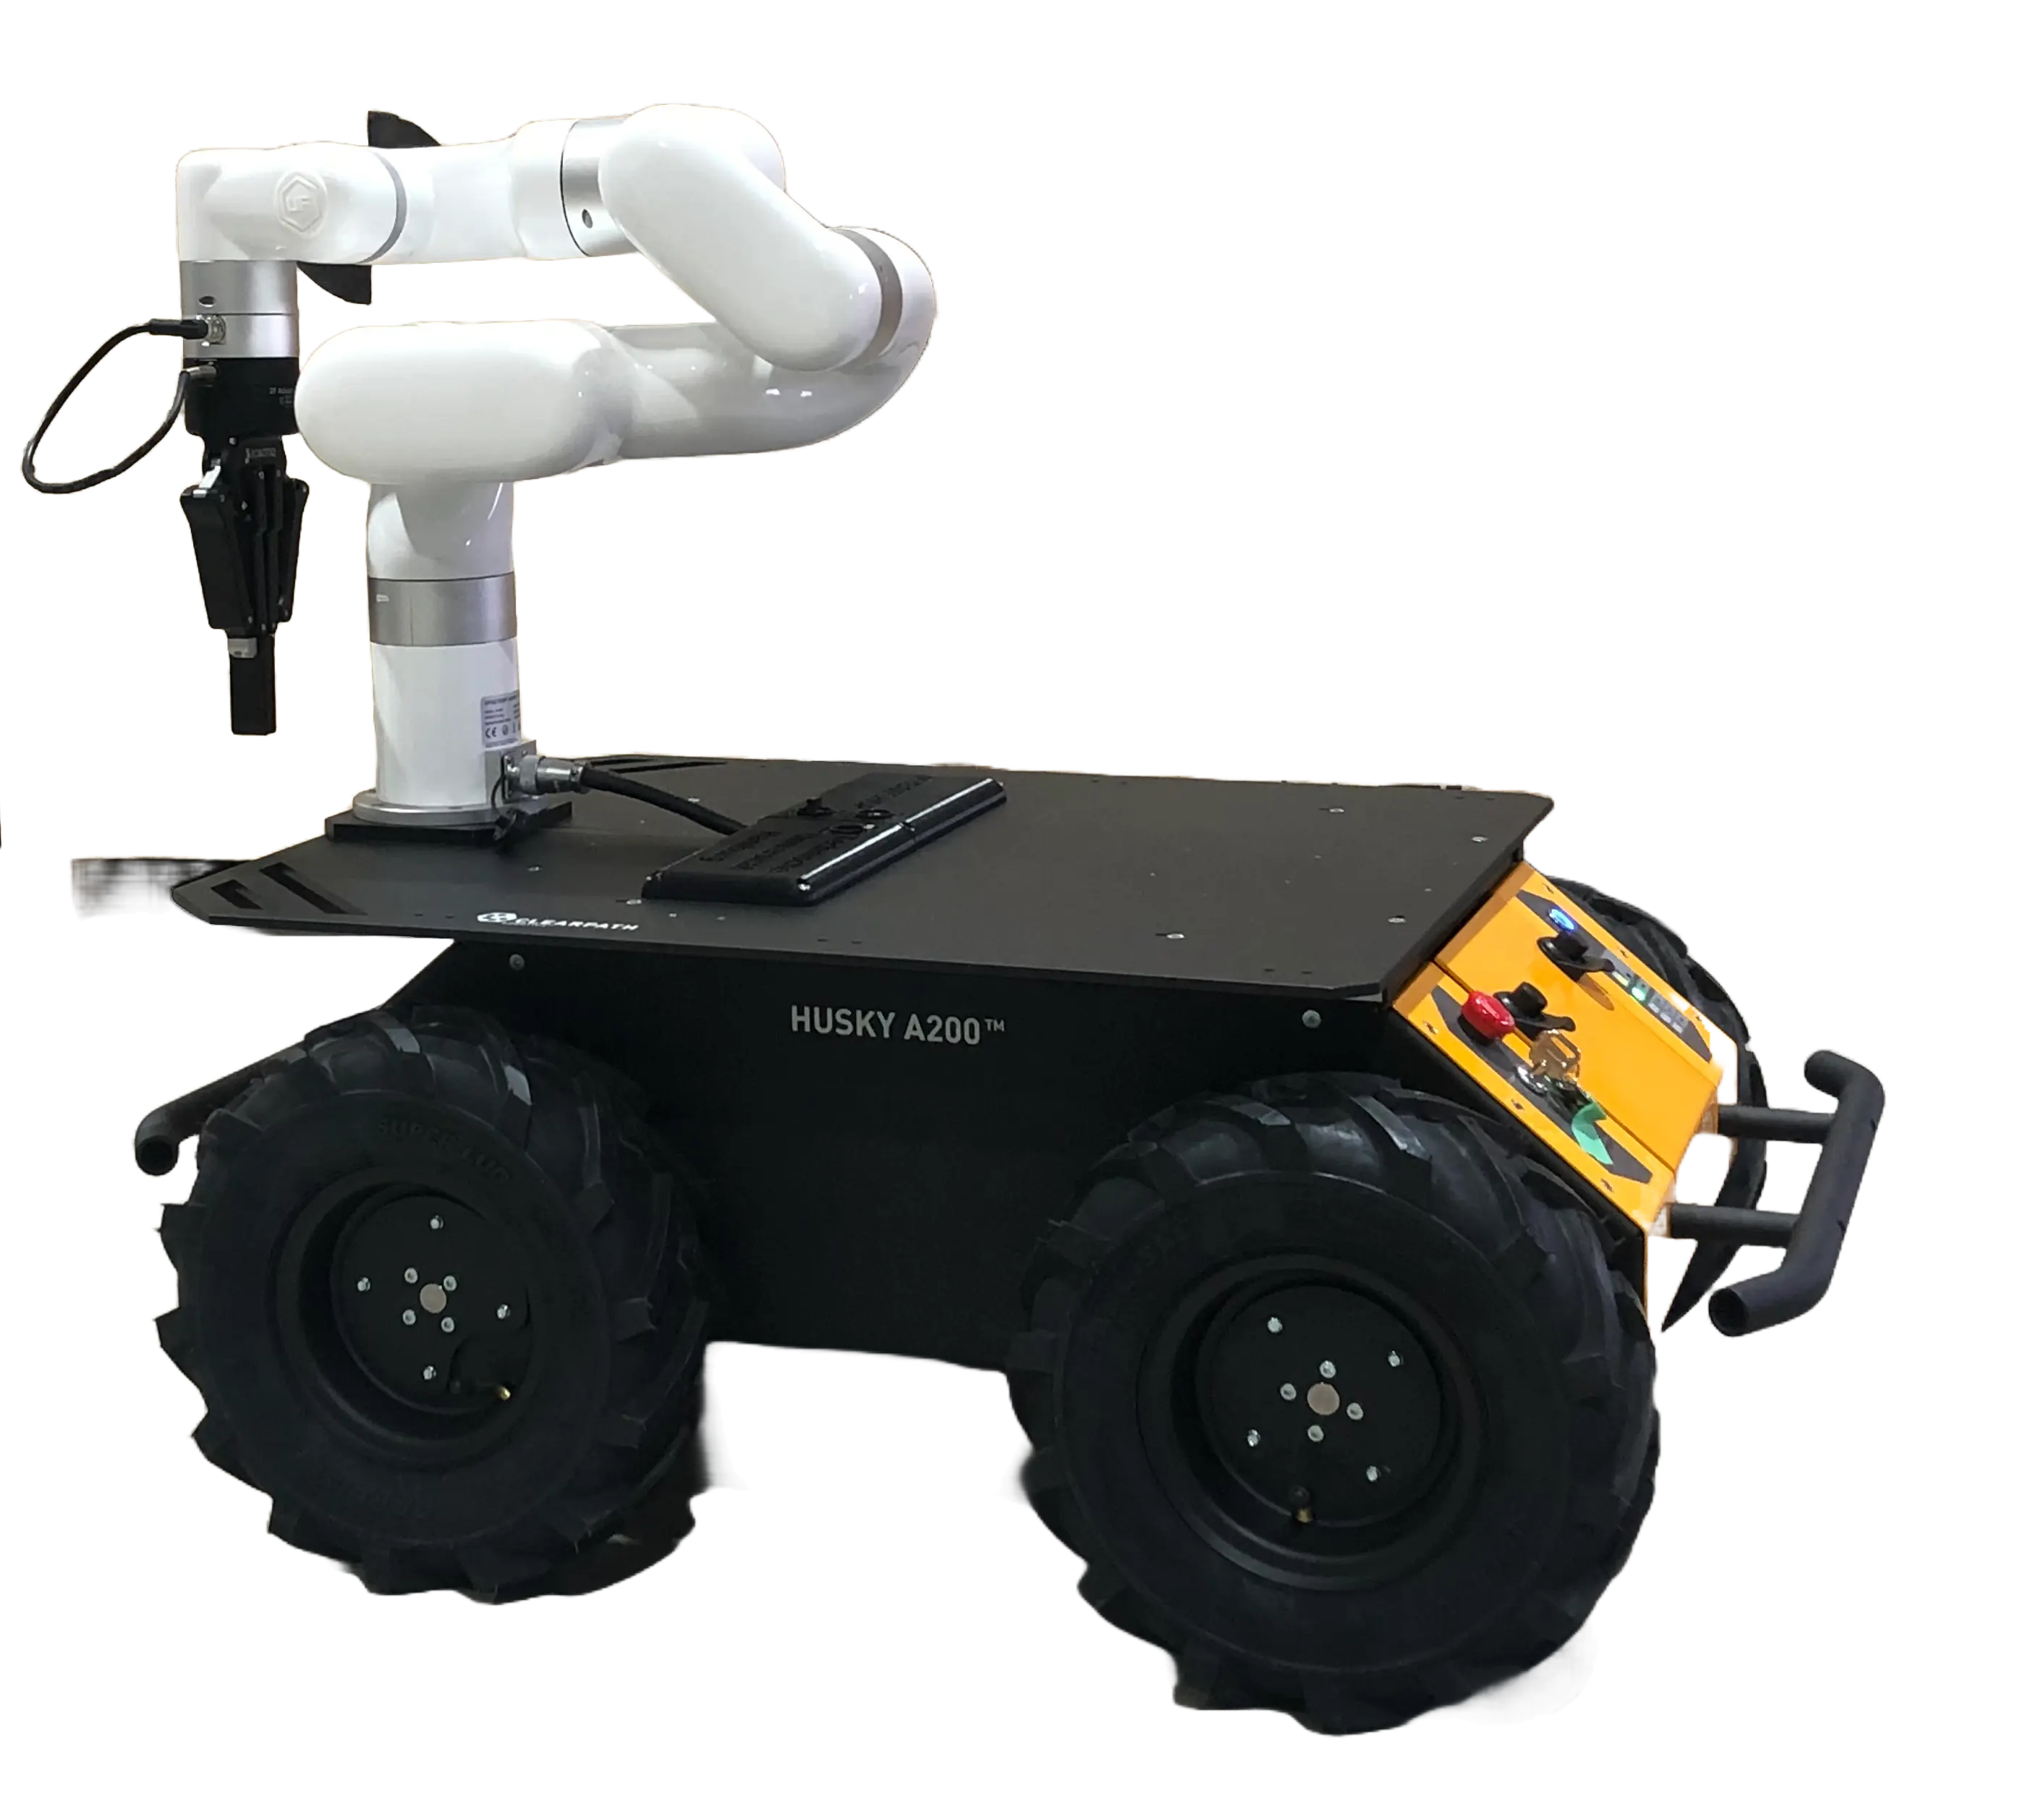
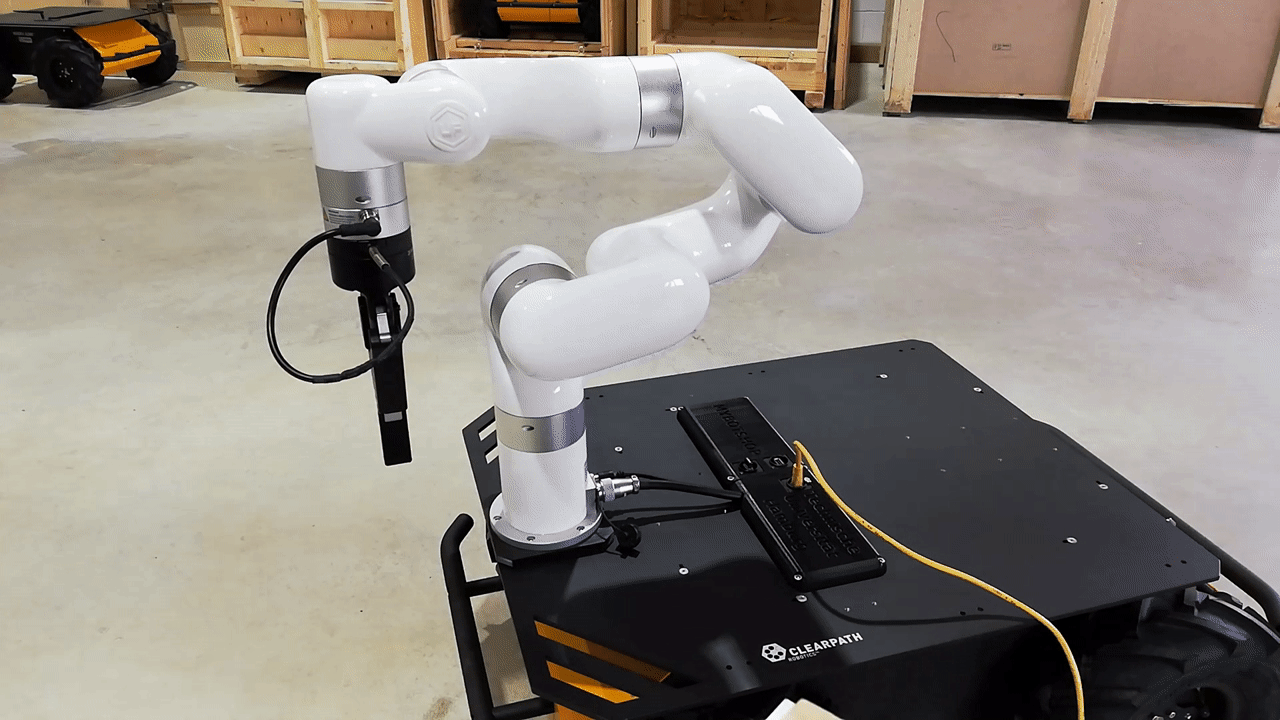
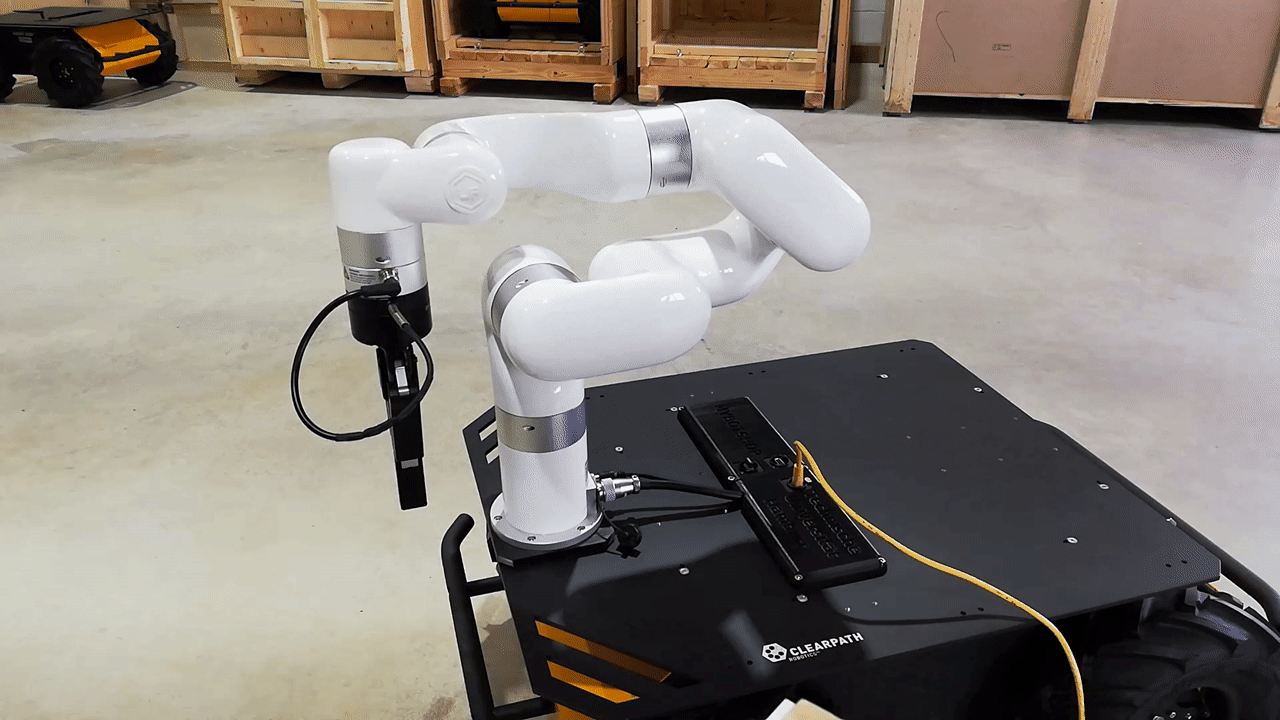
xARM6-Guide
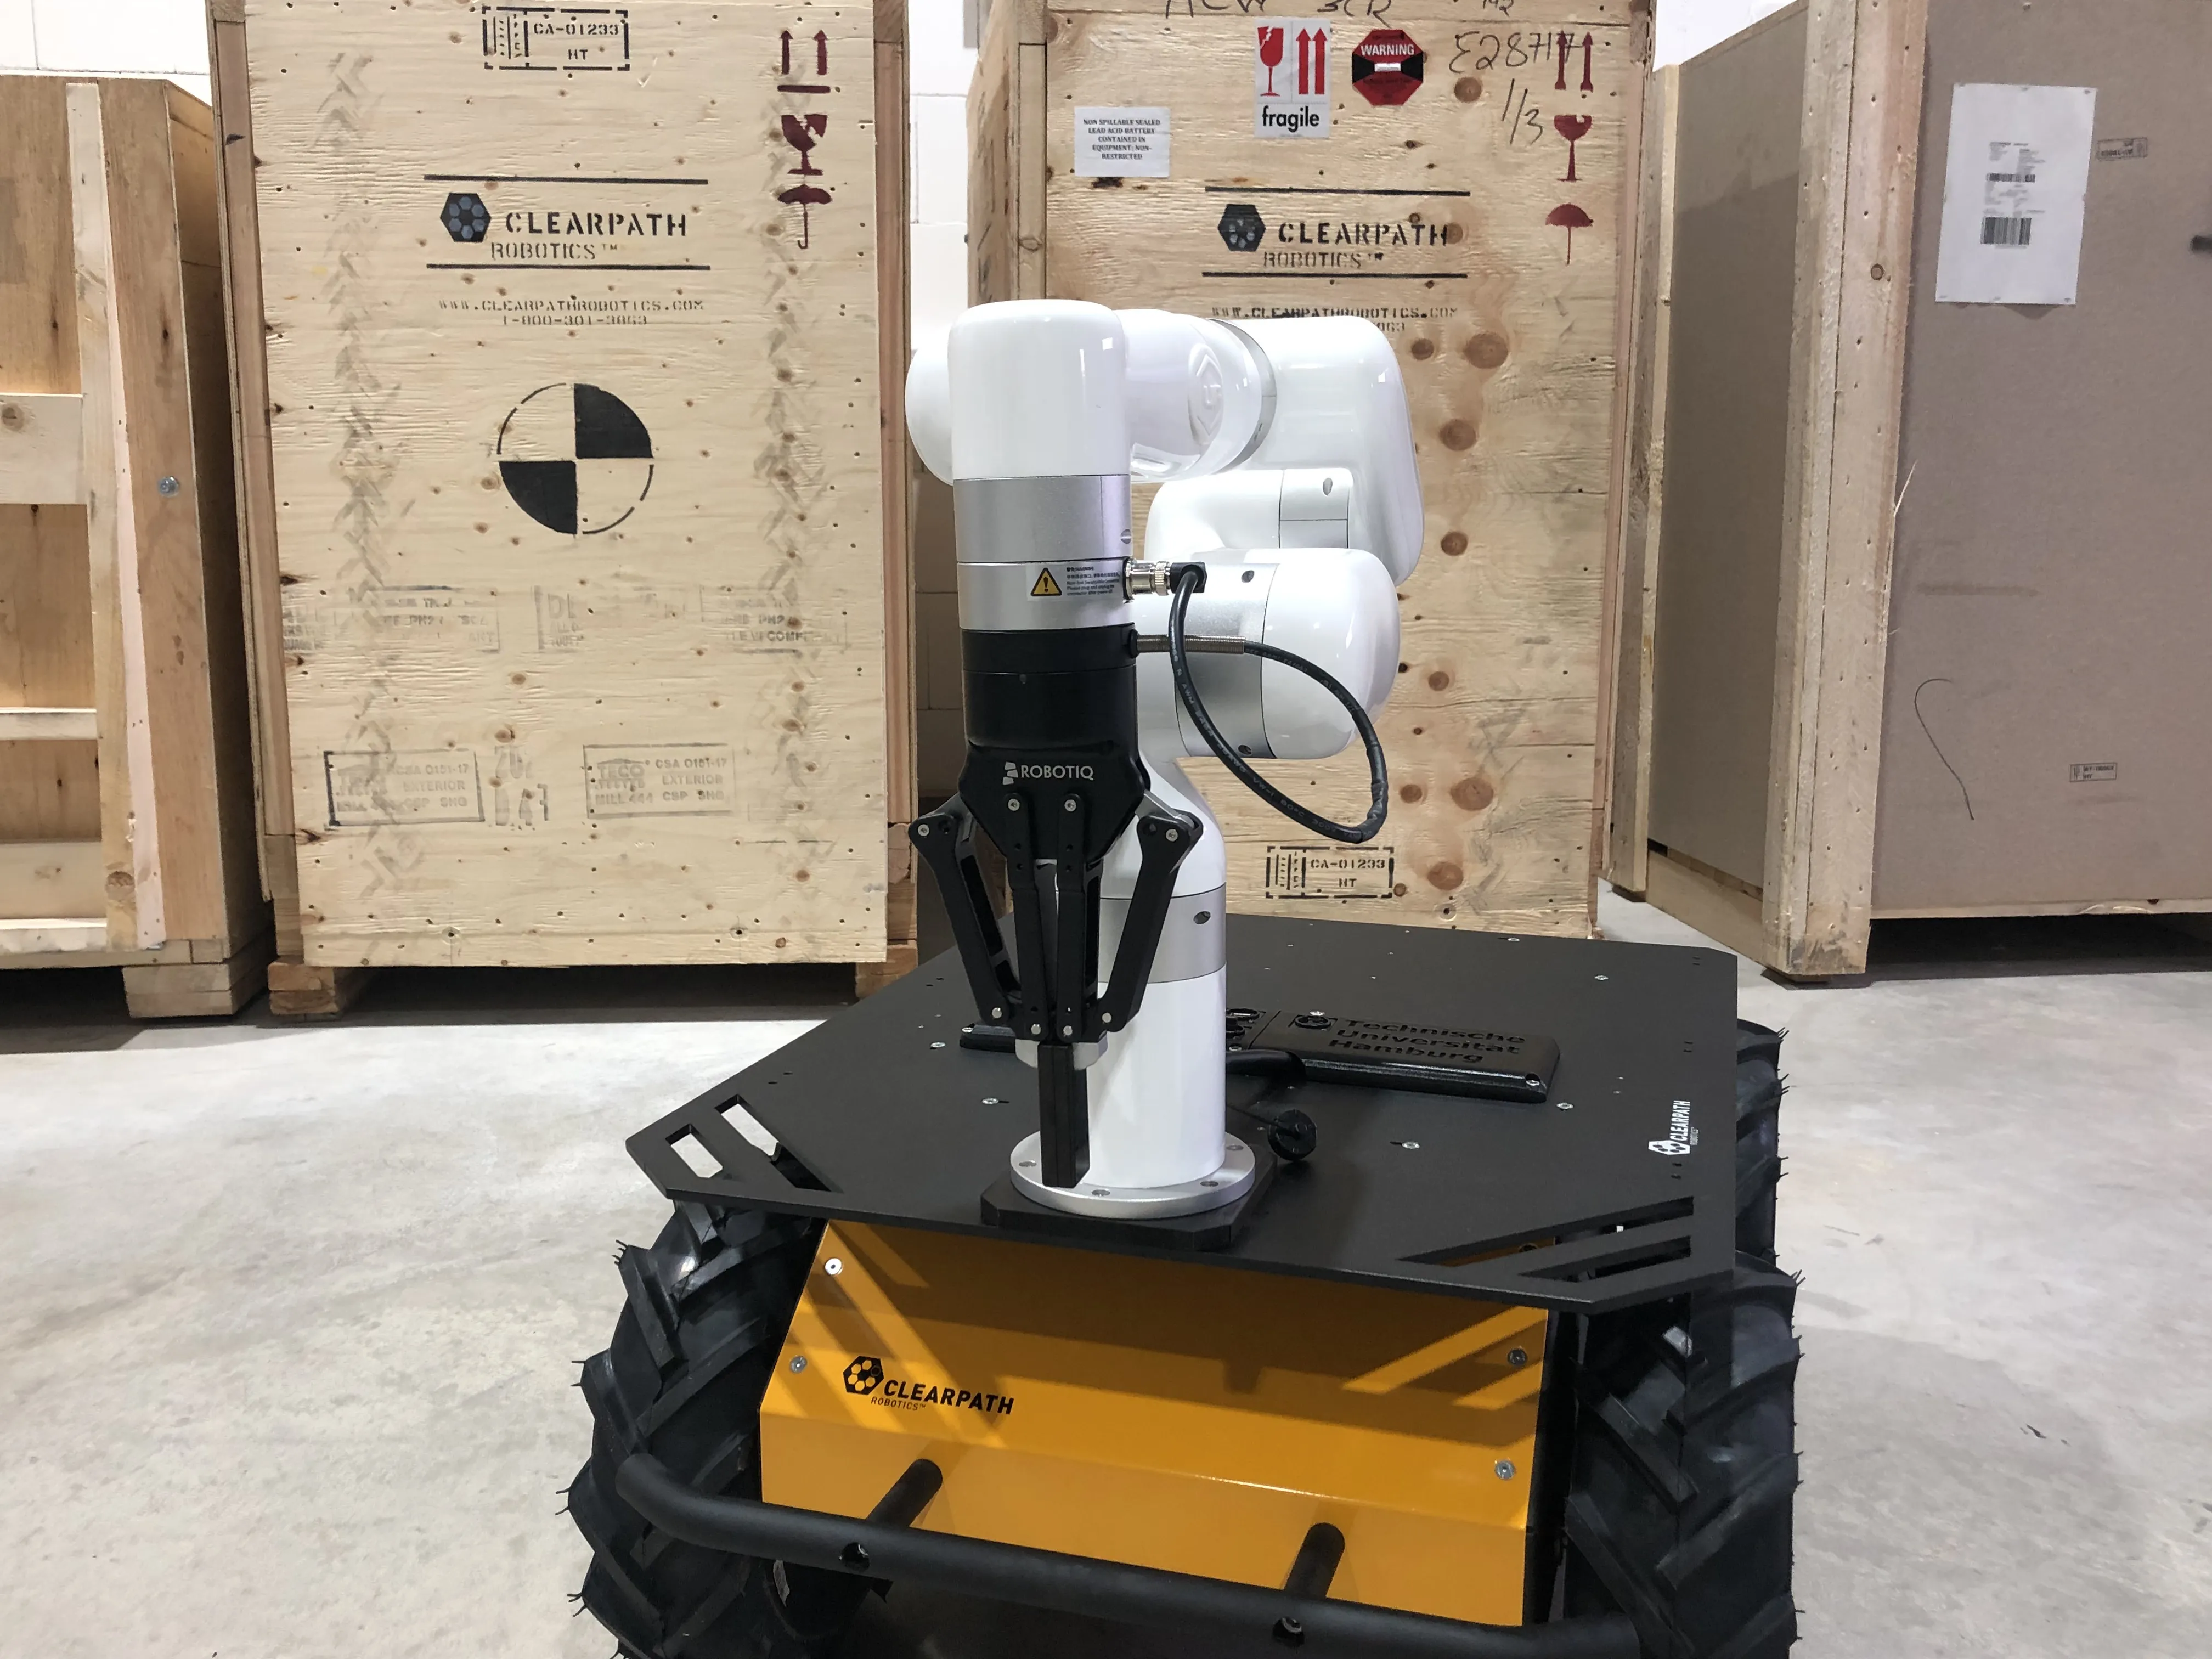
xARM6 integrated into Husky with a Robotiq 2f-140 gripper
Note
As the Husky-xARM6-Robotiq is a multi-robot system consisting of xARM6 and robotiq gripper, hence, the xARM6 tutorials, xARM6 user manual , xARM6 developer manual and the Robotiq 2f-140 manual are applicable.
To power-on the xARM6 please follow the Start-up section.
xARM6 DC Control Box
The control box for the xARM6 is mounted in rear compartment of the Husky.
xARM6-ROS
For the xARM6 ROS drivers please refer to the MBS xARM Robotiq section.
xARM6-Utilities
To operate the xARM6 from other means then ROS, the python and c++ sdks are available in the utils folder in the provided package.
Moreover, direct control of the xARM6 is available via the app. To access the app, navigate into the /utils/app folder and
run the command:
./xArmStudio-linux-0.6.0.AppImage
This should launch the xARM6. Connect to the IP address of 192.168.132.1 and you should have now complete access to the arm.
Also the app has a built-in plugin to interface with robotiq gripper available in the control panels.
Important
The app can also be accessed via ssh.
ssh -X administrator@192.168.131.1
clearpath
cd
cd catkin_ws/utils/app
./xArmStudio-linux-0.6.0.AppImage
Robotiq Gripper 2f-140
Robotiq Gripper 2f-140
Attention
The robotiq gripper does all communication via the xARM6. Hence, the xARM6 must be powered on for the gripper to work.
Robotiq Gripper 2f-140 ROS
For the robotiq ROS drivers please refer to the MBS xARM Robotiq section.