MMP Husky BE
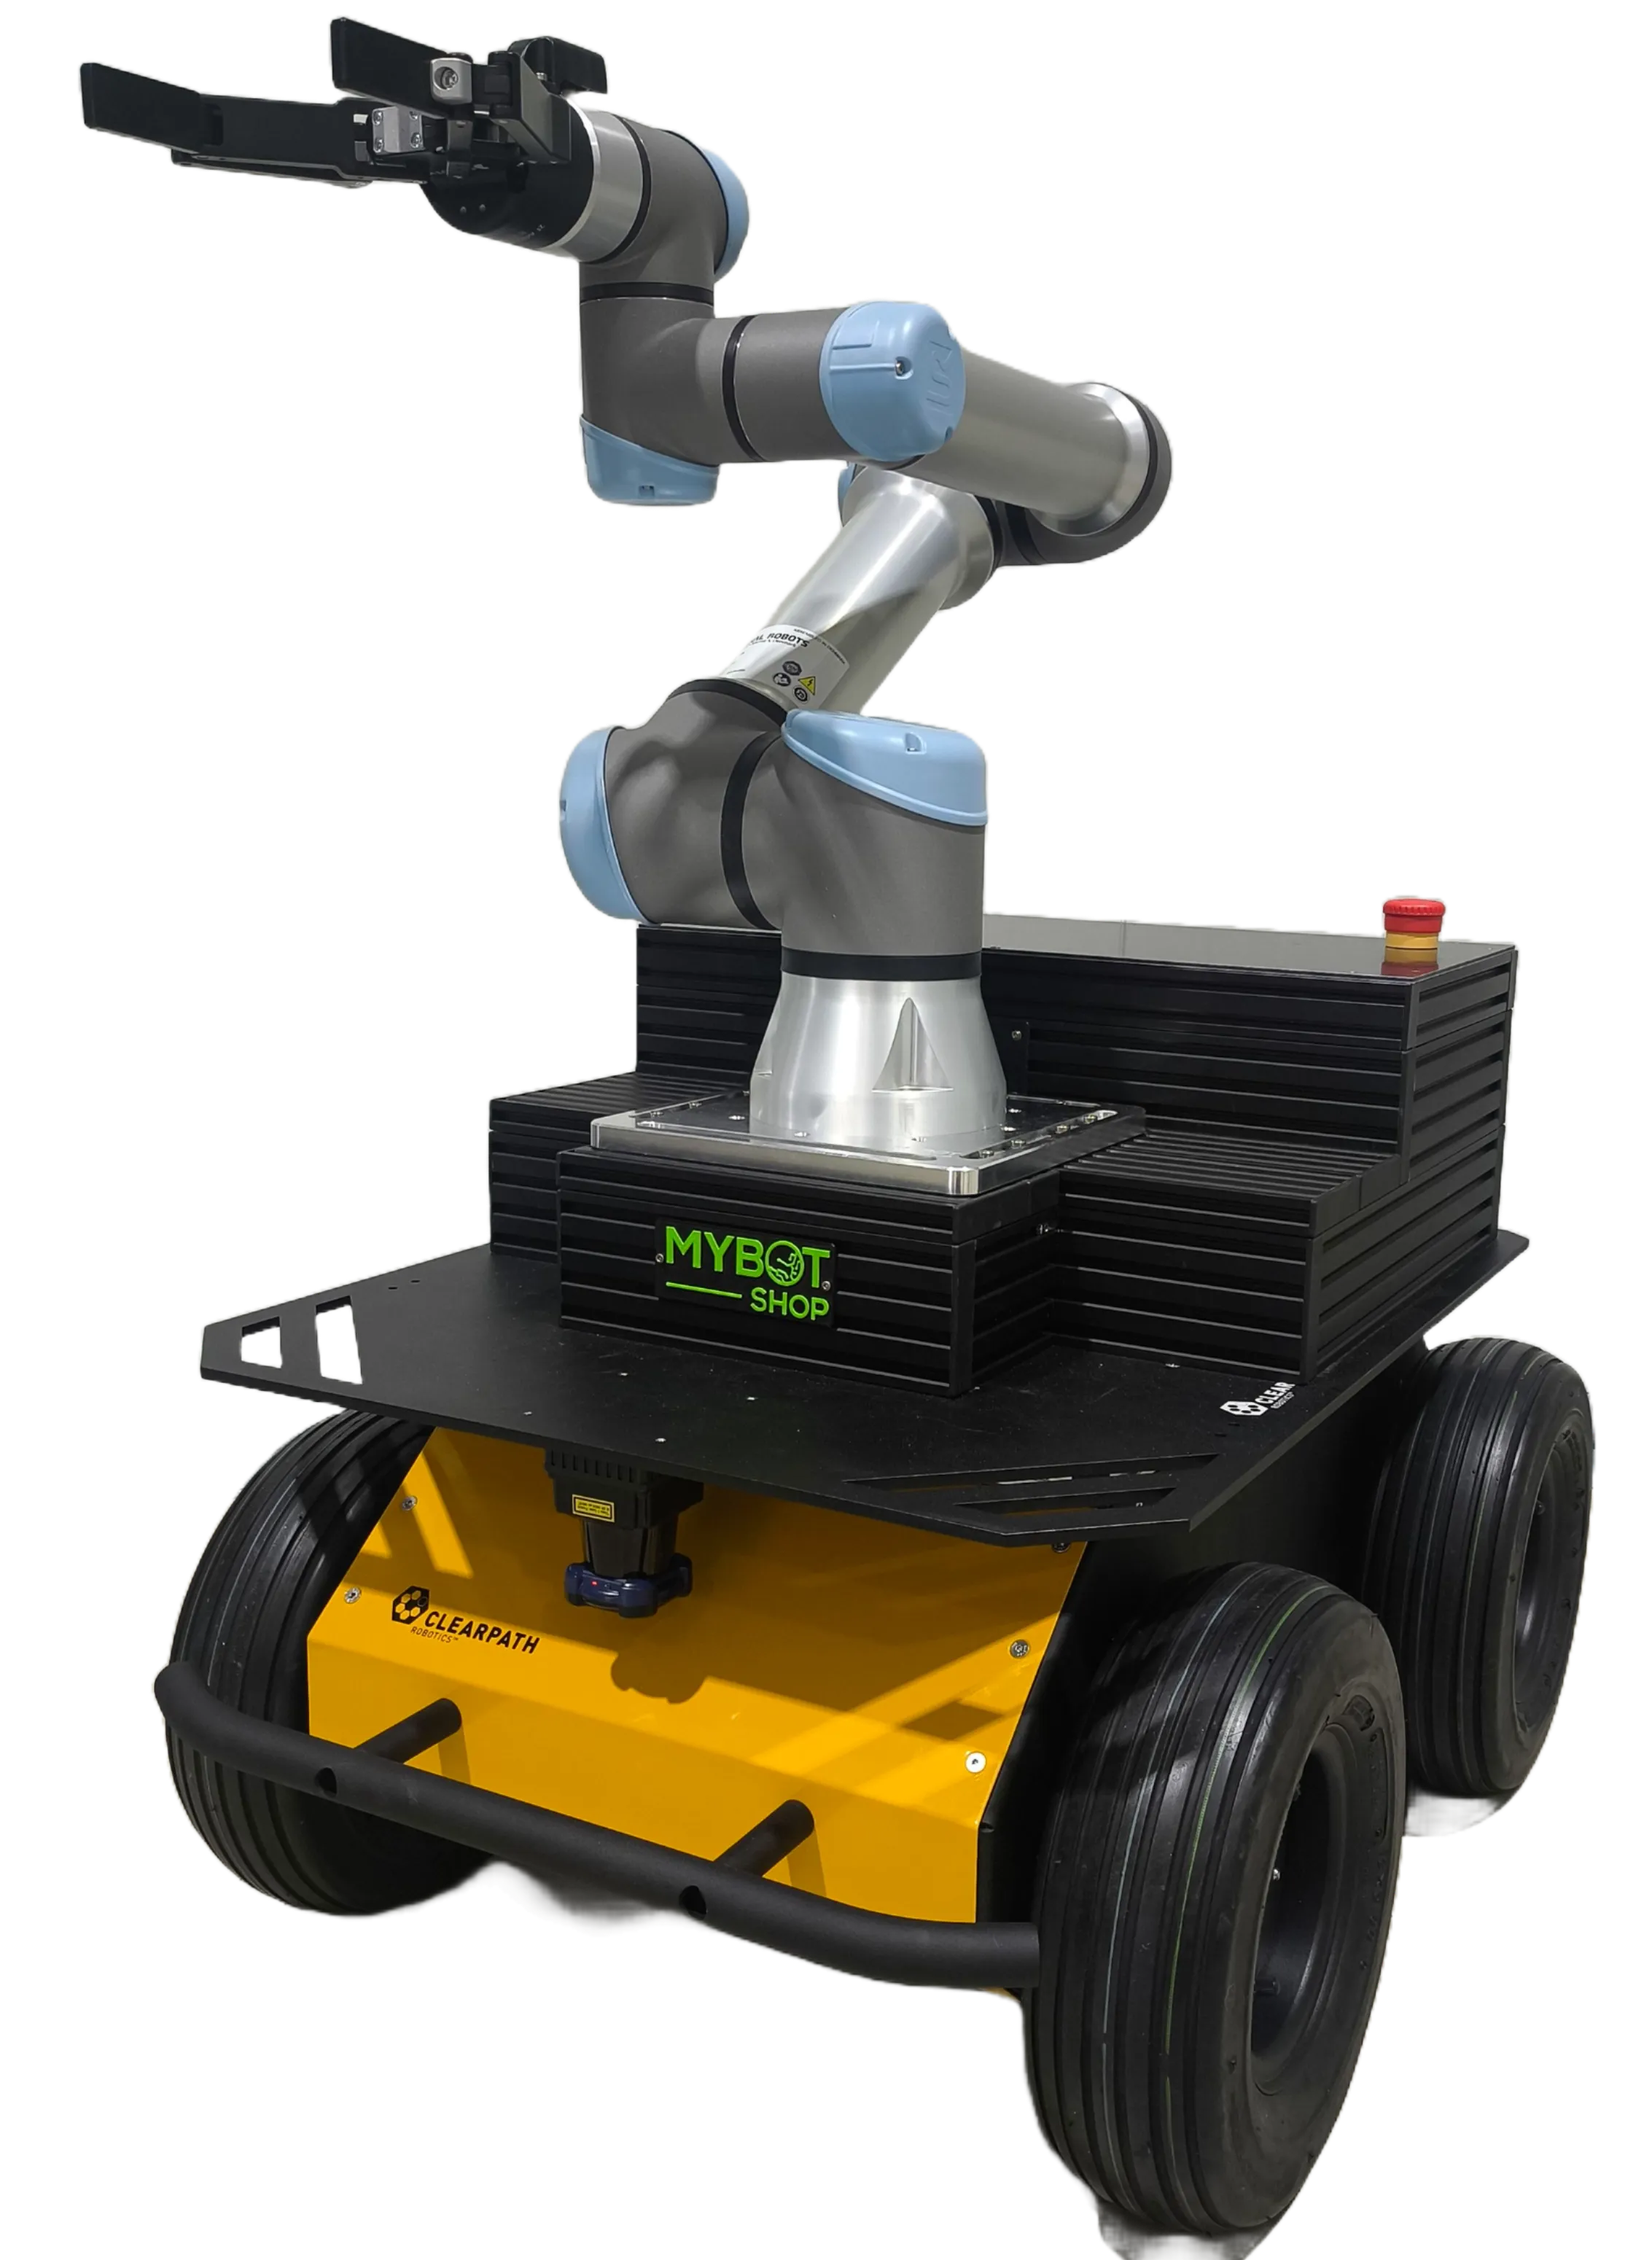
Table of Contents
Getting Started
To start-up the Husky, the instructional video playlist can be used which details the opening and use of the Husky.
Platform Overview
The Husky BE project is equipped with a powerful configuration tailored to meet its diverse operational requirements. It features the robust Husky A200 platform, boasting an Mitac MPi11 i7 processor paired with 16GB of RAM and a 480GB SSD for efficient data processing and storage capabilities. Its manipulator arm consists of a UR5e CB5 DC arm, offering precise control and versatility in handling various tasks. The inclusion of a Phidgets IMU enhances the robot’s spatial awareness and navigation capabilities. Furthermore, the ROBOITQ 2-Finger Gripper 140mm enables dexterous manipulation of objects with ease.
Sensory inputs are provided by the HOKUYO UTM30-LX-EW lidar for accurate environmental perception. The system is powered by the NVIDIA AGX ORIN 64GB board, ensuring robust computation for complex tasks. Additional sensors include an Arduino equipped with two 18B20 sensors housed within the Husky chassis. To facilitate wireless communication, a TP-Link WiFi Router is integrated into the setup, enabling seamless connectivity and control of the robot.
Data Sheets
Documentations
Robot Interface
Instructions for interfacing with the robot using Ubuntu 22.04 and ROS2 Humble.
Important
This procedure should be followed after reading the manuals for the Clearpath Husky as well as the Universal Robots UR5e. Furthermore, all of the Husky’s functionality can be verified via the tutorials by Clearpath. Instructions for set up can be found at Husky Docs .
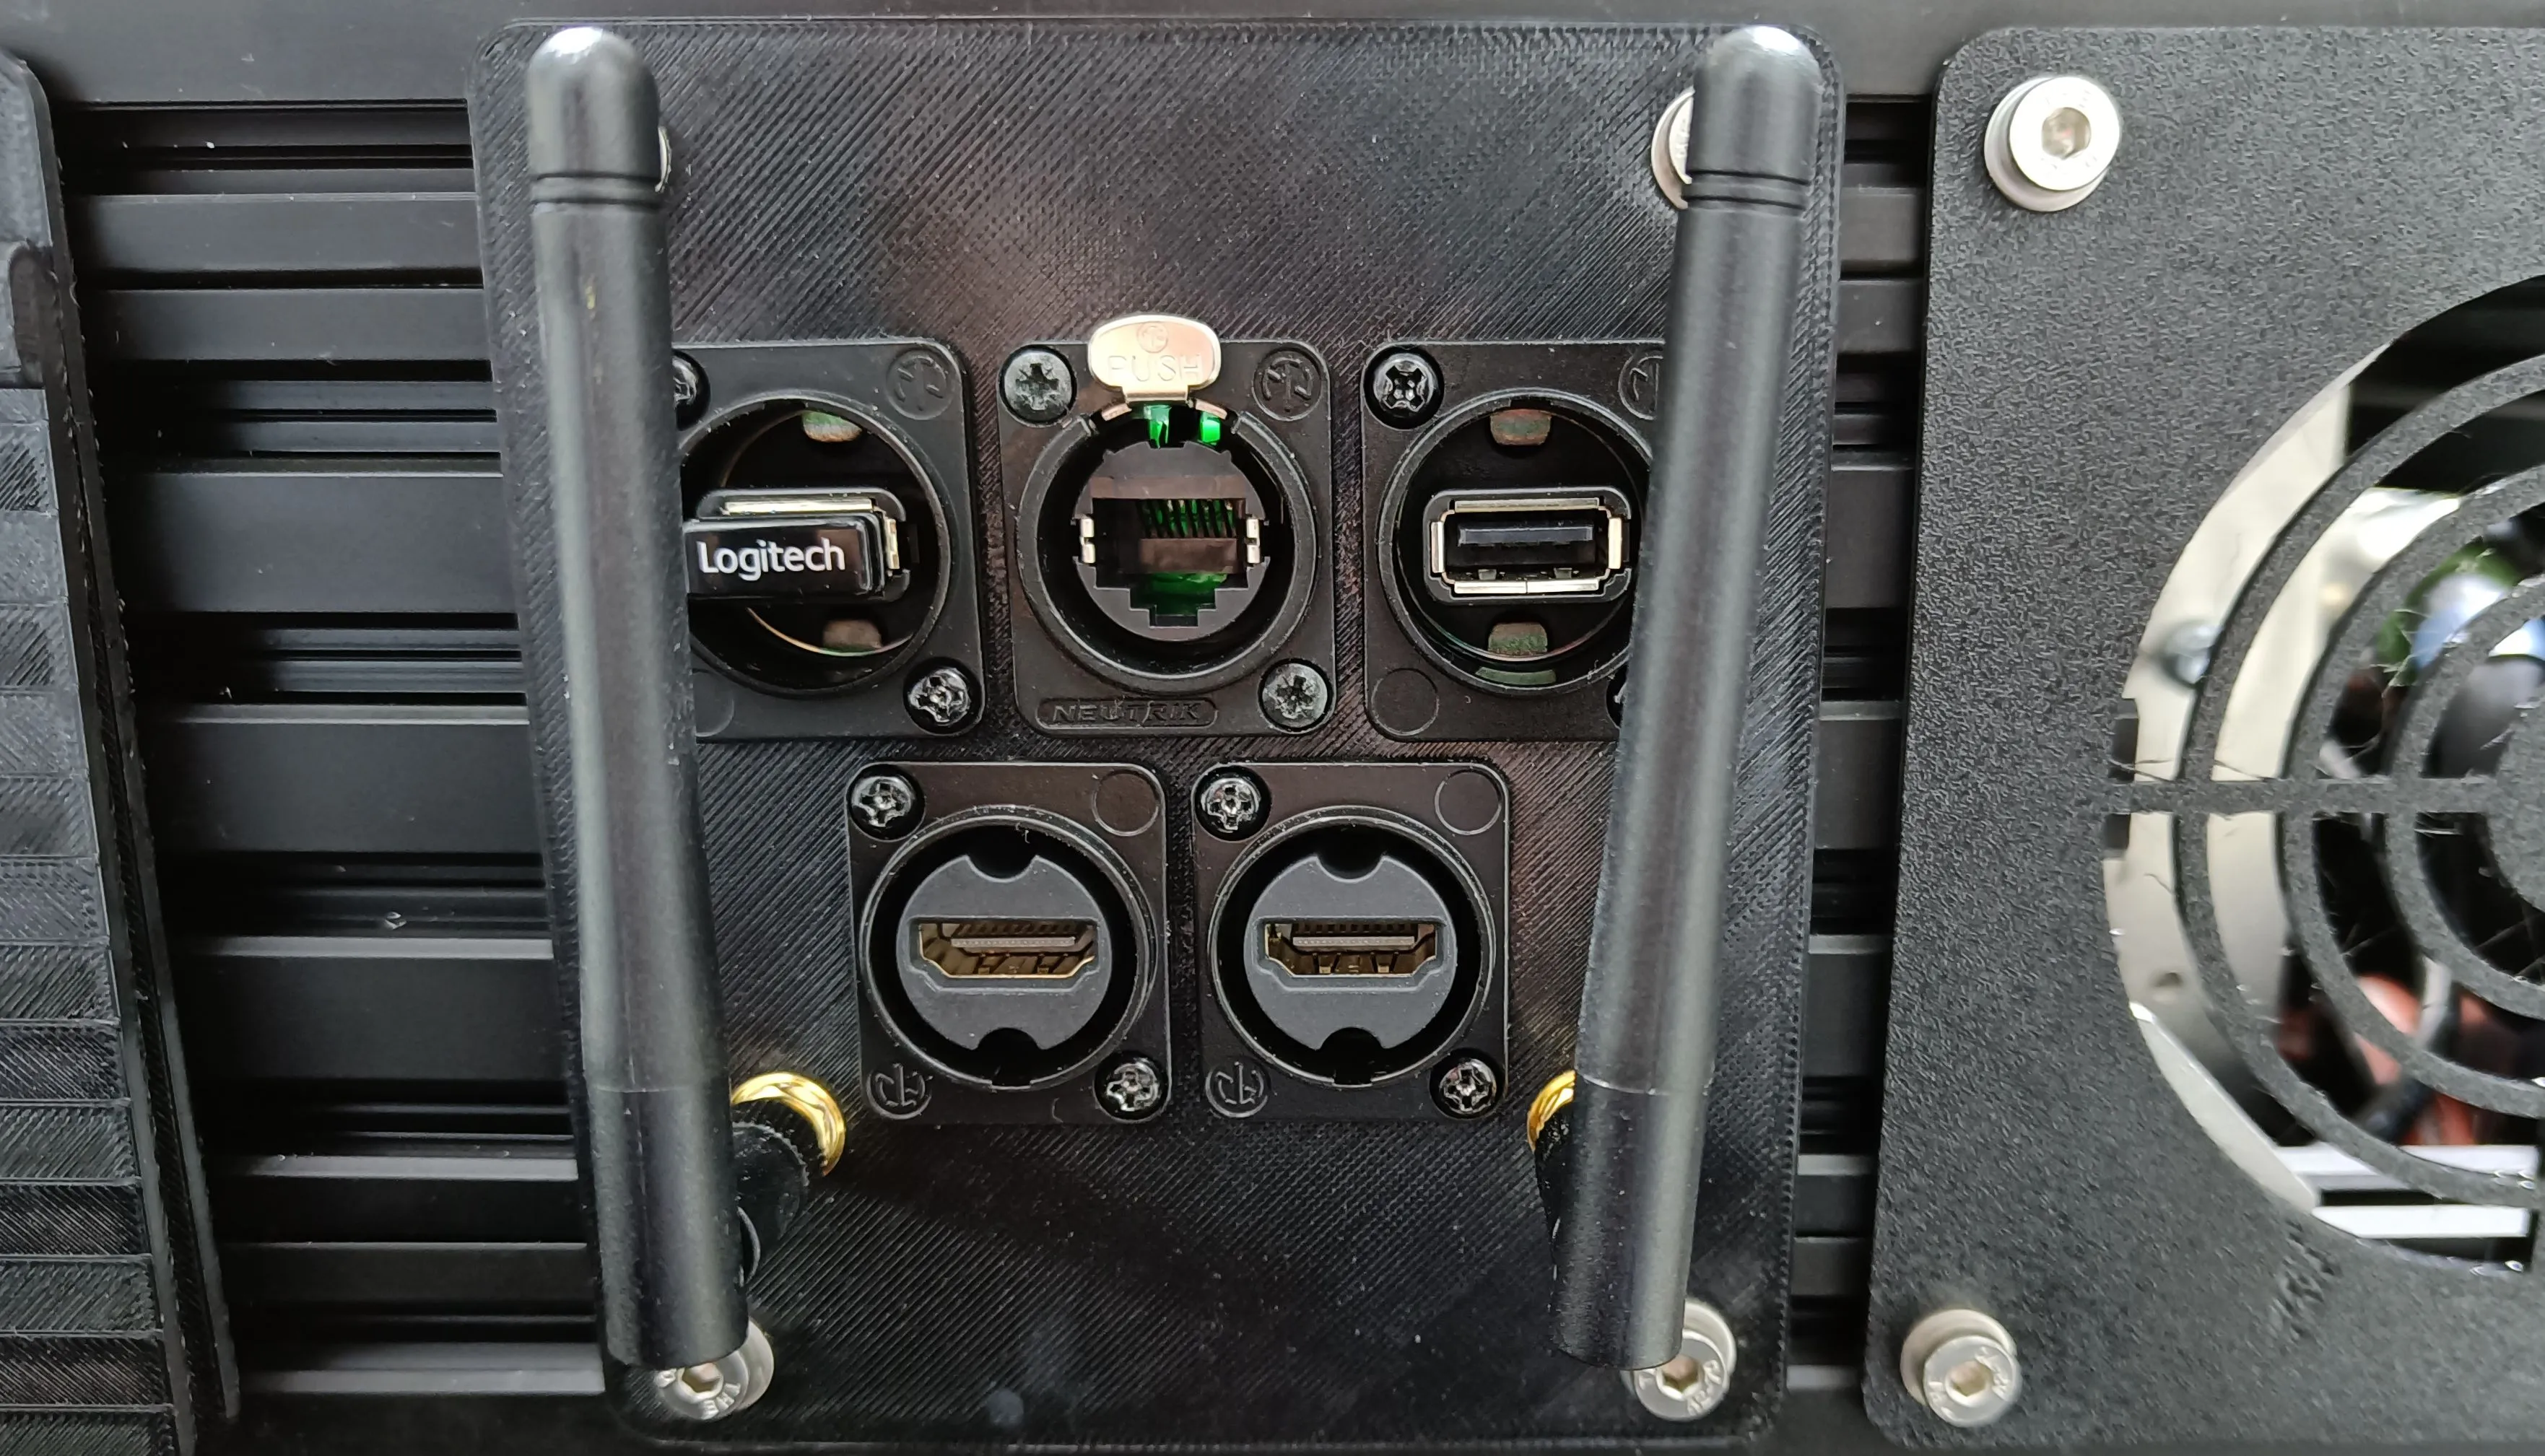
The Ethernet port at the back of the Husky can be utilized for setting up communication via LAN.
Static Network Connection
For the first time, one needs to connect through a LAN cable to configure the robot’s network. To create a static connection in your PC (not the robots), in Ubuntu go to Settings → Network then click on + and create a new connection.
Change the connection to Manual in the IPv4 settings.
Set the Address IP as 192.168.131.51 and the Netmask as 24.
Click save and restart your network.
After a successful connection, check the host’s local IP by typing in the Host PC’s terminal:
ifconfig
Now, ping the robot:
ping 192.168.131.1
Access the robot via SSH:
ssh -X administrator@192.168.131.1
The default password is:
mybotshop
Husky IP Addresses
Device |
IP Address |
Password |
|---|---|---|
Husky MCU |
192.168.131.1 |
mybotshop |
Husky Nvidia |
192.168.131.4 |
mybotshop |
Router |
192.168.131.100 |
mybotshop |
UR5e |
192.168.131.5 |
X |
Husky Hokuyo |
192.168.131.21 |
X |
Note
Sometimes other networks can cause disruptions when connecting to the Husky. It is best to have only your connection to the robot active and all others inactive.
Quick-Start
Powering on the Husky
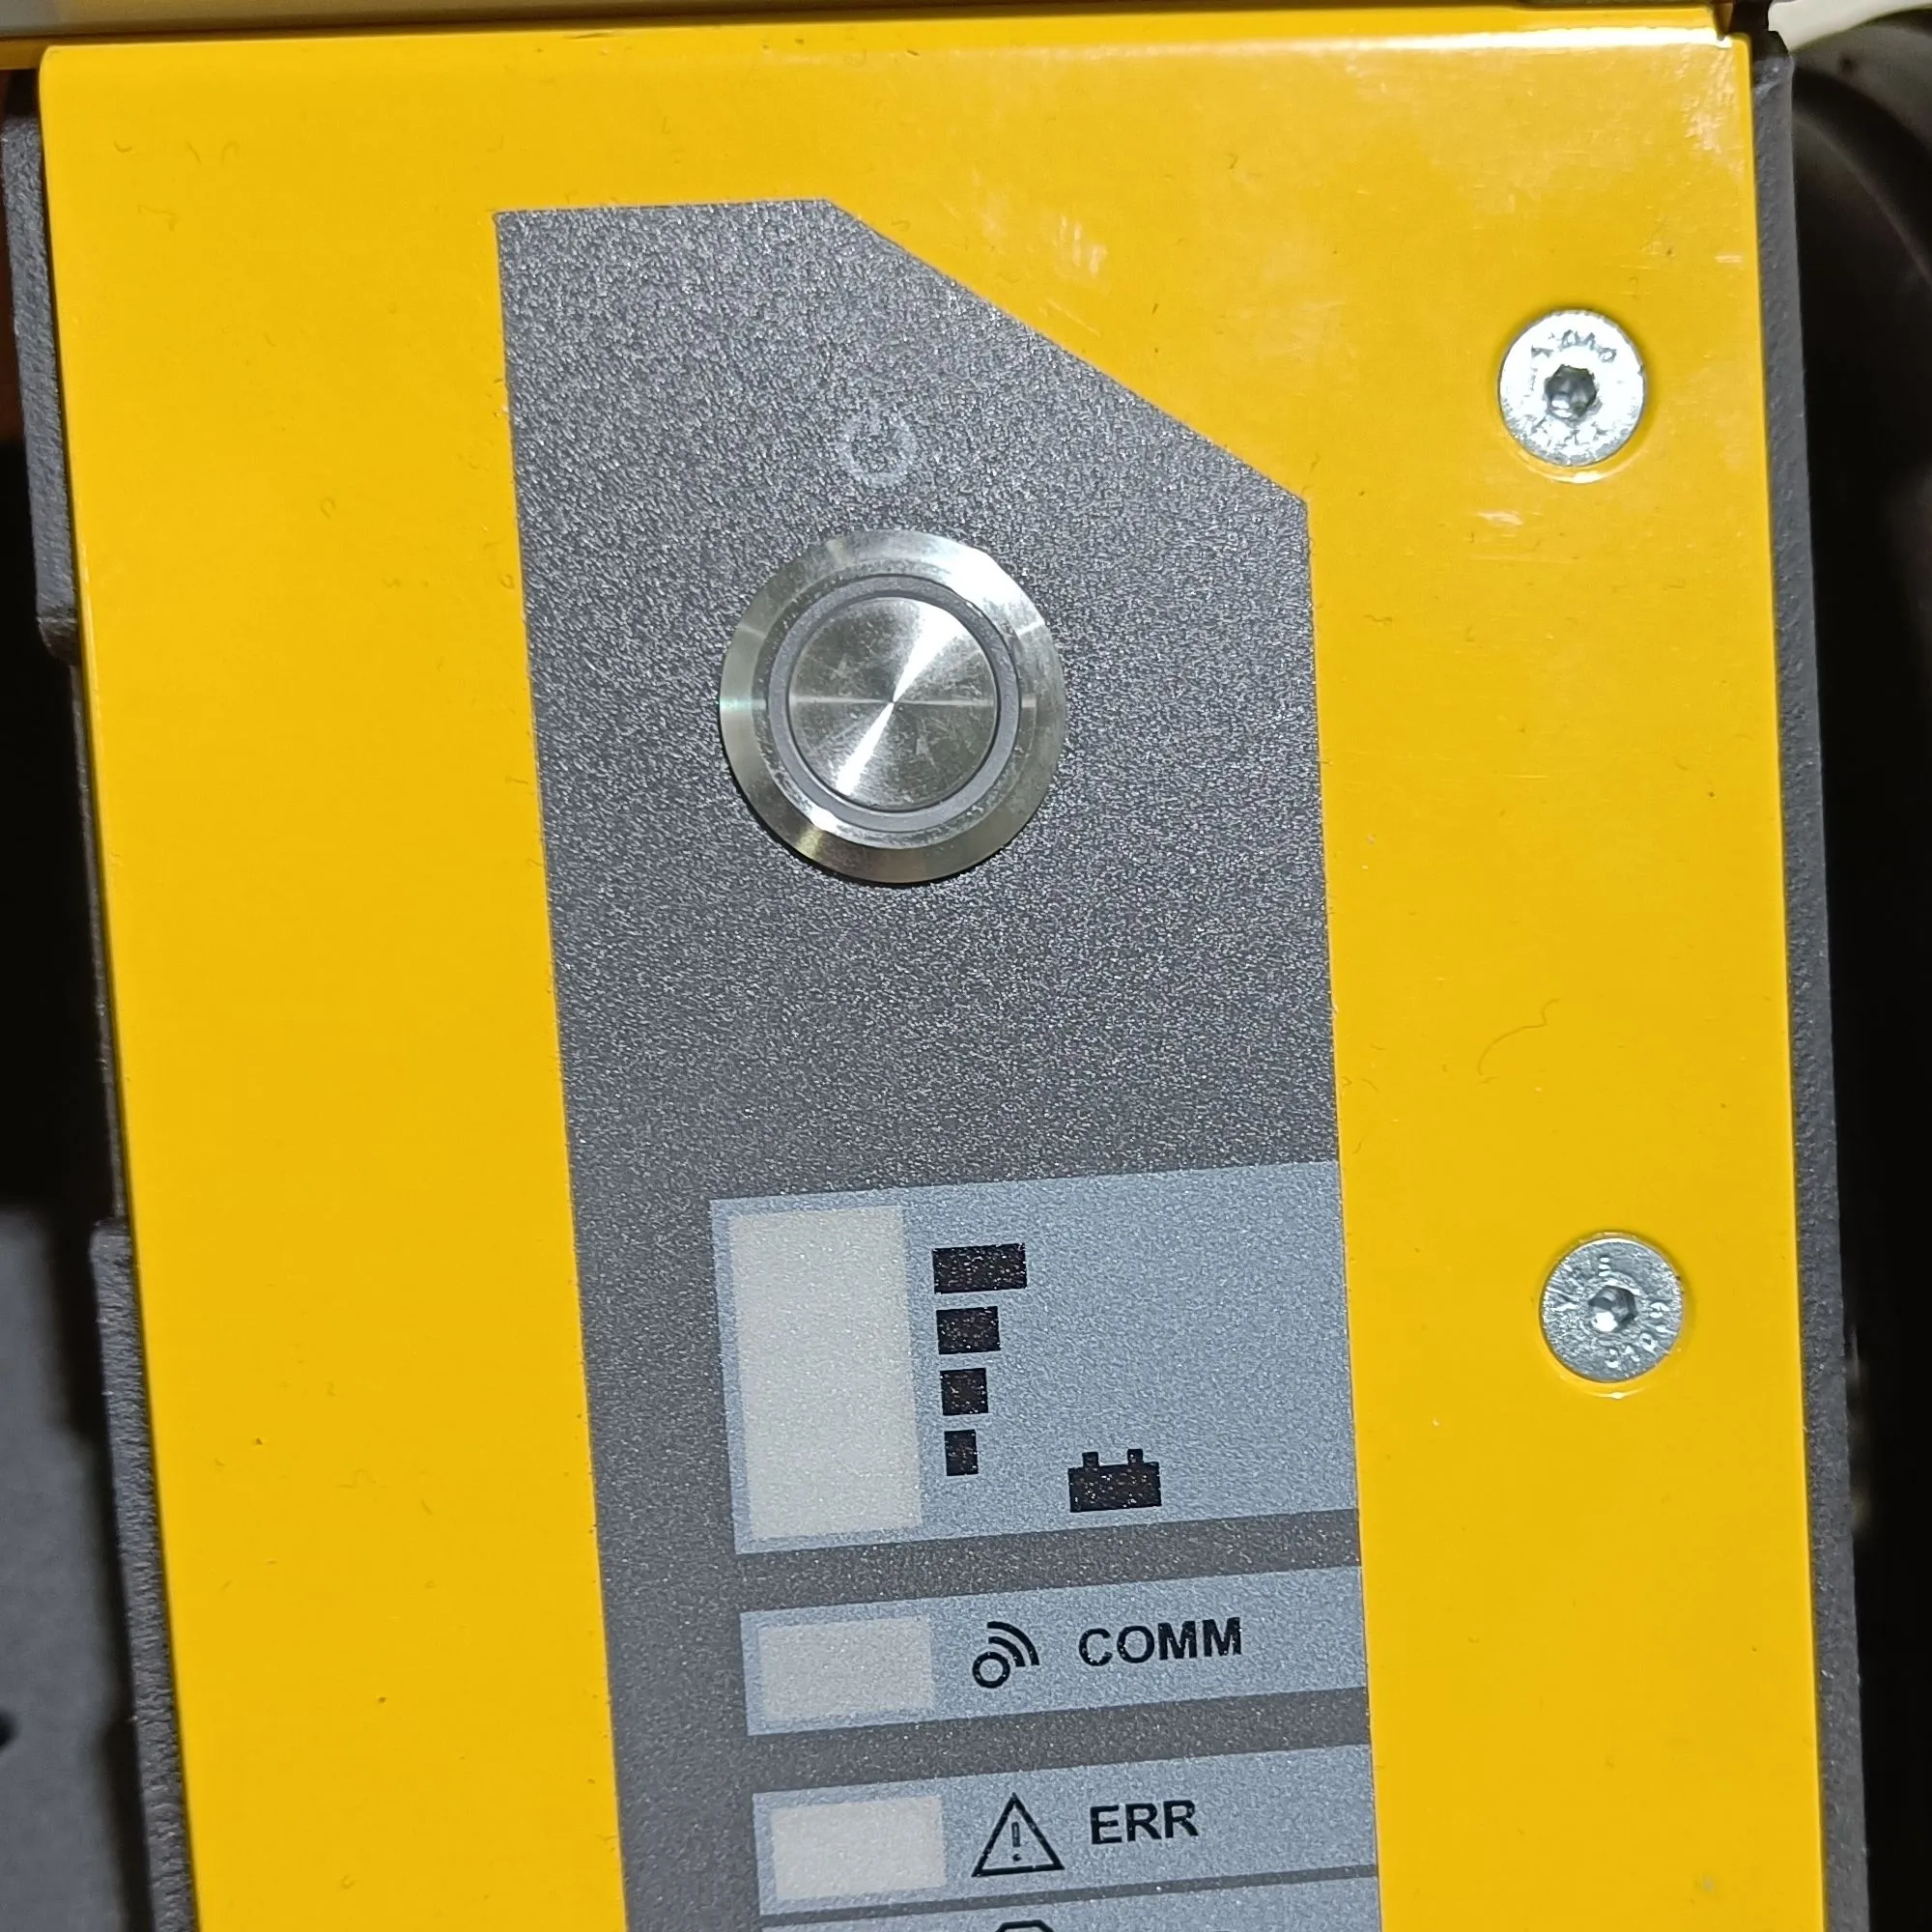
Power Button |
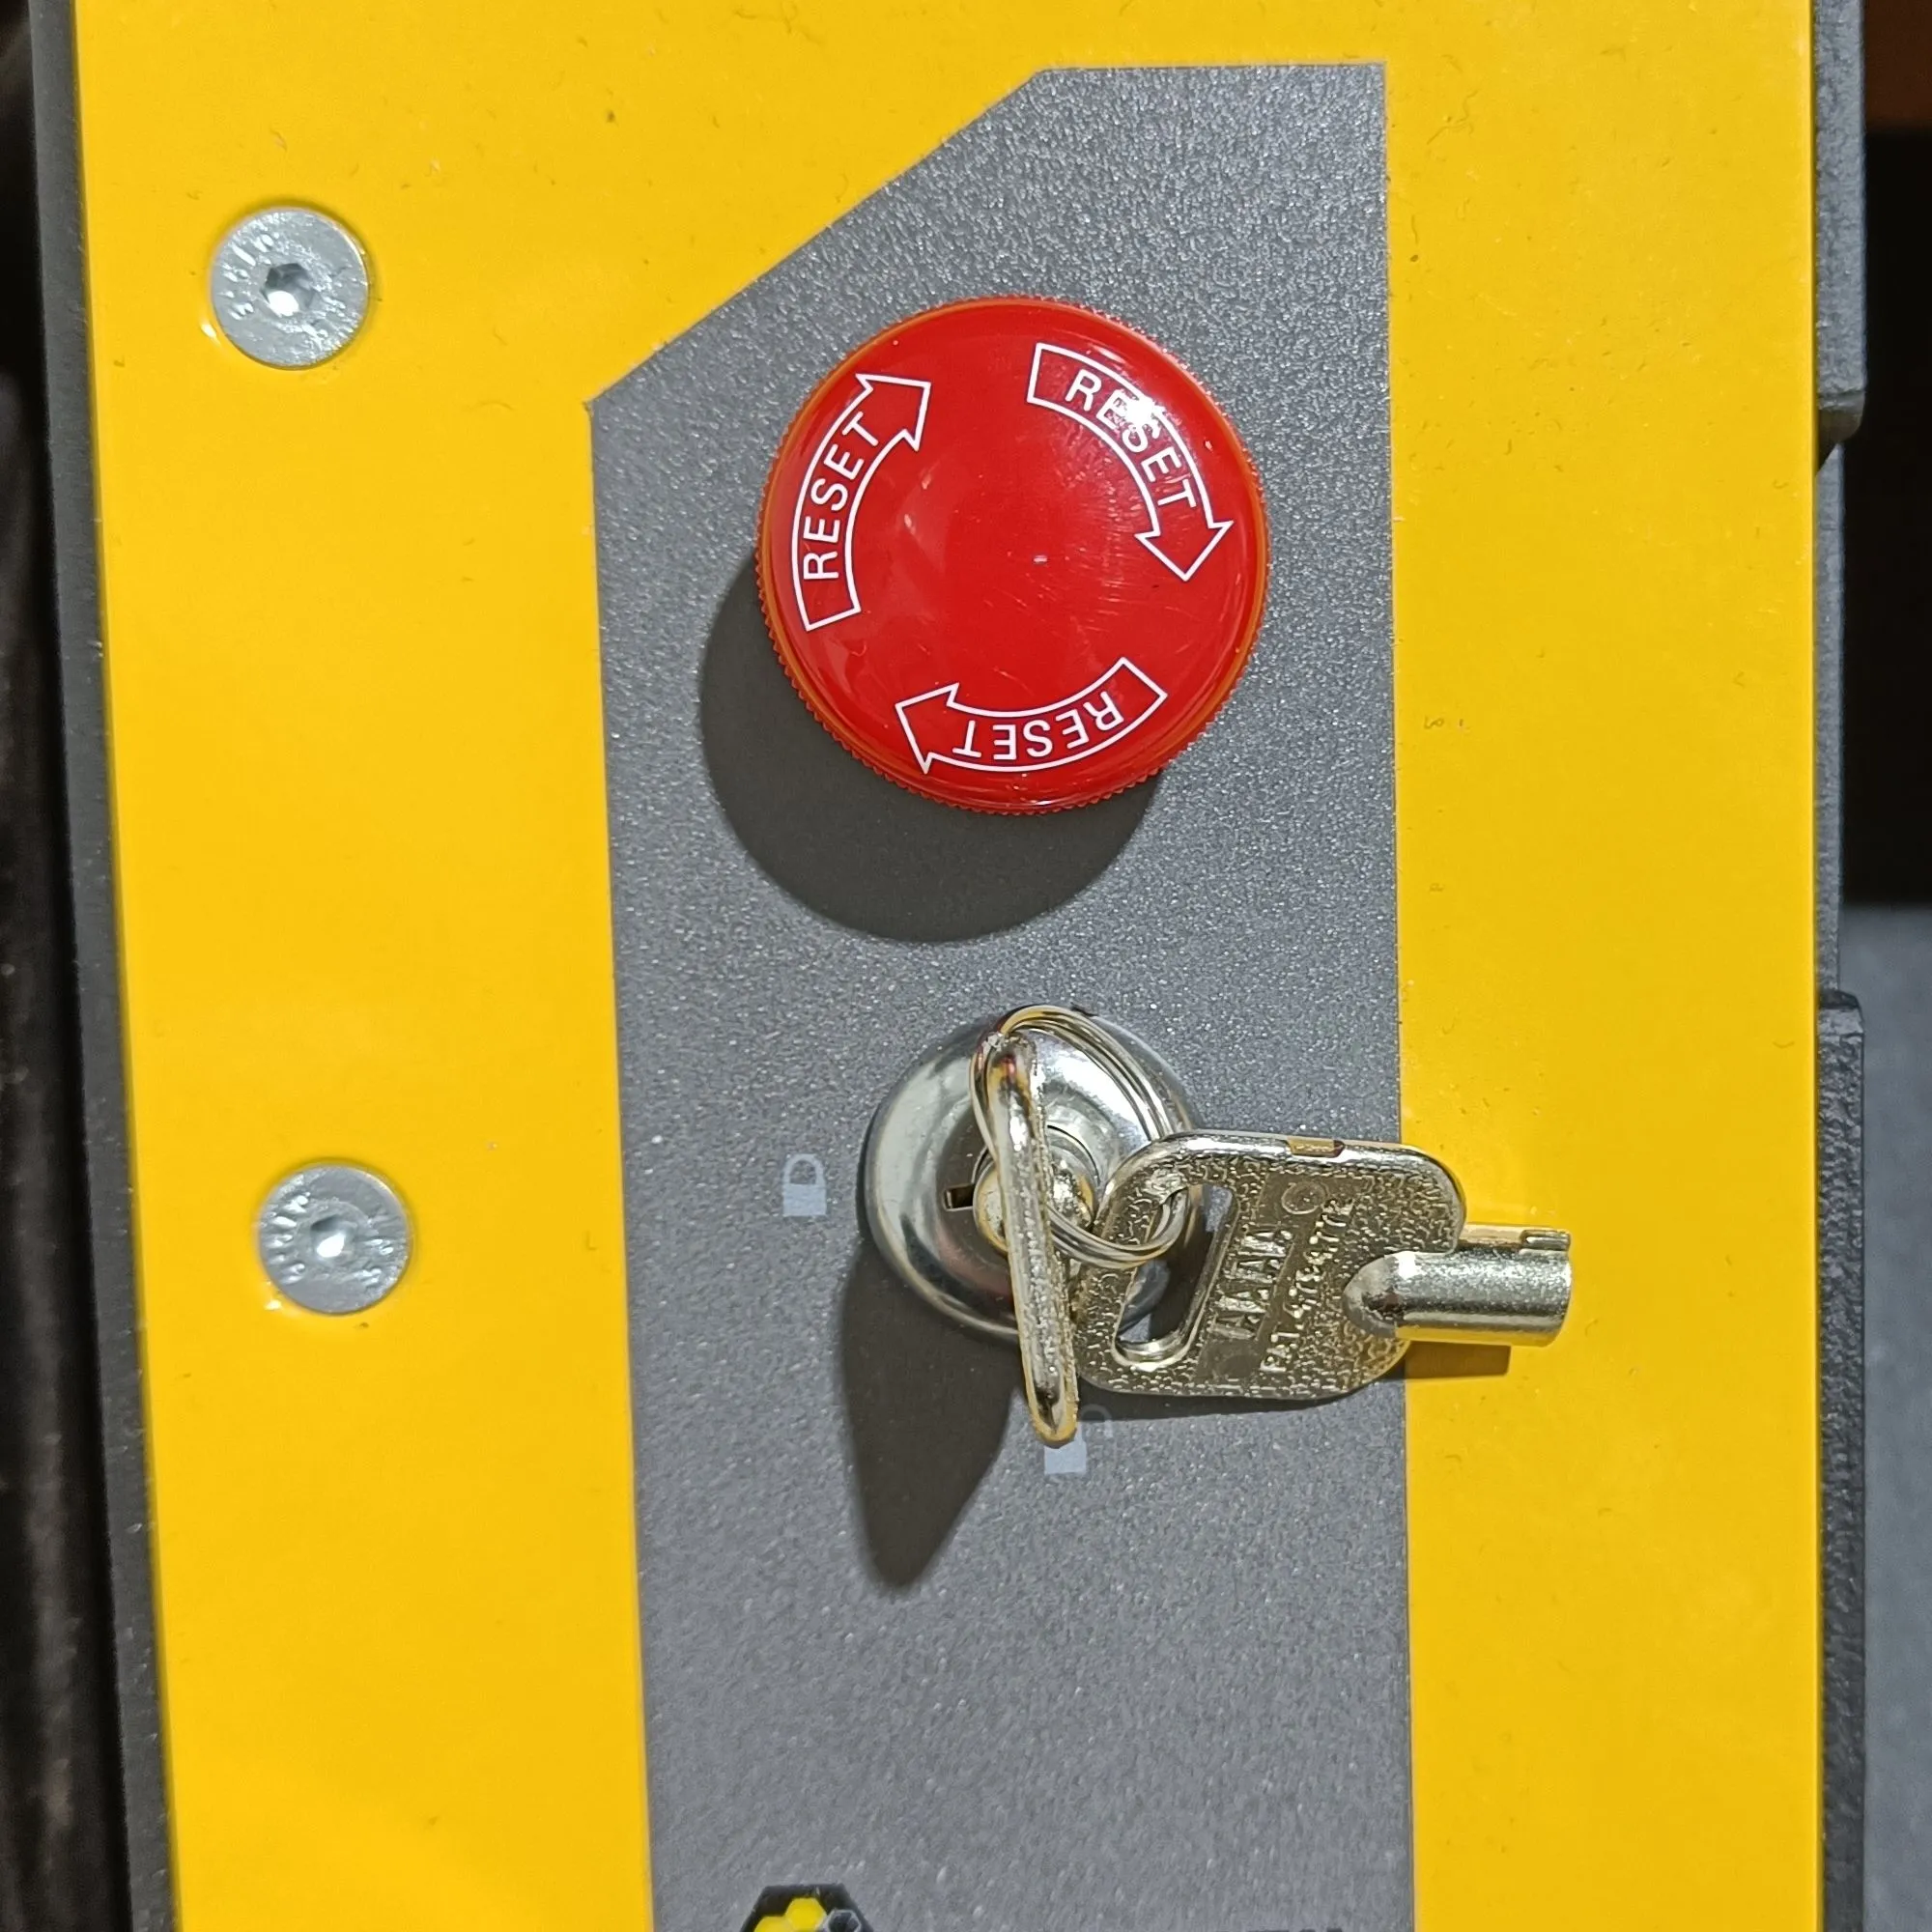
Emergency Switch Release |
Charging Port |
Ensure the emergency button is released as well as the key is turned to the unlock position.
◦ To check if the emergency switch is released, twist the switch in the indicated direction on it. If it pops up, then the switch has successfully been released.
◦ If the robot light is yellow, it means that either the emergency switch is not released or the key is not turned.
Press the power button on the front of the Husky. It has the power symbol as displayed.
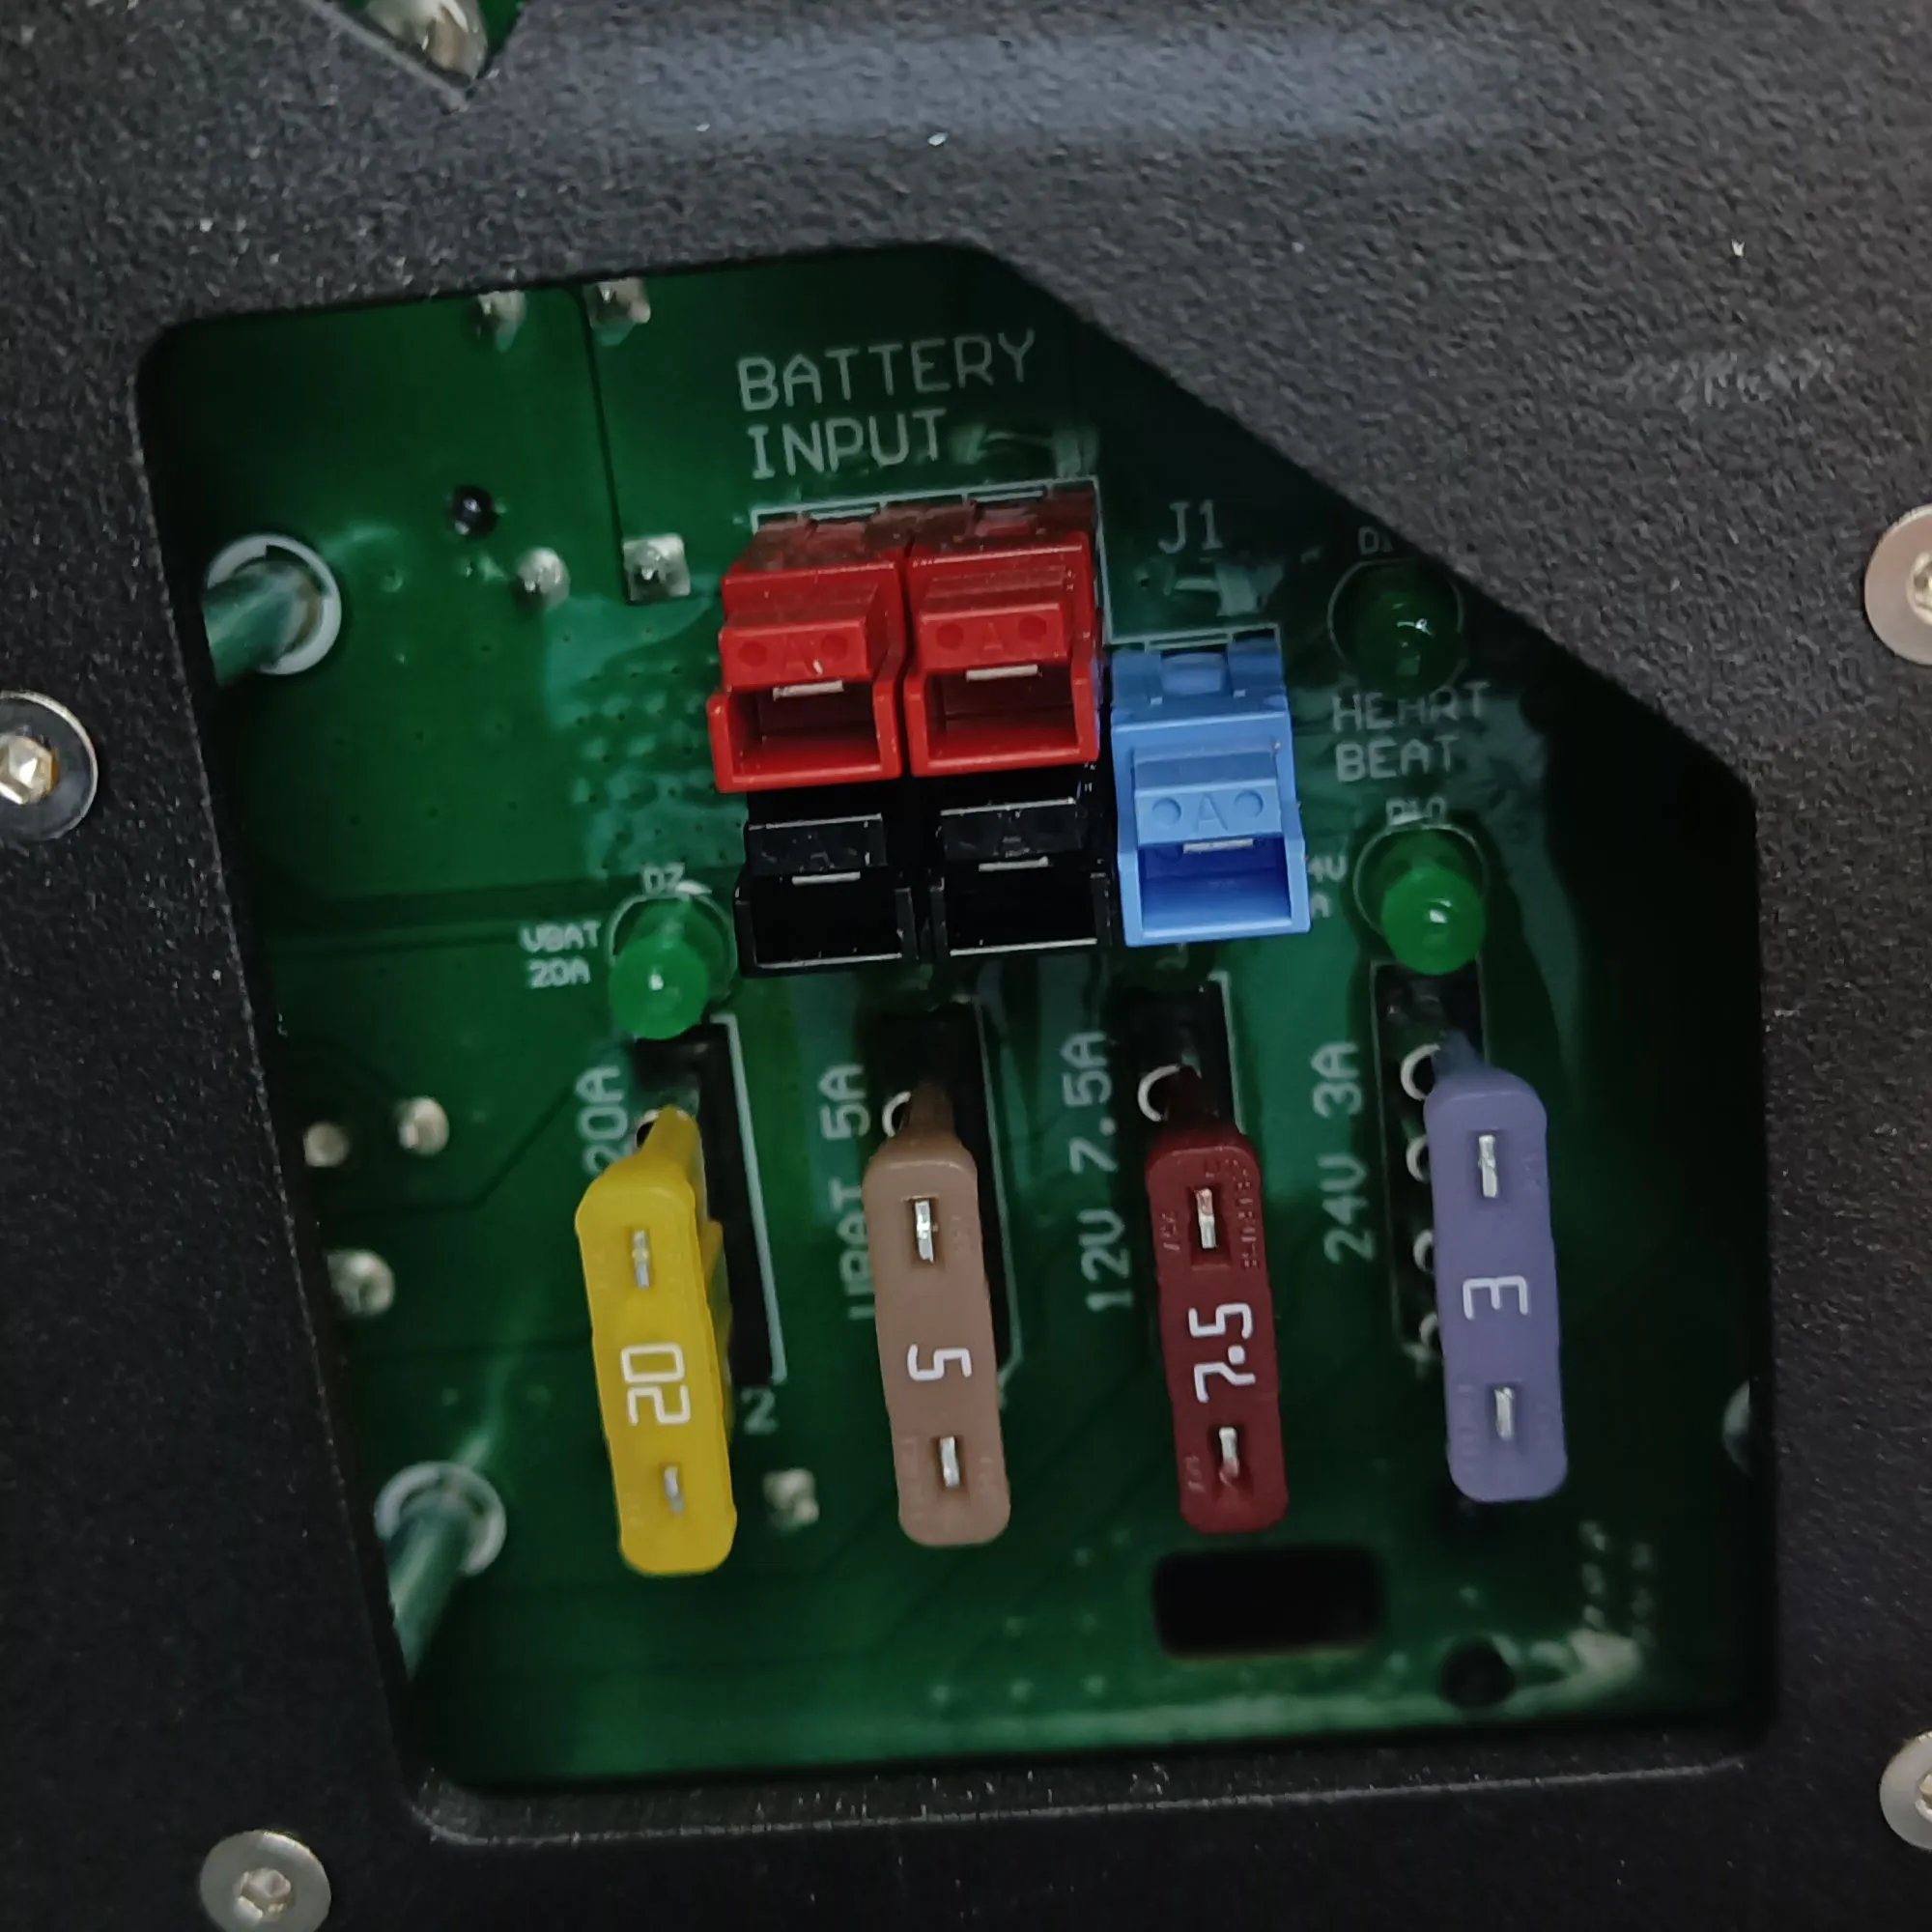
Charging the Husky

LED Voltage Indicators
The power port can be used to charge the Husky. The indicator shows the voltage levels of the Husky and does not necessarily indicate the remaining power available.
Manipulator Activation
To power-on the UR5e and Robotiq 2F-140:
ros2 service call /a200_1025/ur5e_activation/hsky_nano/srv/SerialBoolean "{data: true}"
Launch ROS2 driver for UR5e as well as Robotiq 2F-140:
ros2 launch hsky_manipulation ur5e_robotiq.launch.py
To test the UR5e and gripper you can use Moveit2:
ros2 launch hsky_ur_moveit ur_moveit.launch.py
To power-off the UR5e and Robotiq 2F-140 completely, run:
ros2 run hsky_manipulation remote_shutdown.py
Important
The hsky_manipulation driver should be running when executing the shutdown procedure.
Logitech Controller
Logitech button is to power on the controller.
L1 is the dead man’s switch for slow speed.
R1 is the dead man’s switch for high speed.
LJ is to move in x and y direction.
Steamdeck Controller

Steamdeck
Note
The Steamdeck usage is in experimental phase. Loss of connection or (laggy connection) may lead to the robot moving and/or not stopping immediately. Caution should be taken when using the Steamdeck for the operation of the robot!
Steamdeck - Basic Controls
Power button is on the top of the Steamdeck with the power symbol.
R2 for mouse left-click.
L2 for mouse right-click.
Left trackpad for mouse scrolling.
Right trackpad for mouse movement.
L2+R2 for middle mouse button click.
Hold the three dashes (located on the top right of the Steamdeck next to the Y button) for 3 seconds to enter gamepadmode and hold for 3 seconds again to return to desktop mode.
Steamdeck - Initialization with Robot
Before usage:
Ensure the Steamdeck is connected to the robot’s WiFi access point.
Ensure the robot is powered on and operational.
Double tap the Joystick Launcher on the screen to activate the controller for the robot. (Do not open multiple instances of the joystick launchers, as this can cause zombie nodes.)
Double tap the Rviz2 Launcher on the screen to visualize the robot.
Steamdeck - Robot Controls
L1 is the dead man’s switch for slow speed.
R1 is the dead man’s switch for high speed.
LJ is to move in x and y direction.
R5 powers ON the UR5e.
L5 powers OFF the UR5e only if the UR5e driver is running.
Steamdeck - Rviz2 Controls
L2+R2 should be held when wanting to move the orbit in the xy plane.
R2 should be held to orbit around the orbit’s origin.
Left trackpad can be moved up and down to zoom in and zoom out.
Digital Twin (RVIZ2)
To visualize the Husky, you can run:
ros2 launch hsky_viz view_robot.launch

ROS2 Drivers — MBS
The ROS2 drivers mentioned below are all automatically started when launching the system launch file. These drivers further expand on the functionality for interfacing as well as for independent component checking.
ROS2 Driver — UR5e + Robotiq 2F-140
To power-on the UR5e and Robotiq 2F-140 completely, run:
ros2 service call /a200_1025/ur5e/activation/hsky_nano/srv/SerialBoolean "{data: true}"
Launch ROS2 driver for UR5e as well as Robotiq 2F-140:
ros2 launch hsky_manipulation ur5e_robotiq.launch.py
To test the UR5e and gripper you can use Moveit2:
ros2 launch hsky_ur_moveit ur_moveit.launch.py
To power-off the UR5e and Robotiq 2F-140 completely, run:
ros2 run hsky_manipulation remote_shutdown.py
Important
The hsky_manipulation driver should be running when executing the shutdown procedure.
ROS2 Driver — Hokuyo
The Hokuyo is on by default from the startup job. To launch the Hokuyo only:
ros2 launch hsky_lidars system.launch.py
Hokuyo
Warning
Do not run this command, as this is running in the background on startup via the hsky startup job.
ROS2 Navigation
Navi2 — Odom Navigation
Navigate in the global frame of map
ros2 launch hsky_nav2 odom_navi.launch.py
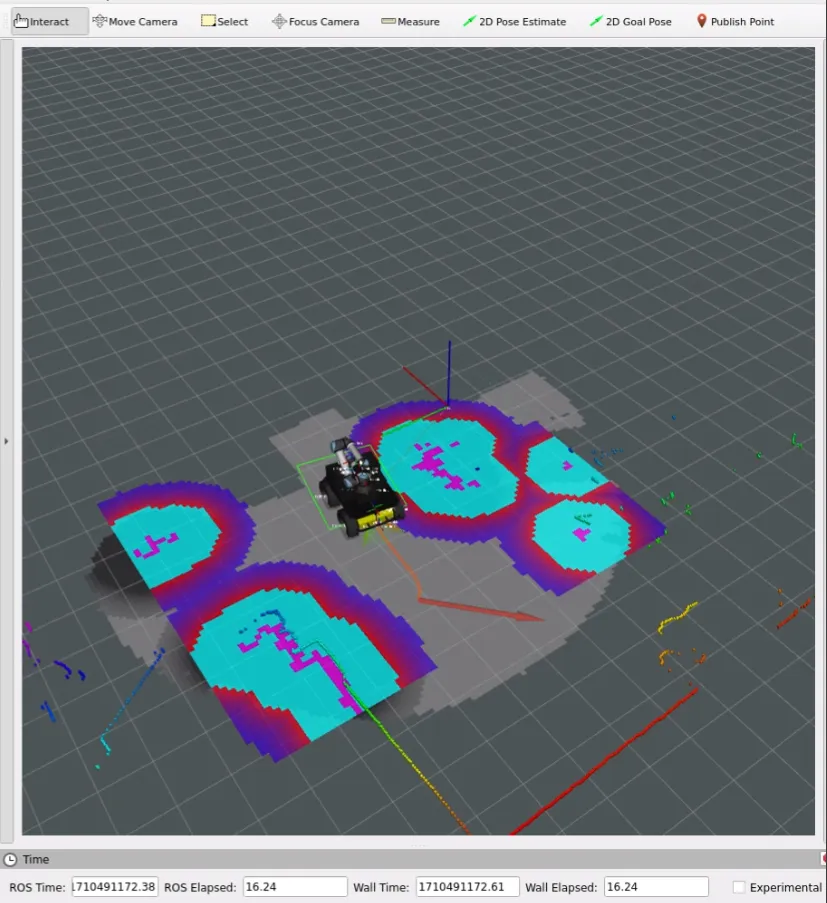
Odom Based Navigation: After launching the drivers and commands, providing a 2D navigation goal in RViz initiates the navigation process. The brown arrow indicates the 2D navigation goal, while the small orange line represents the global planner and the green arrows depict the local planner. The green box surrounding the robot signifies the bounding box. In the map, blue areas represent the local cost map, and the grey area corresponds to the global cost map
Navi2 — Mapping
Mapping
Mapping can begin using the joystick controller:
ros2 launch hsky_nav2 slam.launch.py
Once you are satisfied with your map you can export it by running the following command in one of the Huskys terminals:
ros2 run nav2_map_server map_saver_cli -f /home/administrator/ros2_ws/src/mybotshop/hsky_nav2/maps/custom_map
Rebuild the husky nav2 so that the maps can be installed in the install folder:
colcon build --symlink-install --cmake-args -DCMAKE_BUILD_TYPE=Release
Note
The rebuilding step is not required if the filename is not changed.
Navi2 — Map Navigation
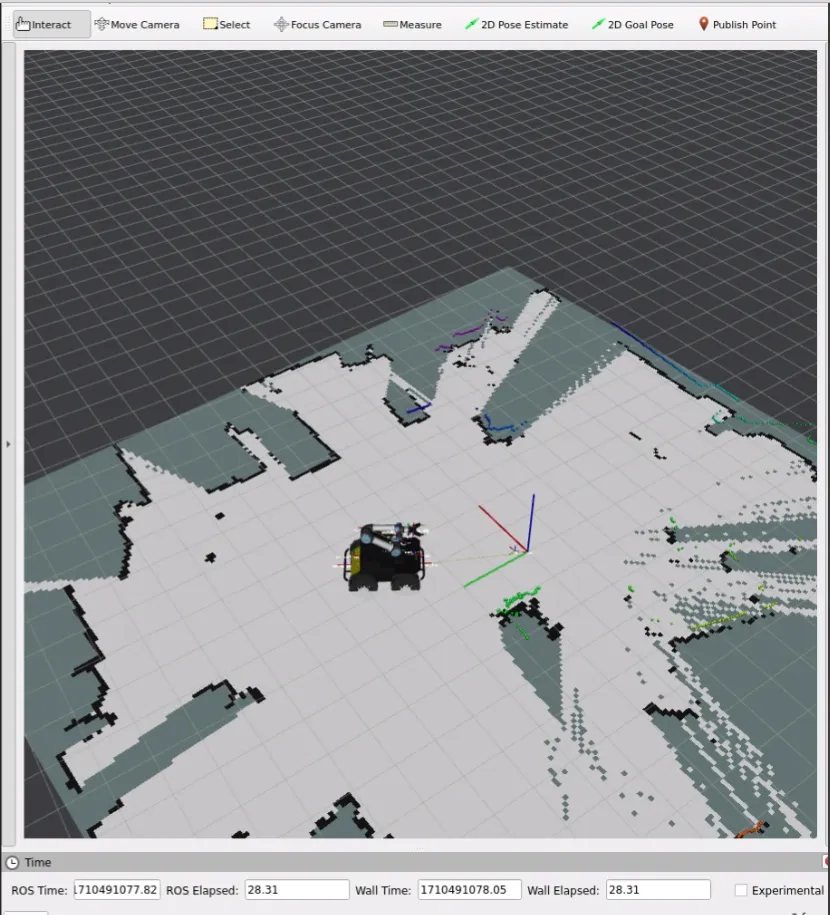
ros2 launch hsky_nav2 map_navi.launch.py

Map Based Navigation: After launching the drivers and commands, providing a 2D pose estimate in RViz in the Map frame initiates map navigation
ROS2 Information
ROS DOMAIN ID: 0
RMW Middleware: rmw fastrtps cpp
Caution
Please read the instruction manuals pertaining to Clearpath Husky and Universal Robots UR5e before operating the robot.
Always be vigilant and remain close to the emergency stop buttons when the robot is in operation.
Known Issues
Husky moving forward on startup
This may occur due to time synchronization of the internet causing the robot’s joint states to reverse. This is dependent on how the network is synchronized between the Husky’s computer and the internet.
By default we have disabled synchronization of time from the internet to prevent this issue, until Clearpath updates its drivers.
Frequently Asked Questions
Logitech controller not working
Ensure that it is powered on.
Ensure that the input mode is X, which is set on the backside of the controller.
Husky in standby mode (yellow color)
Ensure that the emergency switch is twisted and released.
Ensure that the key is in the unlock position.
UR5e does not move with Moveit2.
The solution to this to simply restart the driver.
UR5e driver not starting.
This may happen if the emergency stop button is not connected to the UR5e control box. This causes the SD card in the control box to eject.
The solution is to plug in back the emergency switch back and insert the SD card back into the UR5e.
At times the ROS2 driver may not immediately detect the UR5e, hence, restarting the UR5e driver commonly resolves the issue.
UR5e driver not powering off. • Restart the UR5e driver.
Unable to see some of the ros2 topic lists in remote PC.
Ensure you are in the same network.
Ensure that your ROS DOMAIN ID is 0.
Ensure that your ROS LOCAL HOST is set to 0.
Ensure that your network system (+router) allows for ROS2 communication and/or is configured.
Restart the robot services:
◦ sudo service clearpath-robot restart
◦ sudo service hsky restart
Steamdeck right trackpad not moving the mouse.
Click the 3 dots below the right trackpad.
If 3 dots does not work, then hold the 3 bars for 3 seconds next to the Y button. Do this twice.
Robotic Manipulator Safety Guidelines
When deploying robotic manipulators, it is imperative to prioritize safety procedures to mitigate risks and ensure secure operations. The following guidelines delineate key safety measures when working with robotic manipulators:
Work Area Safety
Maintain a clean and well-organized work area. Cluttered or inadequately lit spaces can impede the proper functioning of sensors and hinder precise manipulation.
Avoid operating robotic manipulators in hazardous environments, such as those containing corrosive substances, extreme temperatures, or sharp objects that may damage the manipulator.
Ensure that only authorized personnel are present in the vicinity during manipulator operation to prevent interference and ensure a safe working environment.
Electrical Safety
Ensure the manipulator’s power system adheres to electrical safety standards. Regularly inspect and maintain power components to prevent malfunctions.
Implement safeguards to protect the manipulator from adverse environmental conditions, such as exposure to moisture or extreme temperatures.
Regularly inspect power cables and connections, promptly replacing damaged components to minimize the risk of electrical issues.
Manipulation Safety
Implement collision detection systems to prevent unintended contact with objects, humans, or other equipment during manipulation tasks.
Define and enforce safety zones around the manipulator’s workspace to minimize the risk of unintended interactions with personnel or other objects.
Regularly calibrate and test the manipulator’s sensors and systems to ensure precise and reliable performance during manipulation tasks.
Emergency Response
Install an emergency stop mechanism to swiftly halt manipulator operation in unforeseen circumstances or emergencies.
Clearly mark and communicate emergency stop locations within the manipulator’s operational area.
Conduct regular emergency response drills to ensure personnel are familiar with procedures for handling unexpected situations during manipulator operation.
Data Security and Privacy
Implement robust cybersecurity measures to safeguard the manipulator’s control systems and data from unauthorized access or manipulation.
Ensure compliance with privacy regulations when collecting, storing, or transmitting data captured by the manipulator’s sensors.
Human Interaction Safety
Integrate sensors and communication systems to detect and respond to the presence of humans in the manipulator’s vicinity.
Clearly communicate the manipulator’s operational status and intentions using visual and audible signals to alert nearby individuals.
Establish protocols for safe human-robot collaboration, particularly in shared workspaces where manipulators are in operation.
Residual Risks
Despite the implementation of safety measures, certain residual risks may persist. These include:
Impairment of sensor functionality.
Risk of collisions during complex manipulation tasks.
Cybersecurity vulnerabilities.
Unintended human interactions due to unforeseen circumstances.
Robotic manipulators are sophisticated technologies that demand correct usage to avoid accidents and ensure a secure environment. Please adhere to proper procedures diligently, prioritizing both precision and safety.
Autonomous Mobile Robot Safety Guidelines
When deploying autonomous mobile robots, prioritizing safety procedures is essential to prevent accidents and ensure secure operations. The following guidelines outline key safety measures when working with an autonomous mobile robot:
Work Area Safety
Maintain a clean and well-lit work area. Cluttered or poorly illuminated spaces can impede the proper functioning of sensors and navigation systems.
Avoid operating autonomous mobile robots in explosive atmospheres, such as areas with flammable liquids, gases, or dust. The robot’s components may pose a risk in such environments.
Keep bystanders and unauthorized personnel at a safe distance during robot operation to prevent interference with autonomous navigation.
Electrical Safety
Ensure the robot’s power system adheres to electrical safety standards. Regularly inspect and maintain power components to prevent malfunctions.
Implement mechanisms to protect the robot from adverse weather conditions, such as rain or wet environments.
Regularly inspect power cables and connections and replace damaged components promptly to minimize the risk of electrical issues.
Emergency Response
Install an emergency stop mechanism to quickly halt the robot’s operation in case of unforeseen circumstances or emergencies.
Clearly mark and communicate emergency stop locations throughout the robot’s operational area.
Conduct regular emergency response drills to ensure personnel are familiar with procedures for handling unexpected situations.
Data Security and Privacy
Implement robust cybersecurity measures to protect the robot’s control systems and data from unauthorized access or manipulation.
Ensure compliance with privacy regulations when collecting, storing, or transmitting data captured by the robot’s sensors.
Human Interaction Safety
Integrate sensors and communication systems to detect and respond to the presence of humans in the robot’s vicinity.
Clearly communicate the robot’s operational status and intentions using visual and audible signals to alert nearby individuals.
Establish protocols for safe human-robot collaboration, especially in shared workspaces.
Residual Risks
Despite the implementation of safety measures, certain residual risks may persist. These include:
Impairment of sensor functionality.
Risk of collisions in crowded or dynamic environments.
Cybersecurity vulnerabilities.
Unintended human interactions due to unforeseen circumstances.
Autonomous Mobile Robots (AMR) are advanced technologies that require correct usage to avoid accidents and ensure a secure environment. Learn and follow the proper procedures diligently; prioritize both quality and safety.