MMP DRE
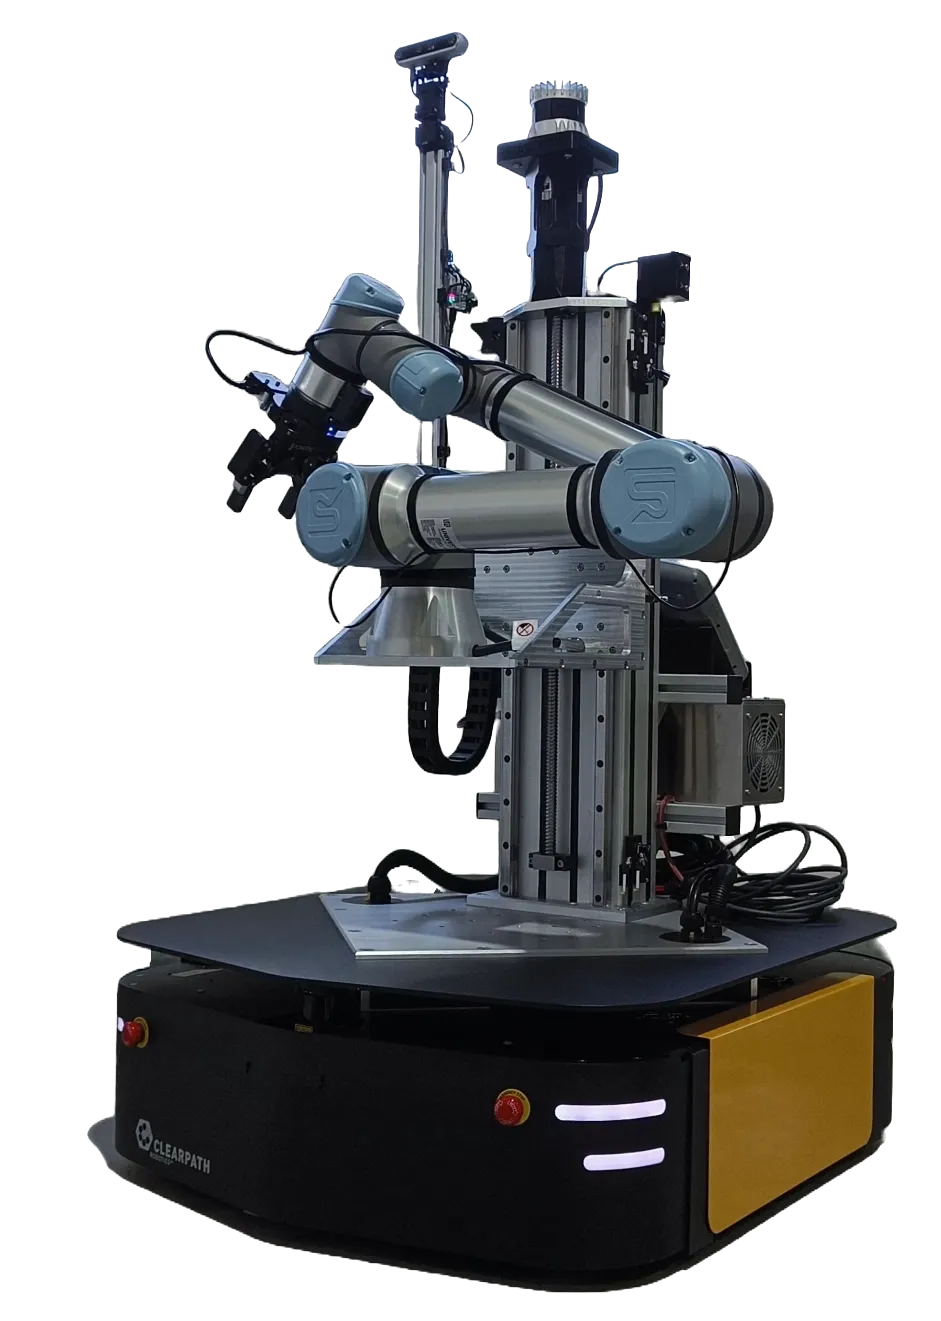
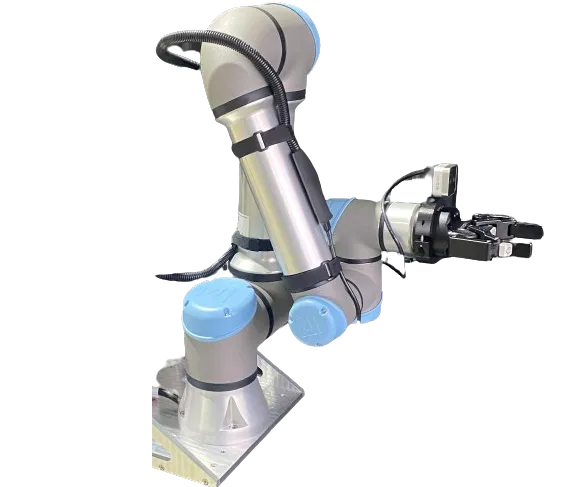
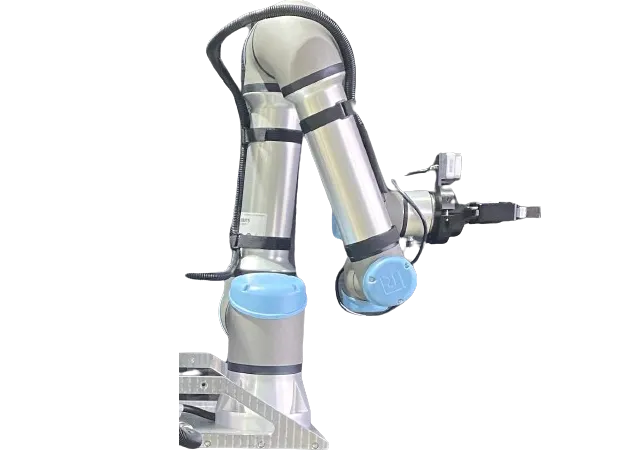
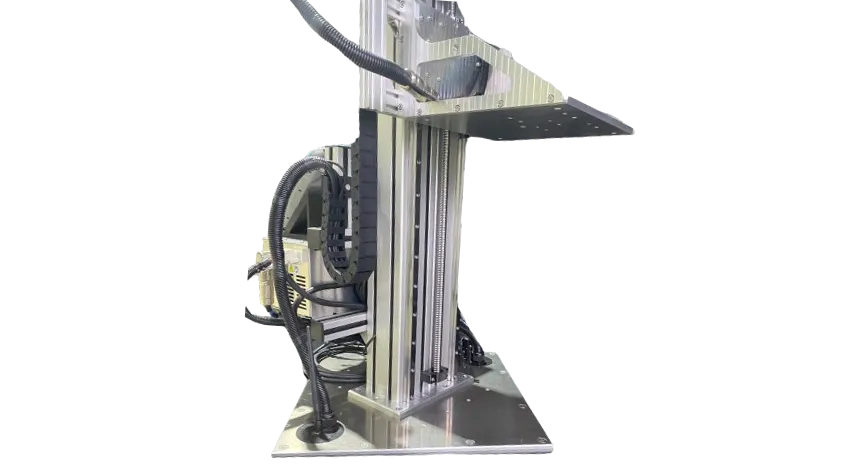
This specifies the configuration for Mobile Manipulation Platform (MMP) Dresden version. It has the following components Custom Lift System ,Stepper Motor, Rope Encoder, Ouster lidar, Nvidia Orin, Intel realsense D455 & D405 depth camera’s, Universal Robot UR5e and Robotiq 2F-140 gripper.
Important
Carefully review this document. If there are uncertainties, it is crucial to seek guidance from specialists, experts, or the manufacturers of the assemblies employed. The robot should not be activated until clarification is obtained. If any doubts persist, refer to the provided guides or get in touch with a specialist, expert, or the manufacturer of the assemblies used. Operational commencement of the robot should only occur after obtaining clarity. Exercise caution and do not permit individuals unfamiliar with robotics or these instructions to operate the robot. Untrained users pose a risk when handling robots.
Warning
The robot supplied by MYBOTSHOP GmbH is intended for research and development purposes and does not bear the CE Marking and/or Certificate of Incorporation. A fundamental understanding of ROS (Robot Operating System) is necessary. If you lack familiarity with ROS, we recommend consulting the ROS Wiki as a first step.
It is important to note that the mentioned robot is categorized as a partially completed machine according to the Machinery Directive 2006/42/EC and does not carry a CE marking. The client acknowledges and agrees that any information or materials provided by MYBOTSHOP GmbH are exclusively for research and development purposes. All services are provided on an “AS IS” basis without any representation or warranty, whether express or implied, including but not limited to merchantability, fitness for a particular purpose, non-infringement, or any other warranty.
MYBOTSHOP GmbH shall not be held liable for any damages, including but not limited to direct, indirect, special, incidental, or consequential damages, arising from or in connection with the use or inability to use the provided information or materials. This limitation on liability applies irrespective of the form of action, whether in contract, tort, or otherwise.
Getting Started
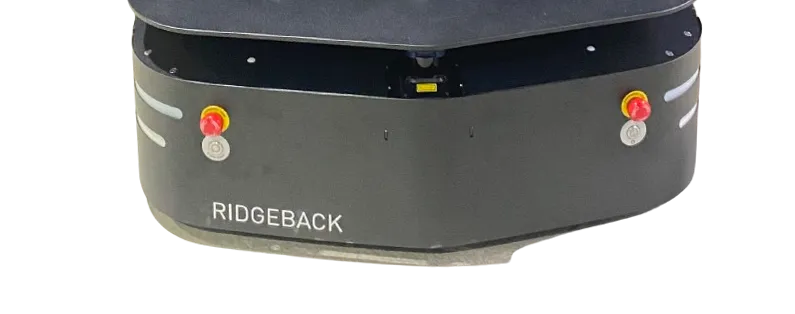
To start-up the Ridgeback, the instructional video playlist can be used which details the opening and use of the Ridgeback.
Data Sheets
Documentations
Repository
Auxiliary Sensor Startup
On Ridgeback startup, the following drivers are initiated
Ridgeback base driver
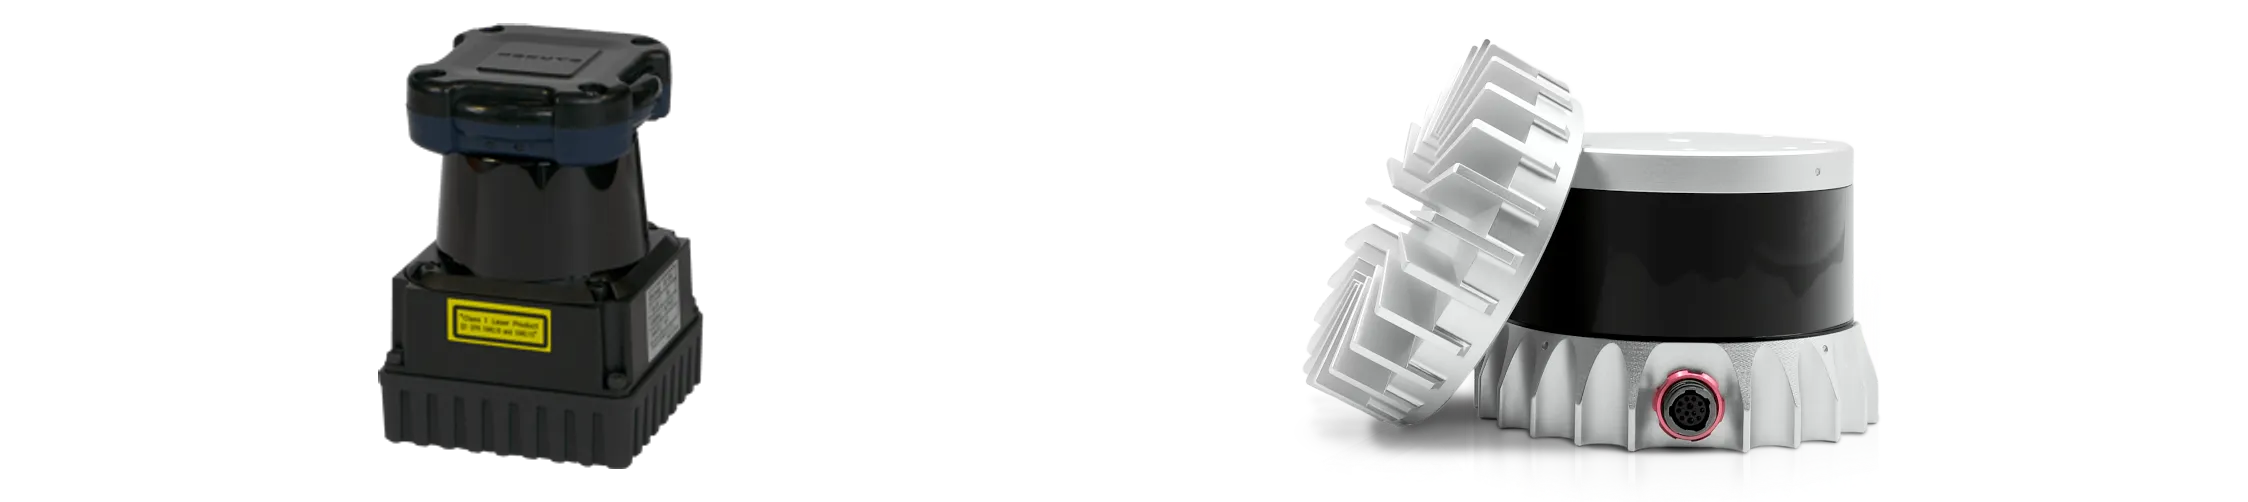
Hokuyo Lidar
The Custom Lift System, Stepper Motor, Rope Encoder, Ouster Lidar, Realsense D455 & D405, UR5e, and Robotiq 2F-140 are powered on when the Ridgeback robot starts. However, only the software drivers for Hokuyo and Ridgeback are activated during startup.
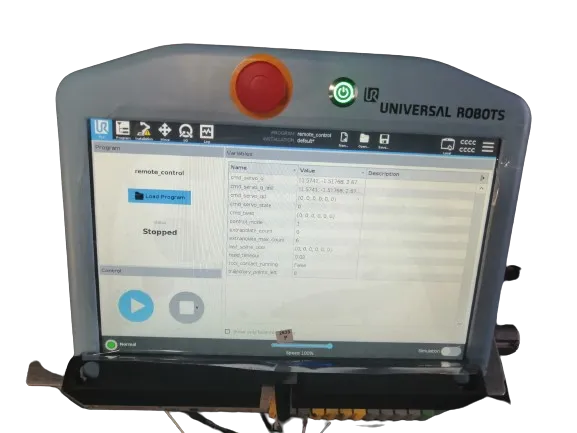
For UR5e, the arm has to be manually turned on by pressing the power button located on the top of the mounted screen. More details on this can be found in the UR5e section.
Network-Setup
The Ridgeback has multiple networks and vary slightly, the following table shows the networks.
Device |
Network Address |
Users |
Password |
|---|---|---|---|
Ridgeback |
192.168.131.1 |
administrator |
mybotshop |
Nvidia |
192.168.131.4 |
administrator |
mybotshop |
UR5e |
192.168.131.5 |
N/A |
N/A |
Hokuyo Front |
192.168.131.20 |
N/A |
N/A |
Hokuyo Rear |
192.168.131.21 |
N/A |
N/A |
Ouster |
192.168.131.22 |
N/A |
N/A |
Wiring Schematic
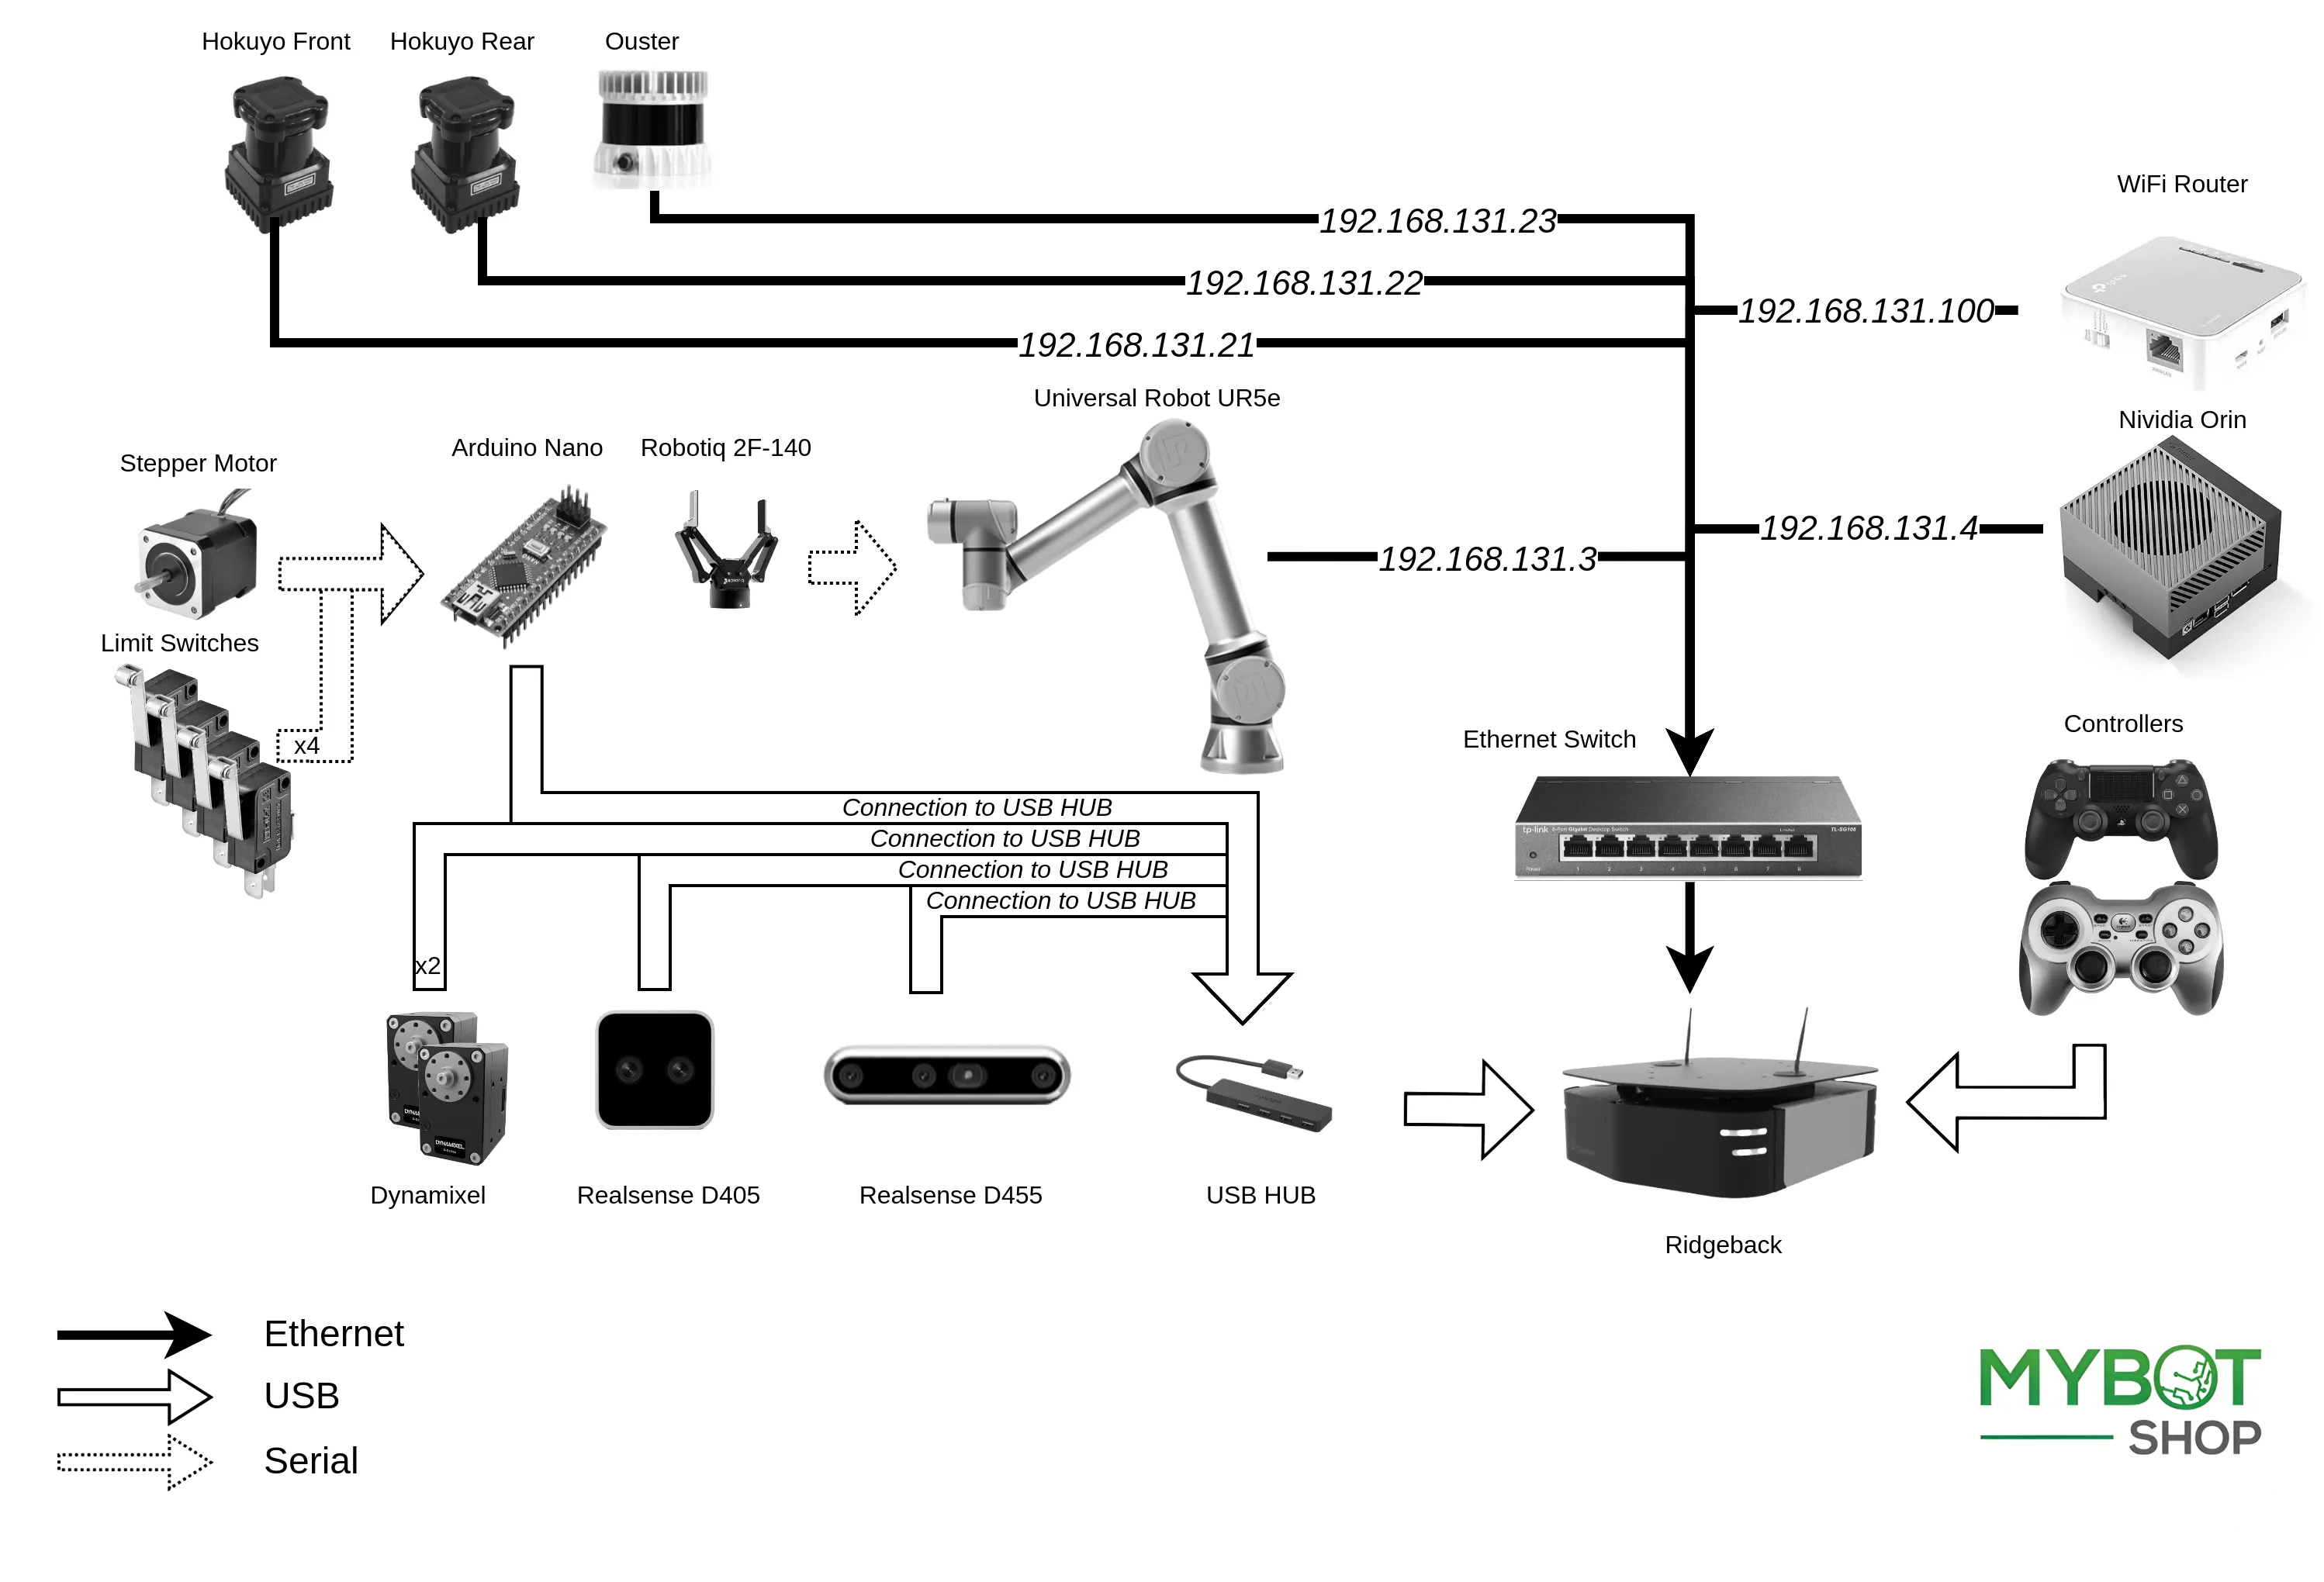
Note
The PS4 controller is connected via bluetooth.
Operation
Initially, connect to the robot’s WLAN network by using a LAN cable for the first setup. To establish a static connection on your PC (not the robot) in Ubuntu, navigate to Settings → Network, then select + to create a new connection and follow these steps
Switch the connection to Manual in the IPv4 settings.
Configure the IP address as
192.168.131.51and the Netmask as24.Save the settings and restart your network.
Once the connection is successful, identify the host’s local IP by entering the following command in the Host PC’s terminal:
ifconfig
Subsequently, ping the robot:
ping 192.168.131.1
Access the robot through SSH:
ssh -X administrator@192.168.131.1
The default password is:
mybotshop
The following message will show up with quick instructions for startup.
 -------------------------------------------------------------------------------
       _  _  _  _  ____   __  ____  ____  _  _   __  ____
      ( \/ )( \/ )(  _ \ /  \(_  _)/ ___)/ )( \ /  \(  _ \
      / \/ \ )  /  ) _ ((  O ) )(  \___ \) __ ((  O )) __/
      \_)(_/(__/  (____/ \__/ (__) (____/\_)(_/ \__/(__)

 Current PC: Ridgeback
 -------------------------------------------------------------------------------
 Ridgeback IP:           192.168.131.1
 Pswd:                   mybotshop
 SSH:                    ssh -X administrator@192.168.131.1

 Ridgeback MCU:          192.168.131.2
 e
 Nvidia IP:              192.168.131.4
 Pswd:                   mybotshop
 SSH:                    ssh -X administrator@192.168.131.4

 UR5e IP:                192.168.131.5  (? Default off)

 Hokuyo F IP:            192.168.131.20
 Hokuyo R IP:            192.168.131.21
 Ouster IP:              192.168.131.22
 -------------------------------------------------------------------------------
 MMP Startup
 -------------------------------------------------------------------------------

 MMP status:          sudo service mmp status
 MMP start:           sudo service mmp start
 MMP stop:            sudo service mmp stop
 MMP restart:         sudo service mmp restart

 All Augments:        roslaunch mmp_startup accessories.launch
 UR5e Moveit:         roslaunch mmp_ur_moveit_config mmp_moveit.launch
 Visualization:       roslaunch mmp_viz view_robot.launch

 Reinstall Startup:   rosrun mmp_startup startup_installer.py

 Rebuild package:     catkin build -DCMAKE_BUILD_TYPE=Release
--------------------------------------------------------------------------------
 MMP Services
 --------------------------------------------------------------------------------
 Lift Movement: rostopic pub /cmd_lift std_msgs/Float32 "data: 0.0"
                 (? +ve for up/ -ve down | -9000 to 9000 microstep)

 Lift Softlock: rosservice call /get_lift_manual_control "{}"
                 (? provides external control)
 --------------------------------------------------------------------------------
Note
Occasionally, disruptions may occur when connecting to the MMP due to other active networks. It is recommended to have only the connection to the robot active, with all others inactive.
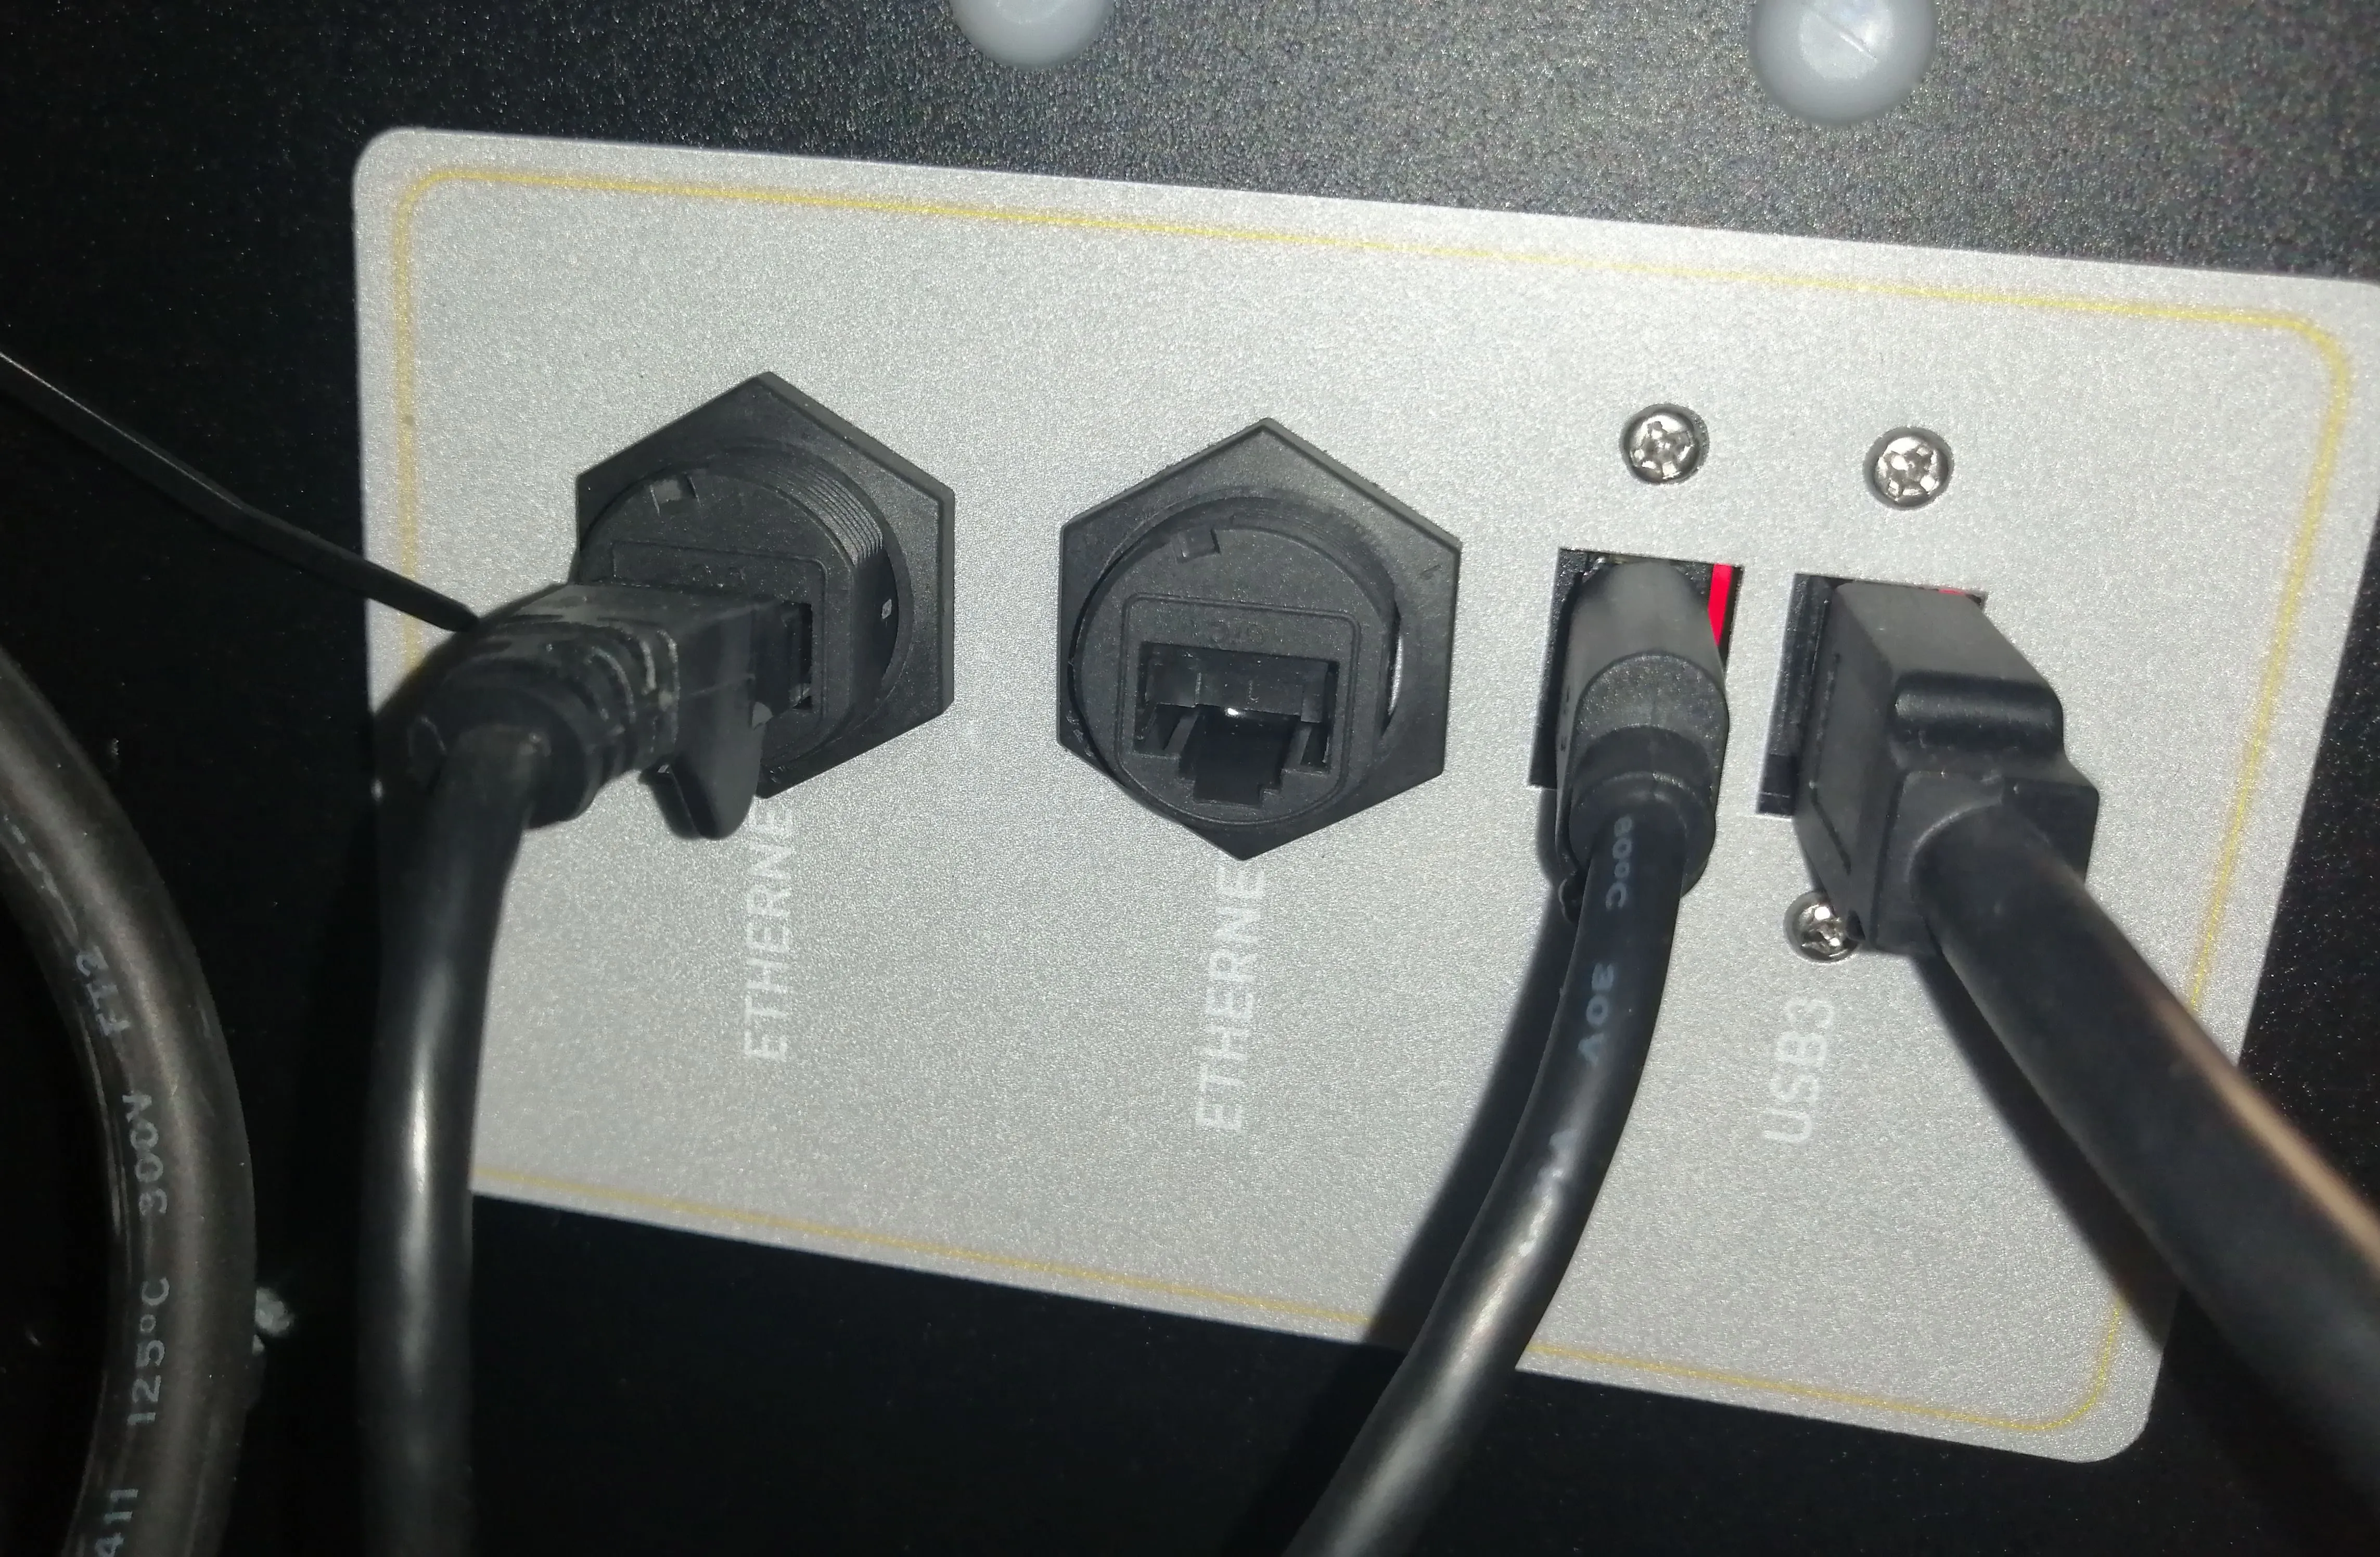
Screen connection
As an alternative method, connect to the robot by plugging in an HDMI cable along with a mouse and keyboard. This allows you to establish a connection to the robot from your local network.
Software Architecture
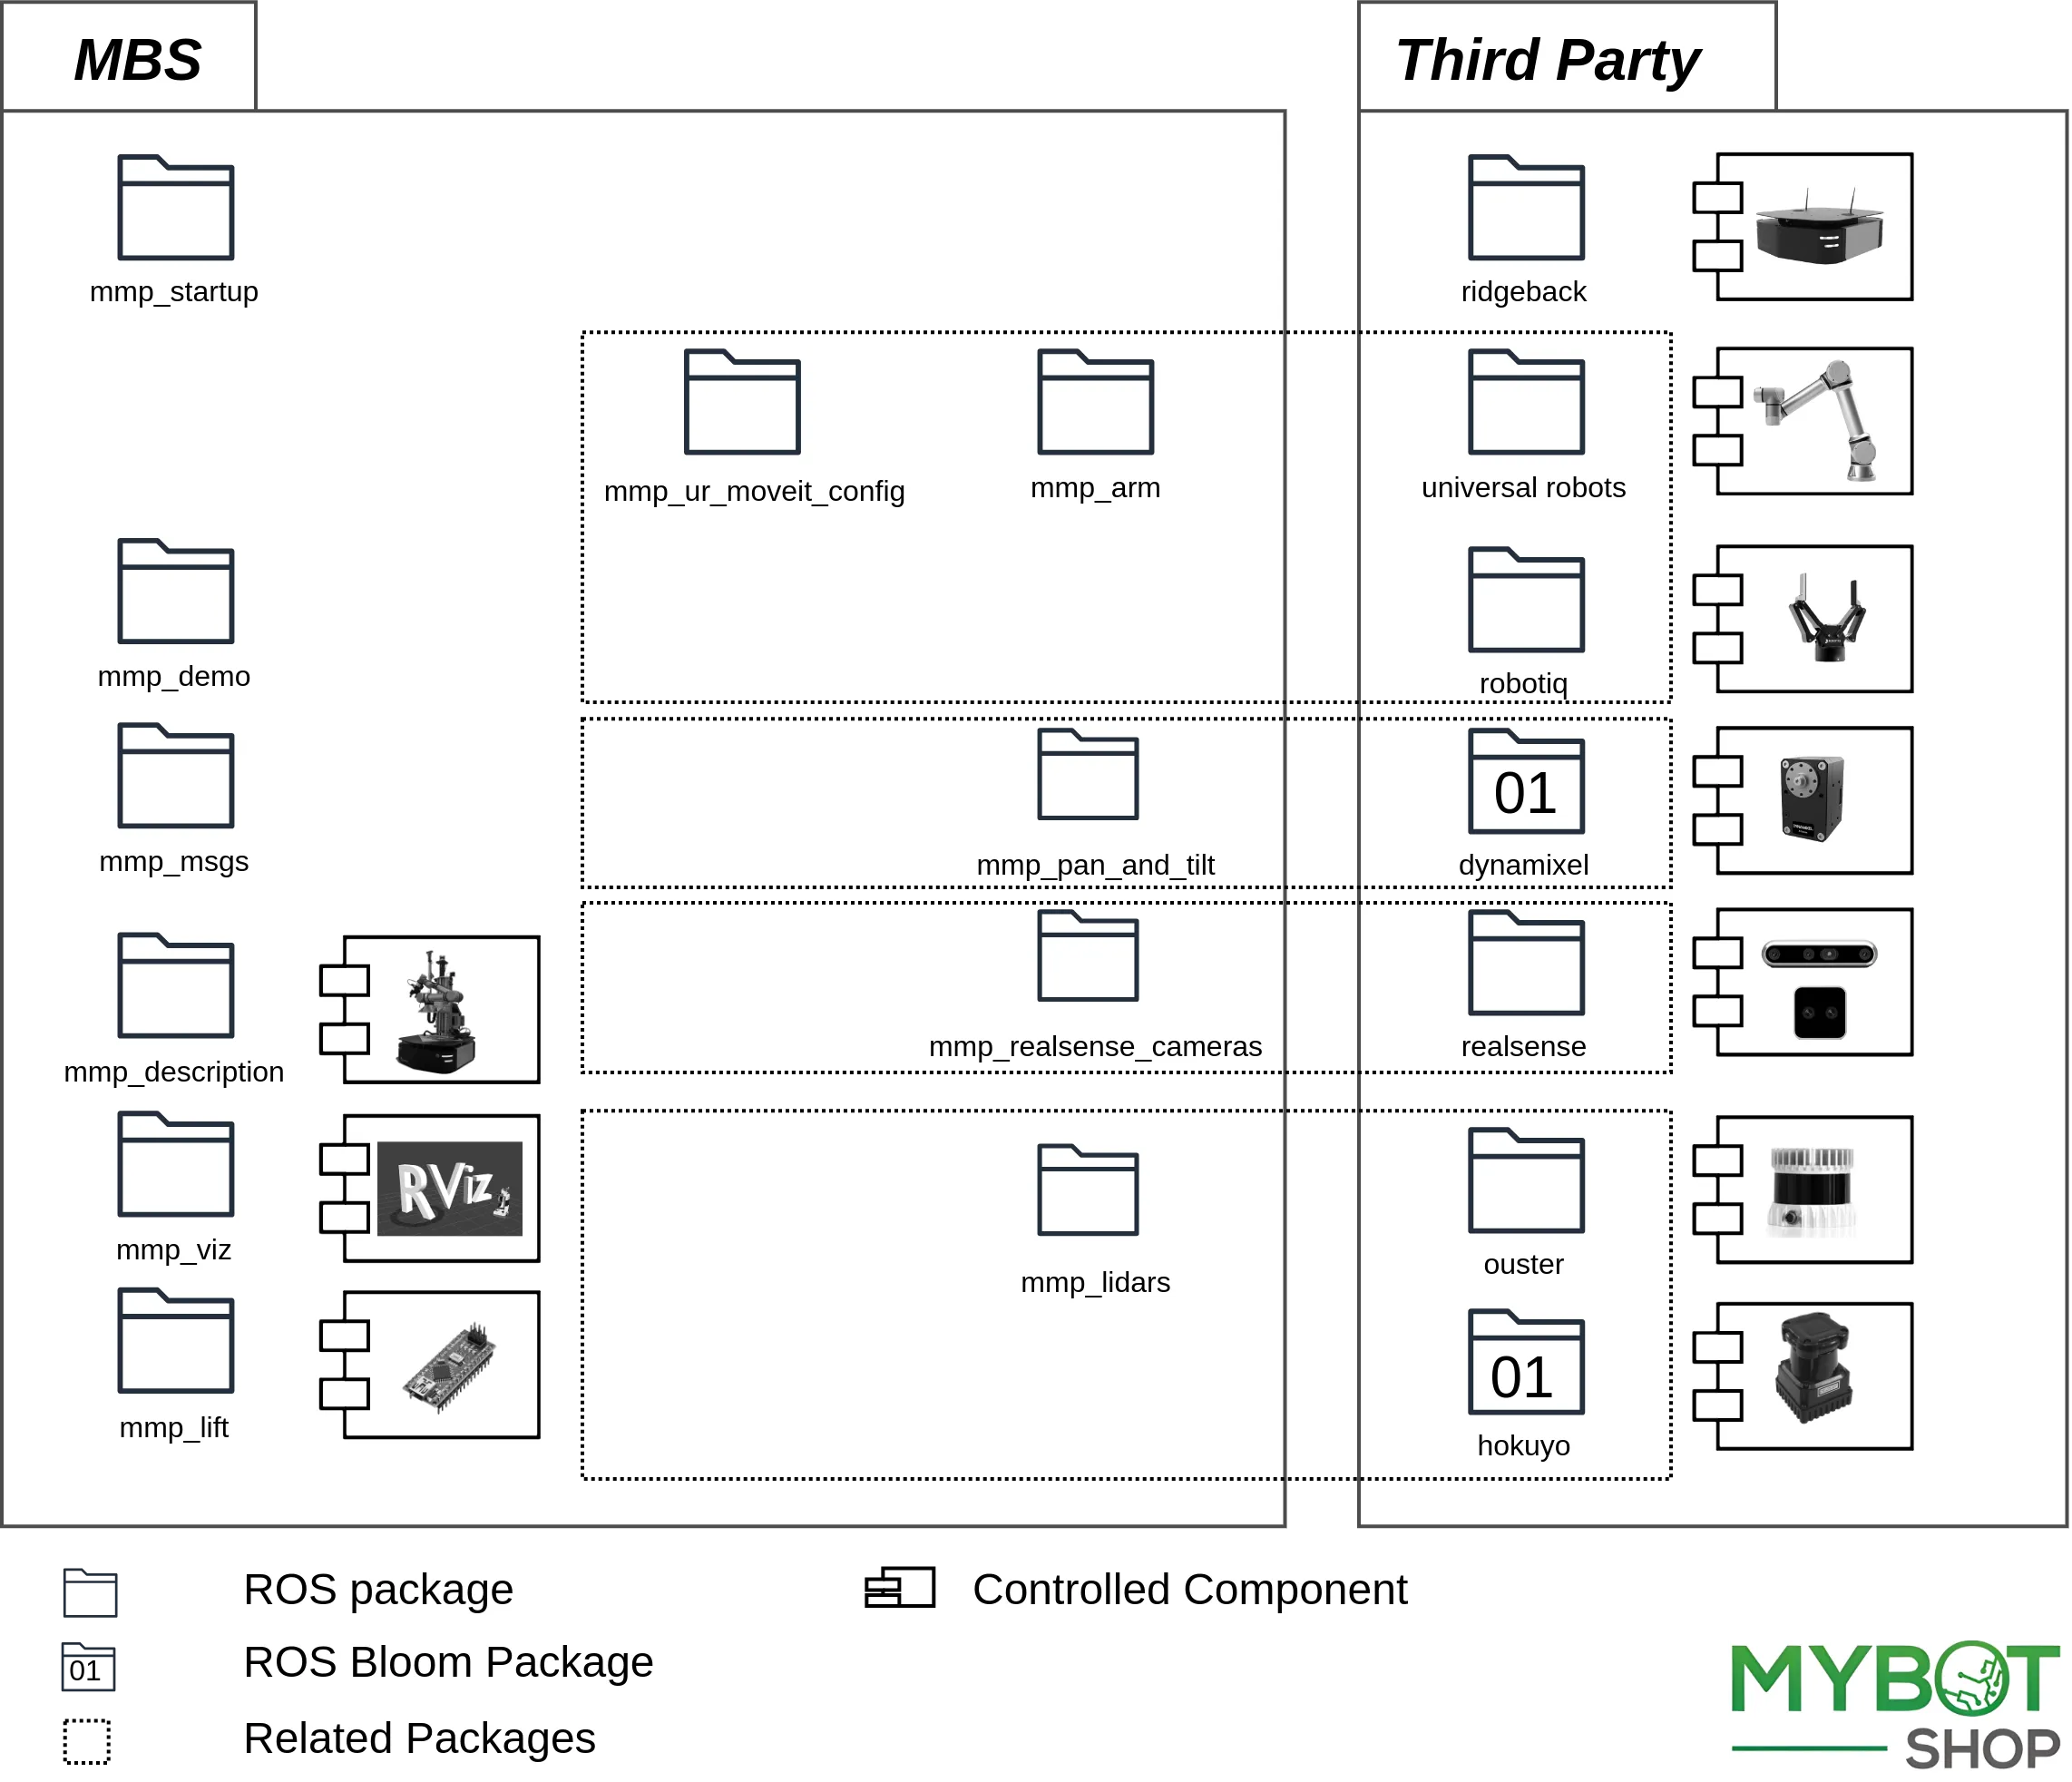
Important
The diagram illustrates the ROS package structure and interaction. Please note that the mmp_startup interacts will all others
ros packages depending on the set environment variables.
This section will explain all the custom packages that we have written which are being used in this particular robot.
mmp_arm
This package facilitates control of the Universal Robots UR5e robotic arm and Robotiq gripper through a customizable launch file. The launch file includes arguments for robot connection, tool communication parameters, and controller configurations. It also supports headless mode, URScript automation, and hardware interface node safety. Additionally, the launch file incorporates XML for UR common functionalities, connecting to the robot, and managing joint states in the ROS environment.
mmp_lidars
This package manages front and back Hokuyo Lidars, and an Ouster Lidar Sensor, with a dedicated lidars.launch file.
The launch file includes configurations for each lidar type, allowing customization of parameters like IP address, ports, and visualization.
mmp_msgs
This package consists of custom messages for PanTilt and SoftSwitchesStatus which are used wile controlling different components
of the robot.
mmp_startup
The mmp package manages the robot
startup files. Ridgeback needs ROS to be running at startup. Ridgeback driver
needs to run at startup which communicates between the robot and its MCU which
is on network address 192.168.131.1.
Warning
Make sure none of your devices are having 192.168.131.1 as well as 192.168.131.2 ip address this will crash the node and the robot will not function properly.
This package is dependent upon roswiki robot_upstart which converts roslaunch files
to systemd service job in Ubuntu. This job runs at the startup of the robot. The
one responsible for Ridgeback is mmp_startup. The status of this service can be
checked by:
sudo service mmp status
To update this launch file at the robot startup, run:
rosrun mmp_startup startup_installer.py
Attention
This command will remove the previous job and install a new one.
Note
Do not edit the files manually to systemd setup files or launch files (it won’t work), always run the above mentioned command to reflect the changes.
This packages also includes UDEV rules for different devices on the robot. They are already set up but for a fresh installation they can be run by:
./setup_udev_rules.sh
The packages have some configuration files for the robot utilities. For example
config/description.bash is responsible set up environment variables for URDF in
order to include parts on the go. Similarly config/setup.bash is responsible for setting up
environment variables for Ridgeback drivers.
mmp_demo
This package runs an example to demonstrate the working of all the robot component attached with the robot simultaneously. A special movement has been programed in this package that will allow you to see all the component workings.
mmp_pan_and_tilt
This package is responsible for two servo motors on which one of the camera is attached.
mmp_ur_moveit_config
This package is responsible for the moveit configuration for all the sensors and components that are attached to the robot.
mmp_description
This is a ros package that contains the 3D models of the Ridgeback. Additionally, the seperate 3D models are stitched together into
a single entity via the universal robot description format (URDF). It contains the models for auxiliary components such as lidars
as well. Additions to the robot’s 3D model can be made in the xacro/accessories.urdf.xacro. To view the robot with simulated dummy drivers.
roslaunch mmp_viz view_model.launch
If you want to add more accessories to the robot please make sure that you add those accessories to accessories.urdf.xacro file
located in mmp_description/xacro/ so that the new accessories can be stitchedwith the old ones.
mmp_lift
This package is responsible for lift control. This package uses the rope encoder to provide joint_state of the lift
hub for transforms between the different links.The lift itself communicates via an Arduino nano.
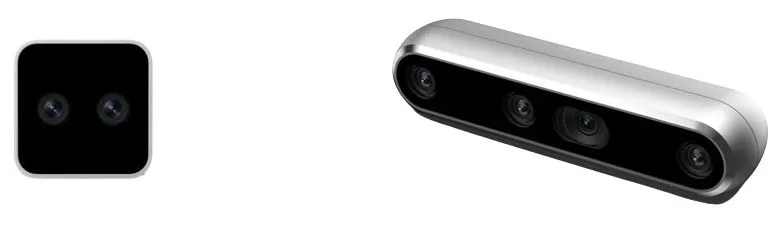
mmp_realsense_cameras
This package is responsible for two realsense cameras(D455 & D405) control.
Note
The package for Intel Realsense D405 has been ported from ROS2 to ROS1 and is custom, the default package will not work with mmp.
Quick-Start
Powering on the Ridgeback
Confirm that the emergency buttons on all four corners are released.
To verify the release of the emergency switch, twist it in the indicated direction. If it pops up, the switch has been successfully released.
Press the power button on the rear of the Ridgeback, identified by the power symbol.
Once the Ridgeback is powered on, and all emergency switches have been released, press the e-reset button located at the rear where the Ridgeback has a yellow flashing light.
Powering on the UR5e
The UR5e should only be powered on when the Ridgeback is fully powered on (indicated by white lights in front and/or a flashing yellow light for the e-reset).
Power on the UR5e using the power button on the teach pendant.
Allow a few minutes for the UR5e to complete its startup.
Confirm that all emergency switches are released, both on the teach pendant and on the lift. Avoid initiating any actions on the UR5e, as ROS handles these automatically. Powering on is the only required action.
Powering Auxiliary Components
Auxiliary components such as the lift, Ouster, Hokuyo lidars, Dynamixels, RealSense cameras, Nvidia, etc., are powered on automatically during startup.
Joystick Teleoperation for Ridgeback

Utilize the
PS buttonto power on the joystick.L1serves as the dead man’s switch.Use
Left-Joystickfor movement in the x and y directions.Utilize
Right-Joystickfor movement in the yaw orientation.Square buttonserves as lift and gripper dead man’s switch .TopandBottom arrow keyon PS4 controller is used to controll lift up/down.LeftandRight arrow keyon PS4 controller is used to gripper open/close.
Manipulator Activation
Once the UR5e is powered on and its emergency switches are released:
Confirm that the UR5e is in remote mode (should be in remote mode by default) — Located in the top right of the Teach pendant.
Check if the UR5e is in a Power off state with an icon — Located in the bottom left of the Teach pendant (Important).
Important
The arm must always be in the Power off state on the Teach pendant for the ROS driver to execute the automated script that boots and configures the UR5e.
Auxiliary ROS Drivers
After activating the manipulator, the next step is to launch the following driver:
roslaunch mmp_startup accessories.launch
This command should activate all components, including the arm, gripper, lift, lidars, camera, and pan & tilt.
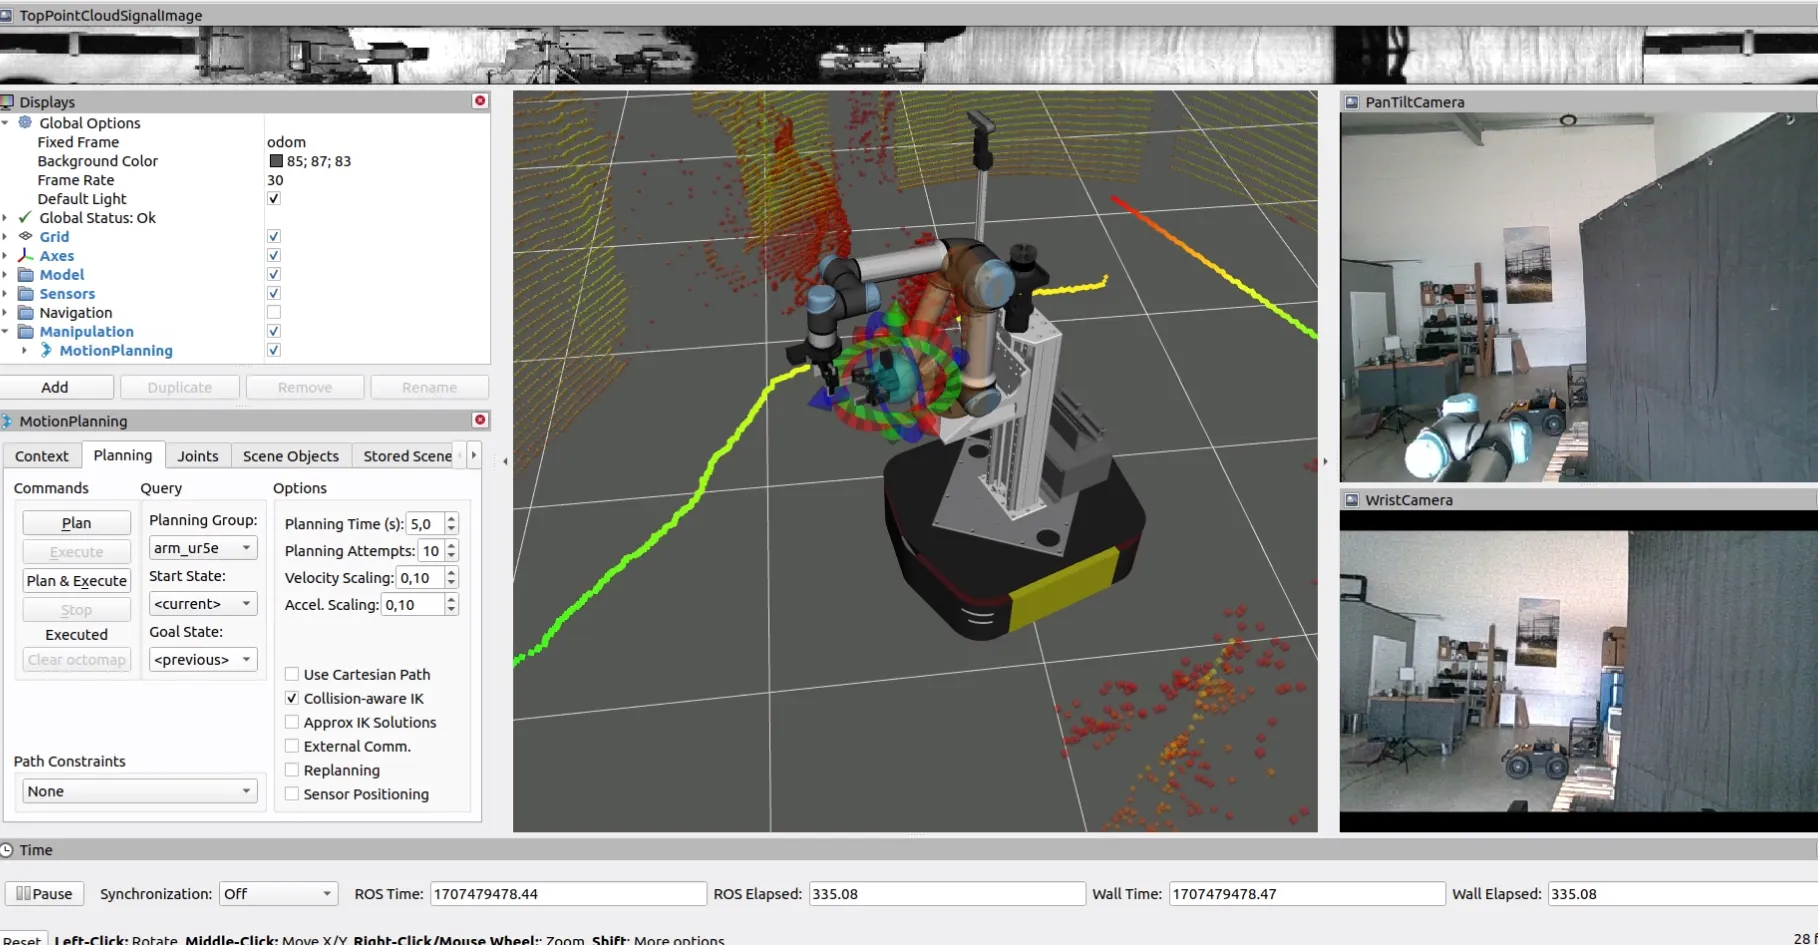
Digital Twin Visualization (RVIZ)
To observe the MMP digitally, execute the following command:
roslaunch mmp_viz view_robot.launch
For optimal and low-latency streaming, it is recommended to employ the ROS multimachine setup outlined in ROS Multimachine Setup section.
Individual Component Activation
The ROS drivers mentioned below are automatically initiated when launching the accessories launch file. These drivers enhance functionality for interfacing and independent component checking.
ROS Driver — UR5e + Robotiq 2F-85
Follow this checklist to interact with the UR5e and Gripper via ROS:
Power on the teach pendant — Located in the Teach pendant Top Center Right.
Release the emergency switch — Located in the Teach pendant Top Center.
Confirm the UR5e is in remote mode — Located in the Teach pendant Top Right.
Ensure the UR5e is in the Power off state with an icon — Located in the Teach pendant Bottom Left (Important).
Note
The arm must always be in a powered-off state for the ROS driver to execute, as the script boots the UR5e.
Launch the ROS driver:
roslaunch mmp_arm ur5e_robotiq_driver.launch
To test the gripper, run:
rosrun mmp_demo gripper.py
For testing the UR5e and gripper using Moveit, you can use Moveit:
roslaunch mmp_ur_moveit_config mmp_moveit.launch
ROS Driver — Lift
Start the driver via:
roslaunch mmp_lift base.launch
Move the lift up 1 to 9000 microsteps:
rostopic pub -r 1 /cmd_lift std_msgs/Float32 "data: 9000.0"
Move the lift down -1 to -9000 microsteps:
rostopic pub -r 1 /cmd_lift std_msgs/Float32 "data: -9000.0"
Activate Lift’s softlock for the lift to move:
rosservice call /get_lift_manual_control "{}"
ROS Driver — Ouster + Hokuyo Front + Hokuyo Rear
To launch all three lidars, execute the following command:
roslaunch mmp_lidars ouster_hokuyos.launch
To launch only the Hokuyos (ideal when working with RealSense):
roslaunch mmp_lidars hokuyos.launch
ROS Driver — RealSense Camera
Start the pan and tilt camera D455:
roslaunch mmp_realsense_cameras d455.launch
Start the wrist camera:
roslaunch mmp_realsense_cameras d405.launch
Start both cameras:
roslaunch mmp_realsense_cameras realsense.launch
Note
When both the Ouster and RealSense cameras operate simultaneously, the camera stream’s latency increases due to a large amount of data transfer. Ideally, Ouster or RealSense should be running. Both can work simultaneously, but then RealSense may experience latency issues.
ROS Driver — Pan & Tilt
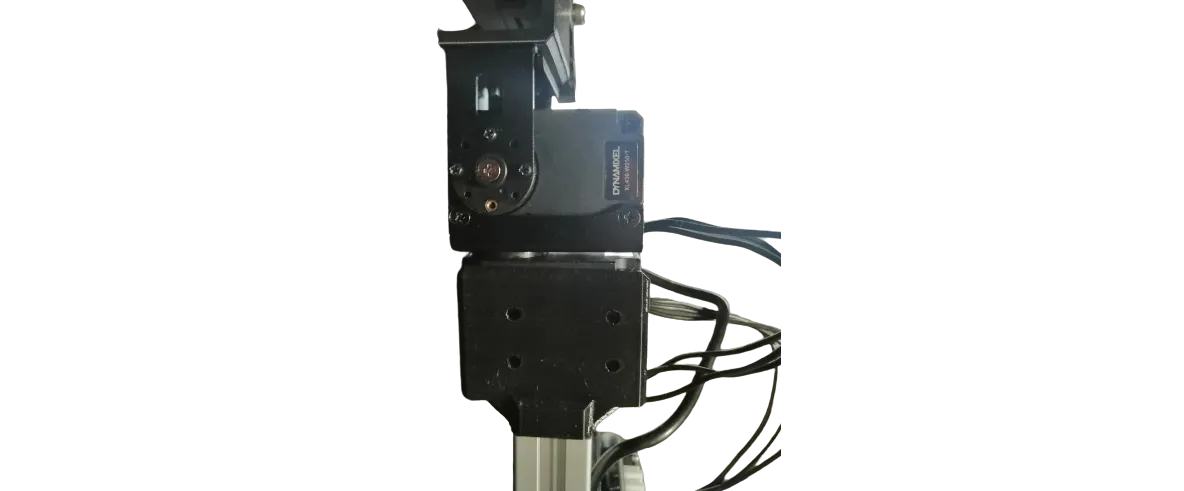
Start the pan and tilt Dynamixel motors via:
roslaunch mmp_pan_and_tilt controller.launch
Move pan and tilt within ranges of -1.5708 to +1.5708 in radians:
rostopic pub /cmd_pan_and_tilt mmp_msgs/Panlt "pan: 1.0" tilt: 0.0"
ROS Multimachine Setup
Multi-Machine - Host
For all terminals on the robot (4-5 terminals recommended), export the following environment variables. The IP should correspond to the robot’s IP obtained from sudo nmtui.
export ROS_MASTER_URI=http://192.168.0.219:11311/
export ROS_IP=192.168.0.219
export ROS_HOSTNAME=192.168.0.219
Multimachine - Client
For all terminals on your PC, export these environment variables. The ROS master should correspond to the robot’s IP, while ROS IP and ROS hostname s hould match your PC’s IP connected to the robot in the same network.
export ROS_MASTER_URI=http://192.168.0.219:11311/
export ROS_IP=192.168.0.225
export ROS_HOSTNAME=192.168.0.225
Please ensure that the mmp_description and mmp viz ROS packages are built on your PC to view the robot over the network.
Multimachine Usage
Stop the mmp service on the robot:
sudo service mmp stop
Launch on the robot:
roslaunch mmp_startup system_startup.launch
On the user’s PC, launch:
roslaunch mmp_viz view_robot.launch
Demo
Launch all accessories:
roslaunch mmp_startup accessories.launch
Note
Ensure the UR5e setup is as mentioned before, i.e., the UR5e is powered on, emergency switch released, and is in remote mode.
Run MoveIt configuration for the robot:
roslaunch mmp_ur_moveit_config mmp_moveit.launch
Run the demo:
rosrun mmp_demo demo.py
Caution
Power off the UR5e correctly via the teach pendant.
Always remain close to the emergency stop buttons.
Sudden jerks to the mobile robot can cause a disconnection. The velocity provided should always be smooth, either through a joystick, keyboard, or program.
Known Issues
Pan and tilt not working (Usually caused by the provision of wrong command values).
Power cycle the dynamixels and restart their driver. A button is available for quick power cycle.
Ridgeback shuts down sometimes when powered on.
In rare cases, the network may not startup in time, causing the Ridgeback to shut down. Power cycling should resolve the issue.
Realsense cameras lagging.
Utilize a multi-machine setup.
Ensure Ouster is not running concurrently with the Realsense, as it takes up a lot of bandwidth, which may be causing the lag.
Robotic Manipulator Safety Guidelines:
When deploying robotic manipulators, it is crucial to prioritize safety procedures to mitigate risks and ensure secure operations. The following guidelines outline key safety measures when working with robotic manipulators:
Work Area Safety
Maintain a clean and well-organized work area. Cluttered or inadequately lit spaces can impede the proper functioning of sensors and hinder precise manipulation.
Avoid operating robotic manipulators in hazardous environments, such as those containing corrosive substances, extreme temperatures, or sharp objects that may damage the manipulator.
Ensure that only authorized personnel are present in the vicinity during manipulator operation to prevent interference and ensure a safe working environment.
Electrical Safety
Ensure the manipulator’s power system adheres to electrical safety standards. Regularly inspect and maintain power components to prevent malfunctions.
Implement safeguards to protect the manipulator from adverse environmental conditions, such as exposure to moisture or extreme temperatures.
Regularly inspect power cables and connections, promptly replacing damaged components to minimize the risk of electrical issues.
Manipulation Safety
Implement collision detection systems to prevent unintended contact with objects, humans, or other equipment during manipulation tasks.
Define and enforce safety zones around the manipulator’s workspace to minimize the risk of unintended interactions with personnel or other objects.
Regularly calibrate and test the manipulator’s sensors and systems to ensure precise and reliable performance during manipulation tasks.
Emergency Response
Install an emergency stop mechanism to swiftly halt manipulator operation in unforeseen circumstances or emergencies.
Clearly mark and communicate emergency stop locations within the manipulator’s operational area.
Conduct regular emergency response drills to ensure personnel are familiar with procedures for handling unexpected situations during manipulator operation.
Data Security and Privacy
Implement robust cybersecurity measures to safeguard the manipulator’s control systems and data from unauthorized access or manipulation.
Ensure compliance with privacy regulations when collecting, storing, or transmitting data captured by the manipulator’s sensors.
Regularly update software and firmware to address security vulnerabilities and enhance overall system integrity.
Human Interaction Safety:
Integrate sensors and communication systems to detect and respond to the presence of humans in the manipulator’s vicinity.
Clearly communicate the manipulator’s operational status and intentions using visual and audible signals to alert nearby individuals.
Establish protocols for safe human-robot collaboration, particularly in shared workspaces where manipulators are in operation.
Residual Risks
Despite the implementation of safety measures, certain residual risks may persist. These include:
Impairment of sensor functionality.
Risk of collisions during complex manipulation tasks.
Cybersecurity vulnerabilities.
Unintended human interactions due to unforeseen circumstances.
Robotic manipulators are sophisticated technologies that demand correct usage to avoid accidents and ensure a secure environment. Learn and adhere to proper procedures diligently, prioritizing both precision and safety. By following these safety guidelines, you contribute to maintaining a secure environment when deploying robotic manipulators.
Autonomous Mobile Robot Safety Guidelines
When deploying autonomous mobile robots, prioritizing safety procedures is essential to prevent accidents and ensure secure operations. The following guidelines outline key safety measures when working with an autonomous mobile robot.
Work Area Safety
Maintain a clean and well-lit work area. Cluttered or poorly illuminated spaces can impede the proper functioning of sensors and navigation systems.
Avoid operating autonomous mobile robots in explosive atmospheres, such as areas with flammable liquids, gases, or dust. The robot’s components may pose a risk in such environments.
Keep bystanders and unauthorized personnel at a safe distance during robot operation to prevent interference with autonomous navigation.
Electrical Safety
Ensure the robot’s power system adheres to electrical safety standards. Regularly inspect and maintain power components to prevent malfunctions.
Implement mechanisms to protect the robot from adverse weather conditions, such as rain or wet environments.
Regularly inspect power cables and connections and replace damaged components promptly to minimize the risk of electrical issues.
Emergency Response:
Install an emergency stop mechanism to quickly halt the robot’s operation in case of unforeseen circumstances or emergencies.
Clearly mark and communicate emergency stop locations throughout the robot’s operational area.
Conduct regular emergency response drills to ensure personnel are familiar with procedures for handling unexpected situations.
Data Security and Privacy:
Implement robust cybersecurity measures to protect the robot’s control systems and data from unauthorized access or manipulation.
Ensure compliance with privacy regulations when collecting, storing, or transmitting data captured by the robot’s sensors.
Regularly update software and firmware to address security vulnerabilities and enhance overall system integrity.
Human Interaction Safety
Integrate sensors and communication systems to detect and respond to the presence of humans in the robot’s vicinity.
Clearly communicate the robot’s operational status and intentions using visual and audible signals to alert nearby individuals.
Establish protocols for safe human-robot collaboration, especially in shared workspaces.
Residual Risks:
Despite the implementation of safety measures, certain residual risks may persist. These include:
Impairment of sensor functionality.
Risk of collisions in crowded or dynamic environments.
Cybersecurity vulnerabilities.
Unintended human interactions due to unforeseen circumstances.
These autonomous mobile robots are advanced technologies that require correct usage to avoid accidents and ensure a secure environment. Learn and follow the proper procedures diligently; prioritize both quality and safety. By adhering to these safety guidelines, you contribute to ensuring a safe environment while deploying an autonomous mobile robot.